
Chapter 9. Plugin Setup
By the time you complete this tutorial, you’ll have configured your API to use the available 3scale code plugins to manage access traffic.
There are several different ways to add 3scale API Management to your API – including using APIcast (API gateway), Amazon API Gateway with Lambda, 3scale Service Management API, or code plugins. This tutorial drills down into how to use the code plugin method to get you set up.
9.1. How plugins work
3scale API plugins are available for a variety of implementation languages including Java, Ruby, PHP, .NET, and others – the full list can be found in the code libraries section. The plugins provide a wrapper for the 3scale Service Management API. Find the Service Management API in the 3scale ActiveDocs, available in your Admin Portal, under the Documentation → 3scale API Docs section, to enable:
- API access control and security
- PI traffic reporting
- API monetization
This wrapper connects back into the 3scale system to set and manage policies, keys, rate limits, and other controls that you can put in place through the interface. Check out the Getting Started guide to see how to configure these elements.
Plugins are deployed within your API code to insert a traffic filter on all calls as shown in the figure.

9.2. Step 1: Select your language and download the plugin
Once you’ve created your 3scale account (signup here), navigate to the code libraries section on this site and choose a plugin in the language you plan to work with. Click through to the code repository to get the bundle in the form that you need.
If your language is not supported or listed, let us know and we’ll inform you of any ongoing support efforts for your language. Alternatively, you can connect directly to the 3scale Service Management API.
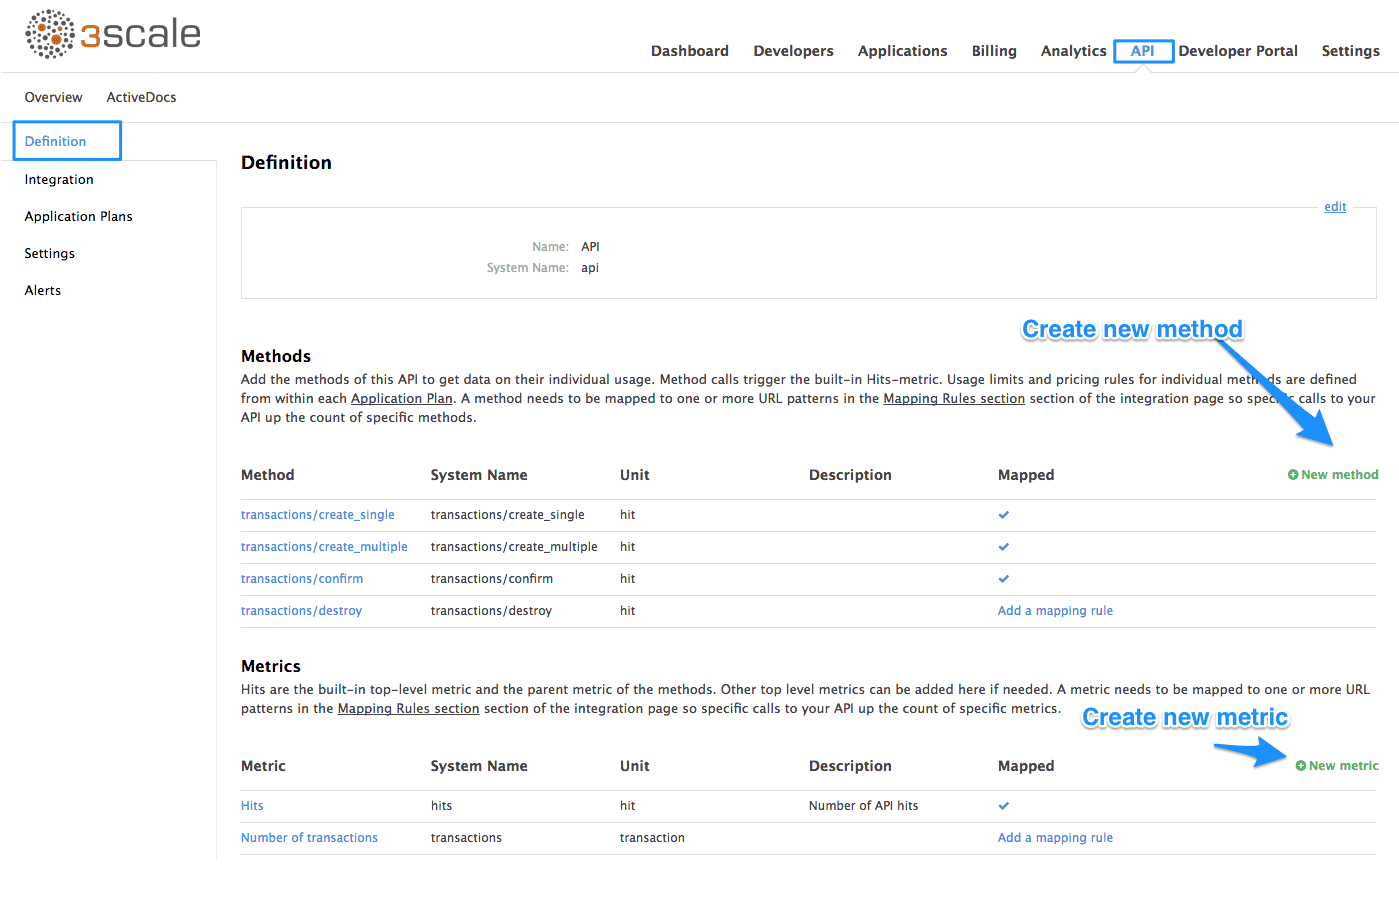
9.3. Step 2: Check the metrics you’ve set for your API
As described in the API definition tutorial, you can configure multiple metrics and methods for your API on the API control panel. Each metric and method has a system name that will be required when configuring your plugin. You can find the metrics in API > Definition area of your Admin Portal.
For more advanced information on metrics, methods, and rate limits see the specific tutorial on rate limits.
9.4. Step 3: Install the plugin code to your application
Armed with this information, return to the code and add the downloaded code bundle to your application. This step varies for each type of plugin, and the form that it takes depends on the way each language framework uses libraries. For the purposes of this tutorial, this example will proceed with Ruby plugin instructions. Other plugins integration details are included in the README documentation of each repository.
This library is distributed as a gem, for which Ruby 2.1 or JRuby 9.1.1.0 are minimum requirements:
gem install 3scale_client
Or alternatively, download the source code from GitHub.
If you are using Bundler, please add this to your Gemfile:
gem '3scale_client'
and do a bundle install.
If you are using Rails' config.gems, put this into your config/environment.rb
config.gem '3scale_client'
Otherwise, require the gem in whatever way is natural to your framework of choice.
Then, create an instance of the client:
client = ThreeScale::Client.new(service_tokens: true)
unless you specify service_tokens: true you will be expected to specify a provider_key parameter, which is deprecated in favor of Service Tokens:
client = ThreeScale::Client.new(provider_key: 'your_provider_key')
This will comunicate with the 3scale platform SaaS default server.
If you want to create a Client with a given host and port when connecting to an on-premise instance of the 3scale platform, you can specify them when creating the instance:
client = ThreeScale::Client.new(service_tokens: true, host: 'service_management_api.example.com', port: 80)
or
client = ThreeScale::Client.new(provider_key: 'your_provider_key', host: 'service_management_api.example.com', port: 80)
Because the object is stateless, you can create just one and store it globally. Then you can perform calls in the client:
  client.authorize(service_token: 'token', service_id: '123', usage: usage)
  client.report(service_token: 'token', service_id: '123', usage: usage)
If you had configured a (deprecated) provider key, you would instead use:
client.authrep(service_id: '123', usage: usage)
service_id is mandatory since November 2016, both when using service tokens and when using provider keys
You might use the option warn_deprecated: false to avoid deprecation warnings. This is enabled by default.
SSL and Persistence
Starting with version 2.4.0 you can use two more options: secure and persistent like:
client = ThreeScale::Client.new(provider_key: '...', secure: true, persistent: true)
secure
Enabling secure will force all traffic going through HTTPS. Because estabilishing SSL/TLS for every call is expensive, there is persistent.
persistent
Enabling persistent will use HTTP Keep-Alive to keep open connection to our servers. This option requires installing gem net-http-persistent.
9.5. Step 4: Add calls to authorize as API traffic arrives
The plugin supports the 3 main calls to the 3scale backend:
- authrep grants access to your API and reports the traffic on it in one call.
- authorize grants access to your API.
- report reports traffic on your API.
9.5.1. Usage on authrep mode
You can make request to this backend operation using service_token and service_id, and an authentication pattern like user_key, or app_id with an optional key, like this:
response = client.authrep(service_token: 'token', service_id: 'service_id', app_id: 'app_id', app_key: 'app_key')
Then call the success? method on the returned object to see if the authorization was successful.
if response.success?
  # All fine, the usage will be reported automatically. Proceeed.
else
  # Something's wrong with this application.
end
The example is using the app_id authentication pattern, but you can also use other patterns such as user_key.
Example:
class ApplicationController < ActionController
  # Call the authenticate method on each request to the API
  before_filter :authenticate

  # You only need to instantiate a new Client once and store it as a global variable
  # If you used a provider key it is advisable to fetch it from the environment, as
  # it is secret.
  def create_client
    @@threescale_client ||= ThreeScale::Client.new(service_tokens: true)
  end

  # To record usage, create a new metric in your application plan. You will use the
  # "system name" that you specifed on the metric/method to pass in as the key to the usage hash.
  # The key needs to be a symbol.
  # A way to pass the metric is to add a parameter that will pass the name of the metric/method along
  #
  # Note that you don't always want to retrieve the service token and service id from
  # the parameters - this will depend on your application.
  def authenticate
    response = create_client.authrep(service_token: params['service_token']
                                     service_id: params['service_id'],
                                     app_id: params['app_id'],
                                     app_key: params['app_key'],
                                     usage: { params['metric'].to_sym => 1 })
    if response.success?
      return true
      # All fine, the usage will be reported automatically. Proceeed.
    else
      # Something's wrong with this application.
      puts "#{response.error_message}"
      # raise error
    end
  end
end
9.6. Step 5: Deploy and run traffic
Once the required calls are added to your code, you can deploy (ideally to a staging/testing environment) and make API calls to your endpoints. As the traffic reaches the API, it will be filtered by the plugin and keys checked against issues API credentials. Refer to the Getting Started guide for how to generate valid keys – a set will have also been created as sample data in your 3scale account.
To see if traffic is flowing, log in to your API Admin Portal and navigate to the Analytics tab – there you will see traffic reported via the plugin.
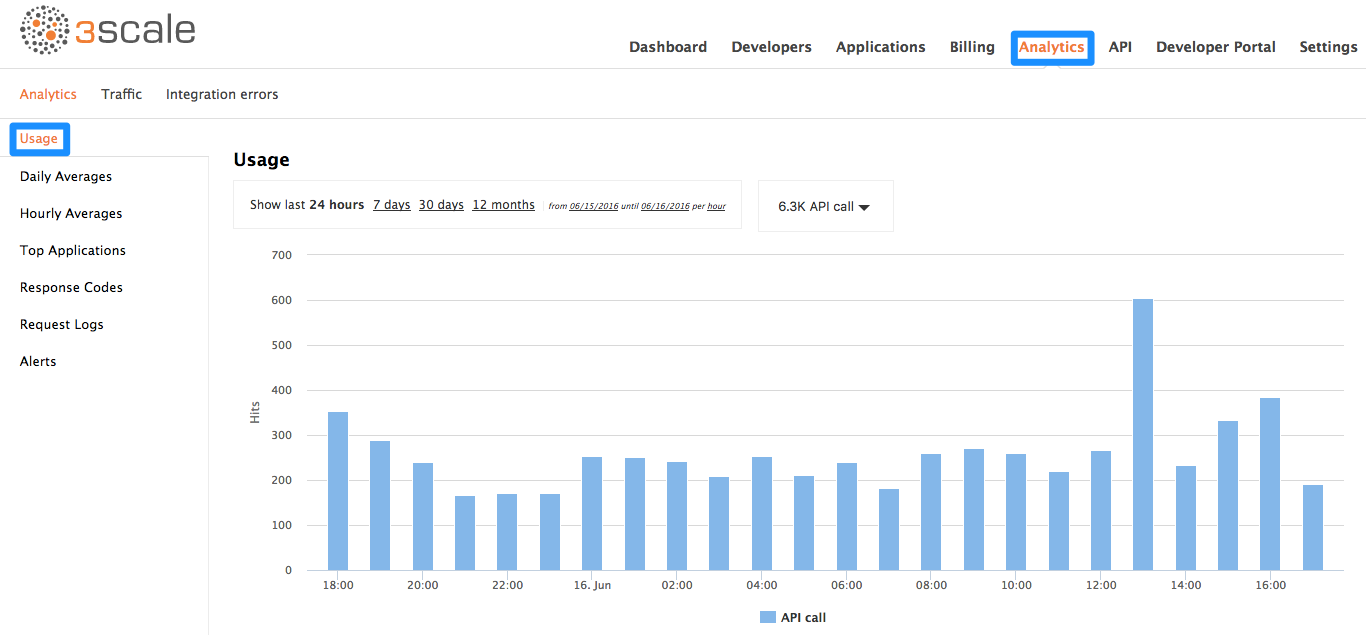
Once the application is making calls to the API, they will become visible on the statistics dashboard and the Statistics > Usage page for more detailed view.
If you’re receiving errors in the connection, you can also check the "Errors" menu item under Monitoring.