
Web console
Getting started with the web console in OpenShift Container Platform
Abstract
Chapter 1. Accessing the web console
The OpenShift Container Platform web console is a user interface accessible from a web browser. Developers can use the web console to visualize, browse, and manage the contents of projects.
1.1. Prerequisites
- JavaScript must be enabled to use the web console. For the best experience, use a web browser that supports WebSockets.
- Review the OpenShift Container Platform 4.x Tested Integrations page before you create the supporting infrastructure for your cluster.
1.2. Understanding and accessing the web console
The web console runs as a pod on the master. The static assets required to run the web console are served by the pod. Once OpenShift Container Platform is successfully installed using openshift-install create cluster, find the URL for the web console and login credentials for your installed cluster in the CLI output of the installation program. For example:
Example output
INFO Install complete!
INFO Run 'export KUBECONFIG=<your working directory>/auth/kubeconfig' to manage the cluster with 'oc', the OpenShift CLI.
INFO The cluster is ready when 'oc login -u kubeadmin -p <provided>' succeeds (wait a few minutes).
INFO Access the OpenShift web-console here: https://console-openshift-console.apps.demo1.openshift4-beta-abcorp.com
INFO Login to the console with user: kubeadmin, password: <provided>
Use those details to log in and access the web console.
For existing clusters that you did not install, you can use oc whoami --show-console to see the web console URL.
Chapter 2. Using the OpenShift Container Platform dashboard to get cluster information
Access the OpenShift Container Platform dashboard, which captures high-level information about the cluster, by navigating to Home → Dashboards → Overview from the OpenShift Container Platform web console.
The OpenShift Container Platform dashboard provides various cluster information, captured in individual dashboard cards.
2.1. About the OpenShift Container Platform dashboards page
The OpenShift Container Platform dashboard consists of the following cards:
Details provides a brief overview of informational cluster details.
Status include ok, error, warning, in progress, and unknown. Resources can add custom status names.
- Cluster ID
- Provider
- Version
Cluster Inventory details number of resources and associated statuses. It is helpful when intervention is required to resolve problems, including information about:
- Number of nodes
- Number of pods
- Persistent storage volume claims
- Bare metal hosts in the cluster, listed according to their state (only available in metal3 environment).
Cluster Capacity charts help administrators understand when additional resources are required in the cluster. The charts contain an inner ring that displays current consumption, while an outer ring displays thresholds configured for the resource, including information about:
- CPU time
- Memory allocation
- Storage consumed
- Network resources consumed
- Cluster Utilization shows the capacity of various resources over a specified period of time, to help administrators understand the scale and frequency of high resource consumption.
- Events lists messages related to recent activity in the cluster, such as pod creation or virtual machine migration to another host.
- Top Consumers helps administrators understand how cluster resources are consumed. Click on a resource to jump to a detailed page listing pods and nodes that consume the largest amount of the specified cluster resource (CPU, memory, or storage).
Chapter 3. Configuring the web console in OpenShift Container Platform
You can modify the OpenShift Container Platform web console to set a logout redirect URL or disable the console.
3.1. Prerequisites
- Deploy an OpenShift Container Platform cluster.
3.2. Configuring the web console
You can configure the web console settings by editing the console.config.openshift.io resource.
Edit the
console.config.openshift.ioresource:$ oc edit console.config.openshift.io cluster
The following example displays the sample resource definition for the console:
apiVersion: config.openshift.io/v1 kind: Console metadata: name: cluster spec: authentication: logoutRedirect: "" 1 status: consoleURL: "" 2- 1
- Specify the URL of the page to load when a user logs out of the web console. If you do not specify a value, the user returns to the login page for the web console. Specifying a
logoutRedirectURL allows your users to perform single logout (SLO) through the identity provider to destroy their single sign-on session. - 2
- The web console URL. To update this to a custom value, see Customizing the web console URL.
Chapter 4. Customizing the web console in OpenShift Container Platform
You can customize the OpenShift Container Platform web console to set a custom logo, product name, links, notifications, and command line downloads. This is especially helpful if you need to tailor the web console to meet specific corporate or government requirements.
4.1. Adding a custom logo and product name
You can create custom branding by adding a custom logo or custom product name. You can set both or one without the other, as these settings are independent of each other.
Prerequisites
- You must have administrator privileges.
-
Create a file of the logo that you want to use. The logo can be a file in any common image format, including GIF, JPG, PNG, or SVG, and is constrained to a
max-heightof60px.
Procedure
Import your logo file into a config map in the
openshift-confignamespace:$ oc create configmap console-custom-logo --from-file /path/to/console-custom-logo.png -n openshift-config
Edit the web console’s Operator configuration to include
customLogoFileandcustomProductName:$ oc edit console.operator.openshift.io cluster
apiVersion: operator.openshift.io/v1
kind: Console
metadata:
  name: cluster
spec:
  customization:
    customLogoFile:
      key: console-custom-logo.png
      name: console-custom-logo
    customProductName: My Console
Once the Operator configuration is updated, it will sync the custom logo config map into the console namespace, mount it to the console pod, and redeploy.
Check for success. If there are any issues, the console cluster Operator will report a
Degradedstatus, and the console Operator configuration will also report aCustomLogoDegradedstatus, but with reasons likeKeyOrFilenameInvalidorNoImageProvided.To check the
clusteroperator, run:$ oc get clusteroperator console -o yaml
To check the console Operator configuration, run:
$ oc get console.operator.openshift.io -o yaml
4.2. Creating custom links in the web console
Prerequisites
- You must have administrator privileges.
Procedure
- From Administration → Custom Resource Definitions, click on ConsoleLink.
- Select Instances tab
Click Create Console Link and edit the file:
apiVersion: console.openshift.io/v1 kind: ConsoleLink metadata: name: example spec: href: 'https://www.example.com' location: HelpMenu 1 text: Link 1- 1
- Valid location settings are
HelpMenu,UserMenu,ApplicationMenu, andNamespaceDashboard.
To make the custom link appear in all namespaces, follow this example:
apiVersion: console.openshift.io/v1
kind: ConsoleLink
metadata:
  name: namespaced-dashboard-link-for-all-namespaces
spec:
  href: 'https://www.example.com'
  location: NamespaceDashboard
  text: This appears in all namespaces
To make the custom link appear in only some namespaces, follow this example:
apiVersion: console.openshift.io/v1
kind: ConsoleLink
metadata:
  name: namespaced-dashboard-for-some-namespaces
spec:
  href: 'https://www.example.com'
  location: NamespaceDashboard
  # This text will appear in a box called "Launcher" under "namespace" or "project" in the web console
  text: Custom Link Text
  namespaceDashboard:
    namespaces:
    # for these specific namespaces
    - my-namespace
    - your-namespace
    - other-namespace
To make the custom link appear in the application menu, follow this example:
apiVersion: console.openshift.io/v1 kind: ConsoleLink metadata: name: application-menu-link-1 spec: href: 'https://www.example.com' location: ApplicationMenu text: Link 1 applicationMenu: section: My New Section # image that is 24x24 in size imageURL: https://via.placeholder.com/24- Click the Save button to apply your changes.
4.3. Customizing the web console URL
You can update the web console URL, consoleURL, to a custom value.
Procedure
Modify the cluster instance created by default during installation in the
consoles.operator.openshift.iocustom resource:$ oc patch consoles.operator.openshift.io cluster --patch '{"spec":{"route":{"hostname":"console.example.com"}}}' --type=mergeIf you specify a custom certificate, you must create a secret in the
openshift-confignamespace that has the key and certificate. For example:$ oc create secret tls console-tls --key=key.pem --cert=cert.pem -n openshift-config
Then, add the following stanza to the configuration resource:
spec:
  route:
    hostname: console.example.com
    secret:
      name: console-tls
4.4. Customizing the login page
Create Terms of Service information with custom login pages. Custom login pages can also be helpful if you use a third-party login provider, such as GitHub or Google, to show users a branded page that they trust and expect before being redirected to the authentication provider. You can also render custom error pages during the authentication process.
Customizing the error template is limited to identity providers (IDPs) that use redirects, such as request header and OIDC-based IDPs. It does not have an effect on IDPs that use direct password authentication, such as LDAP and HTPasswd.
Prerequisites
- You must have administrator privileges.
Procedure
Run the following commands to create templates you can modify:
$ oc adm create-login-template > login.html
$ oc adm create-provider-selection-template > providers.html
$ oc adm create-error-template > errors.html
Create the secrets:
$ oc create secret generic login-template --from-file=login.html -n openshift-config
$ oc create secret generic providers-template --from-file=providers.html -n openshift-config
$ oc create secret generic error-template --from-file=errors.html -n openshift-config
Run:
$ oc edit oauths cluster
Update the specification:
spec:
  templates:
    error:
        name: error-template
    login:
        name: login-template
    providerSelection:
        name: providers-template
Run
oc explain oauths.spec.templatesto understand the options.
4.5. Defining a template for an external log link
If you are connected to a service that helps you browse your logs, but you need to generate URLs in a particular way, then you can define a template for your link.
Prerequisites
- You must have administrator privileges.
Procedure
- From Administration → Custom Resource Definitions, click on ConsoleExternalLogLink.
- Select Instances tab
Click Create Console External Log Link and edit the file:
apiVersion: console.openshift.io/v1
kind: ConsoleExternalLogLink
metadata:
  name: example
spec:
  hrefTemplate: >-
    https://example.com/logs?resourceName=${resourceName}&containerName=${containerName}&resourceNamespace=${resourceNamespace}&podLabels=${podLabels}
  text: Example Logs
4.6. Creating custom notification banners
Prerequisites
- You must have administrator privileges.
Procedure
- From Administration → Custom Resource Definitions, click on ConsoleNotification.
- Select Instances tab
Click Create Console Notification and edit the file:
apiVersion: console.openshift.io/v1 kind: ConsoleNotification metadata: name: example spec: text: This is an example notification message with an optional link. location: BannerTop 1 link: href: 'https://www.example.com' text: Optional link text color: '#fff' backgroundColor: '#0088ce'- 1
- Valid location settings are
BannerTop,BannerBottom, andBannerTopBottom.
- Click the Create button to apply your changes.
4.7. Customizing CLI downloads
You can configure links for downloading the CLI with custom link text and URLs, which can point directly to file packages or to an external page that provides the packages.
Prerequisites
- You must have administrator privileges.
Procedure
- Navigate to Administration → Custom Resource Definitions.
- Select ConsoleCLIDownload from the list of Custom Resource Definitions (CRDs).
Click the YAML tab, and then make your edits:
apiVersion: console.openshift.io/v1 kind: ConsoleCLIDownload metadata: name: example-cli-download-links-for-foo spec: description: | This is an example of download links for foo displayName: example-foo links: - href: 'https://www.example.com/public/foo.tar' text: foo for linux - href: 'https://www.example.com/public/foo.mac.zip' text: foo for mac - href: 'https://www.example.com/public/foo.win.zip' text: foo for windows- Click the Save button.
4.8. Adding YAML examples to Kubernetes resources
You can dynamically add YAML examples to any Kubernetes resources at any time.
Prerequisites
- You must have cluster administrator privileges.
Procedure
- From Administration → Custom Resource Definitions, click on ConsoleYAMLSample.
Click YAML and edit the file:
apiVersion: console.openshift.io/v1
kind: ConsoleYAMLSample
metadata:
  name: example
spec:
  targetResource:
    apiVersion: batch/v1
    kind: Job
  title: Example Job
  description: An example Job YAML sample
  yaml: |
    apiVersion: batch/v1
    kind: Job
    metadata:
      name: countdown
    spec:
      template:
        metadata:
          name: countdown
        spec:
          containers:
          - name: counter
            image: centos:7
            command:
            - "bin/bash"
            - "-c"
            - "for i in 9 8 7 6 5 4 3 2 1 ; do echo $i ; done"
          restartPolicy: Never
Use
spec.snippetto indicate that the YAML sample is not the full YAML resource definition, but a fragment that can be inserted into the existing YAML document at the user’s cursor.- Click Save.
Chapter 5. About the Developer perspective in the web console
The OpenShift Container Platform web console provides two perspectives; the Administrator perspective and the Developer perspective.
The Developer perspective provides workflows specific to developer use cases, such as the ability to:
- Create and deploy applications on OpenShift Container Platform by importing existing codebases, images, and dockerfiles.
- Visually interact with applications, components, and services associated with them within a project and monitor their deployment and build status.
- Group components within an application and connect the components within and across applications.
- Integrate serverless capabilities (Technology Preview).
- Create workspaces to edit your application code using Eclipse Che.
5.1. Prerequisites
To access the Developer perspective, ensure that you have logged in to the web console.
5.2. Accessing the Developer perspective
The Developer perspective in the OpenShift Container Platform web console provides workflows specific to developer use cases.
You can access the Developer perspective from the web console as follows:
Procedure
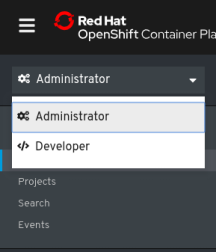
- Log in to the OpenShift Container Platform web console using your login credentials. The default view for the OpenShift Container Platform web console is the Administrator perspective.
Use the perspective switcher to switch to the Developer perspective. The Topology view with a list of all the projects in your cluster is displayed.
Figure 5.1. Developer perspective
- Select an existing project from the list or use the Project drop-down list to create a new project.
If you have no workloads or applications in the project, the Topology view displays the available options to create applications. If you have existing workloads, the Topology view graphically displays your workload nodes.
Chapter 6. About the web terminal in the web console
You can launch an embedded command line terminal instance in the OpenShift web console. You must first install the Web Terminal Operator to use the web terminal.
Cluster administrators can access the web terminal in OpenShift Container Platform 4.7 and later.
This terminal instance is preinstalled with common CLI tools for interacting with the cluster, such as oc, kubectl,odo, kn, tkn, helm, kubens, and kubectx. It also has the context of the project you are working on and automatically logs you in using your credentials.
Web terminal is a Technology Preview feature only. Technology Preview features are not supported with Red Hat production service level agreements (SLAs) and might not be functionally complete. Red Hat does not recommend using them in production. These features provide early access to upcoming product features, enabling customers to test functionality and provide feedback during the development process.
For more information about the support scope of Red Hat Technology Preview features, see https://access.redhat.com/support/offerings/techpreview/.
6.1. Installing the web terminal
You can install the web terminal using the Web Terminal Operator listed in the OpenShift Container Platform OperatorHub. When you install the Web Terminal Operator, the custom resource definitions (CRDs) that are required for the command line configuration, such as the DevWorkspace CRD, are automatically installed. The web console creates the required resources when you open the web terminal.
Prerequisites
-
Access to an OpenShift Container Platform cluster using an account with
cluster-adminpermissions.
Procedure
- In the Administrator perspective of the web console, navigate to Operators → OperatorHub.
-
Use the Filter by keyword box to search for the
Web TerminalOperator in the catalog, and then click the Web Terminal tile. - Read the brief description about the Operator on the Web Terminal page, and then click Install.
On the Install Operator page, retain the default values for all fields.
- The alpha option in the Update Channel menu enables installation of the latest release of the Web Terminal Operator.
- The All namespaces on the cluster option in the Installation Mode menu enables the Operator to watch and be available to all namespaces in the cluster.
-
The openshift-operators option in the Installed Namespace menu installs the Operator in the default
openshift-operatorsnamespace. - The Automatic option in the Approval Strategy menu ensures that the future upgrades to the Operator are handled automatically by the Operator Lifecycle Manager.
- Click Install.
- In the Installed Operators page, click the View operator to verify that the Operator is listed on the Installed Operators page.
- After the Operator is installed, refresh your page to see the command line terminal icon on the upper right of the console.
6.2. Using the web terminal
After the Web Terminal Operator is installed, you can use the web terminal as follows:
-
To launch the web terminal, click the command line terminal icon (
 ) on the upper right of the console. A web terminal instance is displayed in the Command line terminal pane. This instance is automatically logged in with your credentials.
Select the project where the
DevWorkspaceCR must be created from the Project drop-down list. By default, the current project is selected.Note-
The
DevWorkspaceCR is created only if it does not already exist. -
The
openshift-terminalproject is the default project used for cluster administrators. They do not have the option to choose another project.
-
The
- Click Start to initialize the web terminal using the selected project.
After the web terminal is initialized, you can use the preinstalled CLI tools like oc, kubectl, odo, kn, tkn, helm, kubens, and kubectx in the web terminal.
6.3. Uninstalling the web terminal
Uninstalling the web terminal is a two-step process:
- Delete the components and custom resources (CRs) that were added when you installed the Operator.
- Uninstall the Web Terminal Operator.
Uninstalling the Web Terminal Operator does not remove any of its custom resource definitions (CRDs) or managed resources that are created when the Operator is installed. These components must be manually uninstalled for security purposes. Removing these components also allows you to save cluster resources by ensuring that terminals do not idle when the Operator is uninstalled.
Prerequisites
-
Access to an OpenShift Container Platform cluster using an account with
cluster-adminpermissions.
6.3.1. Deleting the web terminal components and custom resources
Use the CLI to delete the CRs that are created during installation of the Web Terminal Operator.
Procedure
Run the following commands to ensure that all
DevWorkspaceCRs are removed along with their related Kubernetes objects, such as deployments.$ oc delete devworkspaces.workspace.devfile.io --all-namespaces --all --wait
$ oc delete workspaceroutings.controller.devfile.io --all-namespaces --all --wait
$ oc delete components.controller.devfile.io --all-namespaces --all --wait
WarningIf this step is not complete, finalizers make it difficult to fully uninstall the Operator easily.
Run the following commands to remove the CRDs:
$ oc delete customresourcedefinitions.apiextensions.k8s.io workspaceroutings.controller.devfile.io
$ oc delete customresourcedefinitions.apiextensions.k8s.io components.controller.devfile.io
$ oc delete customresourcedefinitions.apiextensions.k8s.io devworkspaces.workspace.devfile.io
Remove the
DevWorkspace-Webhook-Serverdeployment:$ oc delete deployment/devworkspace-webhook-server -n openshift-operators
NoteWhen you run this and the following steps, you cannot use the
oc execcommands to run commands in a container. After you remove the webhooks you will be able to use theoc execcommands again.Run the following commands to remove any lingering services, secrets, and config maps:
$ oc delete all --selector app.kubernetes.io/part-of=devworkspace-operator,app.kubernetes.io/name=devworkspace-webhook-server
$ oc delete serviceaccounts devworkspace-webhook-server -n openshift-operators
$ oc delete configmap devworkspace-controller -n openshift-operators
$ oc delete clusterrole devworkspace-webhook-server
$ oc delete clusterrolebinding devworkspace-webhook-server
Run the following commands to remove mutating or validating webhook configurations:
$ oc delete mutatingwebhookconfigurations controller.devfile.io
$ oc delete validatingwebhookconfigurations controller.devfile.io
6.3.2. Uninstalling the Operator using the web console
Procedure
- In the Administrator perspective of the web console, navigate to Operators → Installed Operators.
- Scroll the filter list or type a keyword into the Filter by name box to find the Web Terminal Operator.
-
Click the Options menu
 for the Web Terminal Operator, and then select Uninstall Operator.
- In the Uninstall Operator confirmation dialog box, click Uninstall to remove the Operator, Operator deployments, and pods from the cluster. The Operator stops running and no longer receives updates.
Chapter 7. Disabling the web console in OpenShift Container Platform
You can disable the OpenShift Container Platform web console.
7.1. Prerequisites
- Deploy an OpenShift Container Platform cluster.
7.2. Disabling the web console
You can disable the web console by editing the console.operator.openshift.io resource.
Edit the
console.operator.openshift.ioresource:$ oc edit console.operator.openshift.io cluster
The following example displays the parameters from this resource that you can modify:
apiVersion: config.openshift.io/v1 kind: Console metadata: name: cluster spec: managementState: Removed 1- 1
- Set the
managementStateparameter value toRemovedto disable the web console. The other valid values for this parameter areManaged, which enables the console under the cluster’s control, andUnmanaged, which means that you are taking control of web console management.