
Service Mesh
Service Mesh installation, usage and release notes
Abstract
Chapter 1. Service Mesh Architecture
1.1. Understanding Red Hat OpenShift Service Mesh
Red Hat OpenShift Service Mesh provides a platform for behavioral insight and operational control over your networked microservices in a service mesh. With Red Hat OpenShift Service Mesh, you can connect, secure, and monitor microservices in your OpenShift Container Platform environment.
1.1.1. Understanding service mesh
A service mesh is the network of microservices that make up applications in a distributed microservice architecture and the interactions between those microservices. When a Service Mesh grows in size and complexity, it can become harder to understand and manage.
Based on the open source Istio project, Red Hat OpenShift Service Mesh adds a transparent layer on existing distributed applications without requiring any changes to the service code. You add Red Hat OpenShift Service Mesh support to services by deploying a special sidecar proxy to relevant services in the mesh that intercepts all network communication between microservices. You configure and manage the Service Mesh using the control plane features.
Red Hat OpenShift Service Mesh gives you an easy way to create a network of deployed services that provide:
- Discovery
- Load balancing
- Service-to-service authentication
- Failure recovery
- Metrics
- Monitoring
Red Hat OpenShift Service Mesh also provides more complex operational functions including:
- A/B testing
- Canary releases
- Rate limiting
- Access control
- End-to-end authentication
1.1.2. Red Hat OpenShift Service Mesh Architecture
Red Hat OpenShift Service Mesh is logically split into a data plane and a control plane:
The data plane is a set of intelligent proxies deployed as sidecars. These proxies intercept and control all inbound and outbound network communication between microservices in the service mesh. Sidecar proxies also communicate with Mixer, the general-purpose policy and telemetry hub.
- Envoy proxy intercepts all inbound and outbound traffic for all services in the service mesh. Envoy is deployed as a sidecar to the relevant service in the same pod.
The control plane manages and configures proxies to route traffic, and configures Mixers to enforce policies and collect telemetry.
- Mixer enforces access control and usage policies (such as authorization, rate limits, quotas, authentication, and request tracing) and collects telemetry data from the Envoy proxy and other services.
- Pilot configures the proxies at runtime. Pilot provides service discovery for the Envoy sidecars, traffic management capabilities for intelligent routing (for example, A/B tests or canary deployments), and resiliency (timeouts, retries, and circuit breakers).
- Citadel issues and rotates certificates. Citadel provides strong service-to-service and end-user authentication with built-in identity and credential management. You can use Citadel to upgrade unencrypted traffic in the service mesh. Operators can enforce policies based on service identity rather than on network controls using Citadel.
- Galley ingests the service mesh configuration, then validates, processes, and distributes the configuration. Galley protects the other service mesh components from obtaining user configuration details from OpenShift Container Platform.
Red Hat OpenShift Service Mesh also uses the istio-operator to manage the installation of the control plane. An Operator is a piece of software that enables you to implement and automate common activities in your OpenShift cluster. It acts as a controller, allowing you to set or change the desired state of objects in your cluster.
1.1.3. Red Hat OpenShift Service Mesh control plane
Red Hat OpenShift Service Mesh installs a multi-tenant control plane by default. You specify the projects that can access the Service Mesh, and isolate the Service Mesh from other control plane instances.
1.1.4. Multi-tenancy in Red Hat OpenShift Service Mesh versus cluster-wide installations
The main difference between a multi-tenant installation and a cluster-wide installation is the scope of privileges used by the control plane deployments, for example, Galley and Pilot. The components no longer use cluster-scoped Role Based Access Control (RBAC) resource ClusterRoleBinding, but rely on project-scoped RoleBinding.
Every project in the members list will have a RoleBinding for each service account associated with a control plane deployment and each control plane deployment will only watch those member projects. Each member project has a maistra.io/member-of label added to it, where the member-of value is the project containing the control plane installation.
Red Hat OpenShift Service Mesh configures each member project to ensure network access between itself, the control plane, and other member projects. The exact configuration differs depending on how OpenShift software-defined networking (SDN) is configured. See About OpenShift SDN for additional details.
If the OpenShift Container Platform cluster is configured to use the SDN plug-in:
NetworkPolicy: Red Hat OpenShift Service Mesh creates aNetworkPolicyresource in each member project allowing ingress to all pods from the other members and the control plane. If you remove a member from Service Mesh, thisNetworkPolicyresource is deleted from the project.NoteThis also restricts ingress to only member projects. If ingress from non-member projects is required, you need to create a
NetworkPolicyto allow that traffic through.-
Multitenant: Red Hat OpenShift Service Mesh joins the
NetNamespacefor each member project to theNetNamespaceof the control plane project (the equivalent of runningoc adm pod-network join-projects --to control-plane-project member-project). If you remove a member from the Service Mesh, itsNetNamespaceis isolated from the control plane (the equivalent of runningoc adm pod-network isolate-projects member-project). - Subnet: No additional configuration is performed.
1.1.5. Automatic injection
The upstream Istio community installation automatically injects the sidecar into pods within the projects you have labeled.
Red Hat OpenShift Service Mesh does not automatically inject the sidecar to any pods, but requires you to specify the sidecar.istio.io/inject annotation as illustrated in the Automatic sidecar injection section.
1.1.6. Istio Role Based Access Control features
Istio Role Based Access Control (RBAC) provides a mechanism you can use to control access to a service. You can identify subjects by user name or by specifying a set of properties and apply access controls accordingly.
The upstream Istio community installation includes options to perform exact header matches, match wildcards in headers, or check for a header containing a specific prefix or suffix.
Red Hat OpenShift Service Mesh extends the ability to match request headers by using a regular expression. Specify a property key of request.regex.headers with a regular expression.
Upstream Istio community matching request headers example
apiVersion: "rbac.istio.io/v1alpha1"
kind: ServiceRoleBinding
metadata:
  name: httpbin-client-binding
  namespace: httpbin
spec:
  subjects:
  - user: "cluster.local/ns/istio-system/sa/istio-ingressgateway-service-account"
    properties:
      request.headers[<header>]: "value"
Red Hat OpenShift Service Mesh matching request headers by using regular expressions
apiVersion: "rbac.istio.io/v1alpha1"
kind: ServiceRoleBinding
metadata:
  name: httpbin-client-binding
  namespace: httpbin
spec:
  subjects:
  - user: "cluster.local/ns/istio-system/sa/istio-ingressgateway-service-account"
    properties:
      request.regex.headers[<header>]: "<regular expression>"
1.1.7. OpenSSL
Red Hat OpenShift Service Mesh replaces BoringSSL with OpenSSL. OpenSSL is a software library that contains an open source implementation of the Secure Sockets Layer (SSL) and Transport Layer Security (TLS) protocols. The Red Hat OpenShift Service Mesh Proxy binary dynamically links the OpenSSL libraries (libssl and libcrypto) from the underlying Red Hat Enterprise Linux operating system.
1.1.8. The Istio Container Network Interface (CNI) plug-in
Red Hat OpenShift Service Mesh includes CNI plug-in, which provides you with an alternate way to configure application pod networking. The CNI plug-in replaces the init-container network configuration eliminating the need to grant service accounts and projects access to Security Context Constraints (SCCs) with elevated privileges.
Next steps
- Prepare to install Red Hat OpenShift Service Mesh in your OpenShift Container Platform environment.
1.2. Kiali overview
Kiali provides visibility into your service mesh by showing you the microservices in your service mesh, and how they are connected.
1.2.1. Kiali overview
Kiali provides observability into the Service Mesh running on OpenShift Container Platform. Kiali helps you define, validate, and observe your Istio service mesh. It helps you to understand the structure of your service mesh by inferring the topology, and also provides information about the health of your service mesh.
Kiali provides an interactive graph view of your namespace in real time that provides visibility into features like circuit breakers, request rates, latency, and even graphs of traffic flows. Kiali offers insights about components at different levels, from Applications to Services and Workloads, and can display the interactions with contextual information and charts on the selected graph node or edge. Kiali also provides the ability to validate your Istio configurations, such as gateways, destination rules, virtual services, mesh policies, and more. Kiali provides detailed metrics, and a basic Grafana integration is available for advanced queries. Distributed tracing is provided by integrating Jaeger into the Kiali console.
Kiali is installed by default as part of the Red Hat OpenShift Service Mesh.
1.2.2. Kiali architecture
Kiali is composed of two components: the Kiali application and the Kiali console.
- Kiali application (back end) – This component runs in the container application platform and communicates with the service mesh components, retrieves and processes data, and exposes this data to the console. The Kiali application does not need storage. When deploying the application to a cluster, configurations are set in ConfigMaps and secrets.
- Kiali console (front end) – The Kiali console is a web application. The Kiali application serves the Kiali console, which then queries the back end for data in order to present it to the user.
In addition, Kiali depends on external services and components provided by the container application platform and Istio.
- Red Hat Service Mesh (Istio) - Istio is a Kiali requirement. Istio is the component that provides and controls the service mesh. Although Kiali and Istio can be installed separately, Kiali depends on Istio and will not work if it is not present. Kiali needs to retrieve Istio data and configurations, which are exposed through Prometheus and the cluster API.
- Prometheus - A dedicated Prometheus instance is included as part of the Red Hat OpenShift Service Mesh installation. When Istio telemetry is enabled, metrics data is stored in Prometheus. Kiali uses this Prometheus data to determine the mesh topology, display metrics, calculate health, show possible problems, and so on. Kiali communicates directly with Prometheus and assumes the data schema used by Istio Telemetery. Prometheus is an Istio dependency and a hard dependency for Kiali, and many of Kiali’s features will not work without Prometheus.
- Cluster API - Kiali uses the API of the OpenShift Container Platform (cluster API) in order to fetch and resolve service mesh configurations. Kiali queries the cluster API to retrieve, for example, definitions for namespaces, services, deployments, pods, and other entities. Kiali also makes queries to resolve relationships between the different cluster entities. The cluster API is also queried to retrieve Istio configurations like virtual services, destination rules, route rules, gateways, quotas, and so on.
- Jaeger - Jaeger is optional, but is installed by default as part of the Red Hat OpenShift Service Mesh installation. When you install Jaeger as part of the default Red Hat OpenShift Service Mesh installation, the Kiali console includes a tab to display Jaeger’s tracing data. Note that tracing data will not be available if you disable Istio’s distributed tracing feature. Also note that user must have access to the namespace where the control plane is installed in order to view Jaeger data.
- Grafana - Grafana is optional, but is installed by default as part of the Red Hat OpenShift Service Mesh installation. When available, the metrics pages of Kiali display links to direct the user to the same metric in Grafana. Note that user must have access to the namespace where the control plane is installed in order to view links to the Grafana dashboard and view Grafana data.
1.2.3. Kiali features
The Kiali console is integrated with Red Hat Service Mesh and provides the following capabilities:
- Health – Quickly identify issues with applications, services, or workloads.
- Topology – Visualize how your applications, services, or workloads communicate via the Kiali graph.
- Metrics – Predefined metrics dashboards let you chart service mesh and application performance for Go, Node.js. Quarkus, Spring Boot, Thorntail and Vert.x. You can also create your own custom dashboards.
- Tracing – Integration with Jaeger lets you follow the path of a request through various microservices that make up an application.
- Validations – Perform advanced validations on the most common Istio objects (Destination Rules, Service Entries, Virtual Services, and so on).
- Configuration – Optional ability to create, update and delete Istio routing configuration using wizards or directly in the YAML editor in the Kiali Console.
1.3. Understanding Jaeger
Every time a user takes an action in an application, a request is executed by the architecture that may require dozens of different services to participate in order to produce a response. The path of this request is a distributed transaction. Jaeger lets you perform distributed tracing, which follows the path of a request through various microservices that make up an application.
Distributed tracing is a technique that is used to tie the information about different units of work together—usually executed in different processes or hosts—in order to understand a whole chain of events in a distributed transaction. Distributed tracing lets developers visualize call flows in large service oriented architectures. It can be invaluable in understanding serialization, parallelism, and sources of latency.
Jaeger records the execution of individual requests across the whole stack of microservices, and presents them as traces. A trace is a data/execution path through the system. An end-to-end trace is comprised of one or more spans.
A span represents a logical unit of work in Jaeger that has an operation name, the start time of the operation, and the duration. Spans may be nested and ordered to model causal relationships.
1.3.1. Jaeger overview
Jaeger lets service owners instrument their services to get insights into what their architecture is doing. Jaeger is an open source distributed tracing platform that you can use for monitoring, network profiling, and troubleshooting the interaction between components in modern, cloud-native, microservices-based applications. Jaeger is based on the vendor-neutral OpenTracing APIs and instrumentation.
Using Jaeger lets you perform the following functions:
- Monitor distributed transactions
- Optimize performance and latency
- Perform root cause analysis
Jaeger is installed by default as part of Red Hat OpenShift Service Mesh.
1.3.2. Jaeger architecture
Jaeger is made up of several components that work together to collect, store, and display tracing data.
- Jaeger Client (Tracer, Reporter, instrumented application, client libraries)- Jaeger clients are language specific implementations of the OpenTracing API. They can be used to instrument applications for distributed tracing either manually or with a variety of existing open source frameworks, such as Camel (Fuse), Spring Boot (RHOAR), MicroProfile (RHOAR/Thorntail), Wildfly (EAP), and many more, that are already integrated with OpenTracing.
- Jaeger Agent (Server Queue, Processor Workers) - The Jaeger agent is a network daemon that listens for spans sent over User Datagram Protocol (UDP), which it batches and sends to the collector. The agent is meant to be placed on the same host as the instrumented application. This is typically accomplished by having a sidecar in container environments like Kubernetes.
- Jaeger Collector (Queue, Workers) - Similar to the Agent, the Collector is able to receive spans and place them in an internal queue for processing. This allows the collector to return immediately to the client/agent instead of waiting for the span to make its way to the storage.
- Storage (Data Store) - Collectors require a persistent storage backend. Jaeger has a pluggable mechanism for span storage. Note that for this release, the only supported storage is Elasticsearch.
- Query (Query Service) - Query is a service that retrieves traces from storage.
- Jaeger Console – Jaeger provides a user interface that lets you visualize your distributed tracing data. On the Search page, you can find traces and explore details of the spans that make up an individual trace.
1.3.3. Jaeger features
Jaeger tracing is installed with Red Hat Service Mesh by default, and provides the following capabilities:
- Integration with Kiali – When properly configured, you can view Jaeger data from the Kiali console.
- High scalability – The Jaeger backend is designed to have no single points of failure and to scale with the business needs.
- Distributed Context Propagation – Lets you connect data from different components together to create a complete end-to-end trace.
- Backwards compatibility with Zipkin – Jaeger provides backwards compatibility with Zipkin by accepting spans in Zipkin formats (Thrift or JSON v1/v2) over HTTP.
1.4. Comparing Service Mesh and Istio
An installation of Red Hat OpenShift Service Mesh differs from upstream Istio community installations in multiple ways. The modifications to Red Hat OpenShift Service Mesh are sometimes necessary to resolve issues, provide additional features, or to handle differences when deploying on OpenShift Container Platform.
The current release of Red Hat OpenShift Service Mesh differs from the current upstream Istio community release in the following ways:
1.4.1. Red Hat OpenShift Service Mesh control plane
Red Hat OpenShift Service Mesh installs a multi-tenant control plane by default. You specify the projects that can access the Service Mesh, and isolate the Service Mesh from other control plane instances.
1.4.2. Multi-tenancy in Red Hat OpenShift Service Mesh versus cluster-wide installations
The main difference between a multi-tenant installation and a cluster-wide installation is the scope of privileges used by the control plane deployments, for example, Galley and Pilot. The components no longer use cluster-scoped Role Based Access Control (RBAC) resource ClusterRoleBinding, but rely on project-scoped RoleBinding.
Every project in the members list will have a RoleBinding for each service account associated with a control plane deployment and each control plane deployment will only watch those member projects. Each member project has a maistra.io/member-of label added to it, where the member-of value is the project containing the control plane installation.
Red Hat OpenShift Service Mesh configures each member project to ensure network access between itself, the control plane, and other member projects. The exact configuration differs depending on how OpenShift software-defined networking (SDN) is configured. See About OpenShift SDN for additional details.
If the OpenShift Container Platform cluster is configured to use the SDN plug-in:
NetworkPolicy: Red Hat OpenShift Service Mesh creates aNetworkPolicyresource in each member project allowing ingress to all pods from the other members and the control plane. If you remove a member from Service Mesh, thisNetworkPolicyresource is deleted from the project.NoteThis also restricts ingress to only member projects. If ingress from non-member projects is required, you need to create a
NetworkPolicyto allow that traffic through.-
Multitenant: Red Hat OpenShift Service Mesh joins the
NetNamespacefor each member project to theNetNamespaceof the control plane project (the equivalent of runningoc adm pod-network join-projects --to control-plane-project member-project). If you remove a member from the Service Mesh, itsNetNamespaceis isolated from the control plane (the equivalent of runningoc adm pod-network isolate-projects member-project). - Subnet: No additional configuration is performed.
1.4.3. Automatic injection
The upstream Istio community installation automatically injects the sidecar into pods within the projects you have labeled.
Red Hat OpenShift Service Mesh does not automatically inject the sidecar to any pods, but requires you to specify the sidecar.istio.io/inject annotation as illustrated in the Automatic sidecar injection section.
1.4.4. Istio Role Based Access Control features
Istio Role Based Access Control (RBAC) provides a mechanism you can use to control access to a service. You can identify subjects by user name or by specifying a set of properties and apply access controls accordingly.
The upstream Istio community installation includes options to perform exact header matches, match wildcards in headers, or check for a header containing a specific prefix or suffix.
Red Hat OpenShift Service Mesh extends the ability to match request headers by using a regular expression. Specify a property key of request.regex.headers with a regular expression.
Upstream Istio community matching request headers example
apiVersion: "rbac.istio.io/v1alpha1"
kind: ServiceRoleBinding
metadata:
  name: httpbin-client-binding
  namespace: httpbin
spec:
  subjects:
  - user: "cluster.local/ns/istio-system/sa/istio-ingressgateway-service-account"
    properties:
      request.headers[<header>]: "value"
Red Hat OpenShift Service Mesh matching request headers by using regular expressions
apiVersion: "rbac.istio.io/v1alpha1"
kind: ServiceRoleBinding
metadata:
  name: httpbin-client-binding
  namespace: httpbin
spec:
  subjects:
  - user: "cluster.local/ns/istio-system/sa/istio-ingressgateway-service-account"
    properties:
      request.regex.headers[<header>]: "<regular expression>"
1.4.5. OpenSSL
Red Hat OpenShift Service Mesh replaces BoringSSL with OpenSSL. OpenSSL is a software library that contains an open source implementation of the Secure Sockets Layer (SSL) and Transport Layer Security (TLS) protocols. The Red Hat OpenShift Service Mesh Proxy binary dynamically links the OpenSSL libraries (libssl and libcrypto) from the underlying Red Hat Enterprise Linux operating system.
1.4.6. The Istio Container Network Interface (CNI) plug-in
Red Hat OpenShift Service Mesh includes CNI plug-in, which provides you with an alternate way to configure application pod networking. The CNI plug-in replaces the init-container network configuration eliminating the need to grant service accounts and projects access to Security Context Constraints (SCCs) with elevated privileges.
1.4.7. Kiali and service mesh
Installing Kiali via the Service Mesh on OpenShift Container Platform differs from community Kiali installations in multiple ways. These modifications are sometimes necessary to resolve issues, provide additional features, or to handle differences when deploying on OpenShift Container Platform.
- Kiali has been enabled by default.
- Ingress has been enabled by default.
- Updates have been made to the Kiali ConfigMap.
- Updates have been made to the ClusterRole settings for Kiali.
-
Users should not manually edit the ConfigMap or the Kiali custom resource files as those changes might be overwritten by the Service Mesh or Kiali operators. All configuration for Kiali running on Red Hat OpenShift Service Mesh is done in the
ServiceMeshControlPlanecustom resource file and there are limited configuration options. Updating the operator files should be restricted to those users with cluster-admin privileges.
1.4.8. Jaeger and service mesh
Installing Jaeger with the Service Mesh on OpenShift Container Platform differs from community Jaeger installations in multiple ways. These modifications are sometimes necessary to resolve issues, provide additional features, or to handle differences when deploying on OpenShift Container Platform.
- Jaeger has been enabled by default for Service Mesh.
- Ingress has been enabled by default for Service Mesh.
- The name for the Zipkin port name has changed to jaeger-collector-zipkin (from http)
- Jaeger uses Elasticsearch for storage by default.
- The community version of Istio provides a generic "tracing" route. Red Hat OpenShift Service Mesh uses a "jaeger" route that is installed by the Jaeger operator and is already protected by OAuth.
- Red Hat OpenShift Service Mesh uses a sidecar for the Envoy proxy, and Jaeger also uses a sidecar, for the Jaeger agent. These two sidecars are configured separately and should not be confused with each other. The proxy sidecar creates spans related to the pod’s ingress and egress traffic. The agent sidecar receives the spans emitted by the application and sends them to the Jaeger Collector.
Chapter 2. Service Mesh Installation
2.1. Preparing to install Red Hat OpenShift Service Mesh
Before you can install Red Hat OpenShift Service Mesh, review the installation activities, ensure that you meet the prerequisites:
Prerequisites
- Possess an active OpenShift Container Platform subscription on your Red Hat account. If you do not have a subscription, contact your sales representative for more information.
- Review the OpenShift Container Platform 4.1 overview.
Install OpenShift Container Platform 4.1.
Install the version of the OpenShift Container Platform command line utility (the
occlient tool) that matches your OpenShift Container Platform version and add it to your path.- If you are using OpenShift Container Platform 4.1, see About the CLI.
2.1.1. Red Hat OpenShift Service Mesh supported configurations
The following are the only supported configurations for the Red Hat OpenShift Service Mesh 1.0.10:
- Red Hat OpenShift Container Platform version 4.1.
OpenShift Online and OpenShift Dedicated are not supported for Red Hat OpenShift Service Mesh 1.0.10.
- The deployment must be contained to a single OpenShift Container Platform cluster that is not federated.
- This release of Red Hat OpenShift Service Mesh is only available on OpenShift Container Platform x86_64.
- Red Hat OpenShift Service Mesh is only suited for OpenShift Container Platform Software Defined Networking (SDN) configured as a flat network with no external providers.
- This release only supports configurations where all Service Mesh components are contained in the OpenShift cluster in which it operates. It does not support management of microservices that reside outside of the cluster, or in a multi-cluster scenario.
- This release only supports configurations that do not integrate external services such as virtual machines.
2.1.1.1. Supported configurations for Kiali on Red Hat OpenShift Service Mesh
- The Kiali observability console is only supported on the two most recent releases of the Chrome, Edge, Firefox, or Safari browsers.
2.1.1.2. Supported Mixer adapters
This release only supports the following Mixer adapter:
- 3scale Istio Adapter
2.1.2. Red Hat OpenShift Service Mesh installation activities
To install the Red Hat OpenShift Service Mesh Operator, you must first install these Operators:
Please see Configuring Elasticsearch for details on configuring the default Jaeger parameters for Elasticsearch in a production environment.
- Elasticsearch - Based on the open source Elasticsearch project that enables you to configure and manage an Elasticsearch cluster for tracing and logging with Jaeger.
- Jaeger - based on the open source Jaeger project, lets you perform tracing to monitor and troubleshoot transactions in complex distributed systems.
- Kiali - based on the open source Kiali project, provides observability for your service mesh. By using Kiali you can view configurations, monitor traffic, and view and analyze traces in a single console.
After you install the Elasticsearch, Jaeger, and Kiali Operators, then you install the Red Hat OpenShift Service Mesh Operator. The Service Mesh Operator defines and monitors the ServiceMeshControlPlane resources that manage the deployment, updating, and deletion of the Service Mesh components.
- Red Hat OpenShift Service Mesh - based on the open source Istio project, lets you connect, secure, control, and observe the microservices that make up your applications.
Next steps
- Install Red Hat OpenShift Service Mesh in your OpenShift Container Platform environment.
2.2. Installing Red Hat OpenShift Service Mesh
Installing the Service Mesh involves installing the Elasticsearch, Jaeger, Kiali and Service Mesh Operators, creating and managing a ServiceMeshControlPlane resource to deploy the control plane, and creating a ServiceMeshMemberRoll resource to specify the namespaces associated with the Service Mesh.
Mixer’s policy enforcement is disabled by default. You must enable it to run policy tasks. See Update Mixer policy enforcement for instructions on enabling Mixer policy enforcement.
Multi-tenant control plane installations are the default configuration starting with Red Hat OpenShift Service Mesh 1.0.
Prerequisites
- Follow the Preparing to install Red Hat OpenShift Service Mesh process.
- An account with cluster administration access.
2.2.1. Installing the Operators from OperatorHub
The Service Mesh installation process uses the OperatorHub to install the ServiceMeshControlPlane custom resource definition within the openshift-operators project. The Red Hat OpenShift Service Mesh defines and monitors the ServiceMeshControlPlane related to the deployment, update, and deletion of the control plane.
Starting with Red Hat OpenShift Service Mesh 1.0.10, you must install the Elasticsearch Operator, the Jaeger Operator, and the Kiali Operator before the Red Hat OpenShift Service Mesh Operator can install the control plane.
2.2.1.1. Installing the Elasticsearch Operator
You must install the Elasticsearch Operator for the Red Hat OpenShift Service Mesh Operator to install the control plane.
Do not install Community versions of the Operators. Community Operators are not supported.
Prerequisites
- Access to the OpenShift Container Platform web console.
Procedure
- Log in to the OpenShift Container Platform web console.
- Navigate to Catalog → OperatorHub.
- Type Elasticsearch into the filter box to locate the Elasticsearch Operator.
- Click the Elasticsearch Operator to display information about the Operator.
- Click Install.
-
On the Create Operator Subscription page, select All namespaces on the cluster (default). This installs the Operator in the default
openshift-operatorsproject and makes the Operator available to all projects in the cluster. - Select the preview Update Channel.
Select the Automatic Approval Strategy.
NoteThe Manual approval strategy requires a user with appropriate credentials to approve the Operator install and subscription process.
- Click Subscribe.
- The Subscription Overview page displays the Elasticsearch Operator’s installation progress.
2.2.1.2. Installing the Jaeger Operator
You must install the Jaeger Operator for the Red Hat OpenShift Service Mesh Operator to install the control plane.
Do not install Community versions of the Operators. Community Operators are not supported.
Prerequisites
- Access to the OpenShift Container Platform web console.
- The Elasticsearch Operator must be installed.
Procedure
- Log in to the OpenShift Container Platform web console.
- Navigate to Catalog → OperatorHub.
- Type Jaeger into the filter box to locate the Jaeger Operator.
- Click the Jaeger Operator provided by Red Hat to display information about the Operator.
- Click Install.
-
On the Create Operator Subscription page, select All namespaces on the cluster (default). This installs the Operator in the default
openshift-operatorsproject and makes the Operator available to all projects in the cluster. - Select the stable Update Channel.
Select the Automatic Approval Strategy.
NoteThe Manual approval strategy requires a user with appropriate credentials to approve the Operator install and subscription process.
- Click Subscribe.
- The Subscription Overview page displays the Jaeger Operator’s installation progress.
2.2.1.3. Installing the Kiali Operator
You must install the Kiali Operator for the Red Hat OpenShift Service Mesh Operator to install the control plane.
Do not install Community versions of the Operators. Community Operators are not supported.
Prerequisites
- Access to the OpenShift Container Platform web console.
Procedure
- Log in to the OpenShift Container Platform web console.
- Navigate to Catalog → OperatorHub.
- Type Kiali into the filter box to find the Kiali Operator.
- Click the Kiali Operator provided by Red Hat to display information about the Operator.
- Click Install.
-
On the Create Operator Subscription page, select All namespaces on the cluster (default). This installs the Operator in the default
openshift-operatorsproject and makes the Operator available to all projects in the cluster. - Select the stable Update Channel.
Select the Automatic Approval Strategy.
NoteThe Manual approval strategy requires a user with appropriate credentials to approve the Operator install and subscription process.
- Click Subscribe.
- The Subscription Overview page displays the Kiali Operator’s installation progress.
2.2.1.4. Installing the Red Hat OpenShift Service Mesh Operator
Prerequisites
- Access to the OpenShift Container Platform web console.
- The Elasticsearch Operator must be installed.
- The Jaeger Operator must be installed.
- The Kiali Operator must be installed.
Procedure
- Log in to the OpenShift Container Platform web console.
- Navigate to Catalog → OperatorHub.
- Type Red Hat OpenShift Service Mesh into the filter box to find the Red Hat OpenShift Service Mesh Operator.
- Click the Red Hat OpenShift Service Mesh Operator to display information about the Operator.
-
On the Create Operator Subscription page, select All namespaces on the cluster (default). This installs the Operator in the default
openshift-operatorsproject and makes the Operator available to all projects in the cluster. - Click Install.
- Select the 1.0 Update Channel.
Select the Automatic Approval Strategy.
NoteThe Manual approval strategy requires a user with appropriate credentials to approve the Operator install and subscription process.
- Click Subscribe.
- The Subscription Overview page displays the Red Hat OpenShift Service Mesh Operator’s installation progress.
2.2.2. Deploying the Red Hat OpenShift Service Mesh control plane
You can deploy the Service Mesh control plane by using the OpenShift Container Platform web console or the CLI.
2.2.2.1. Deploying the control plane with the web console
Follow this procedure to deploy the Red Hat OpenShift Service Mesh control plane by using the web console.
Prerequisites
- The Red Hat OpenShift Service Mesh Operator must be installed.
- Review the Customize the Red Hat OpenShift Service Mesh installation instructions.
Procedure
- Log in to the OpenShift Container Platform web console.
-
Create a project named
istio-system. - Navigate to Catalogs → Installed Operators.
- Click the Red Hat OpenShift Service Mesh Operator.
Under Provided APIs, the Operator enables you to create two resource types:
-
A
ServiceMeshControlPlaneresource -
A
ServiceMeshMemberRollresource
-
A
- Click Create New under Istio Service Mesh Control Plane.
Modify the minimal
ServiceMeshControlPlanetemplate.NoteReview Customize the Red Hat OpenShift Service Mesh installation for additional information on customizing the control plane and control plane parameters.
- Click Create to create the control plane.
- The Operator starts up the pods, services, and Service Mesh control plane components.
- Click the Istio Service Mesh Control Plane tab.
- Click the name of the new control plane.
- Click the Resources tab to see the Red Hat OpenShift Service Mesh control plane resources the Operator created and configured.
2.2.2.2. Deploying the control plane from the CLI
Follow this procedure to deploy the Red Hat OpenShift Service Mesh control plane by using the CLI.
Prerequisites
- The Red Hat OpenShift Service Mesh Operator must be installed.
- Review the Customize the Red Hat OpenShift Service Mesh installation instructions.
-
Access to the OpenShift Container Platform Command-line Interface (CLI) also known as
oc.
Review Customize the Red Hat OpenShift Service Mesh installation for additional information on customizing the control plane and control plane parameters.
Procedure
- Log in to the OpenShift Container Platform CLI.
-
Create a
ServiceMeshControlPlanefile namedistio-installation.yaml. Run this command to deploy the control plane:
$ oc create -n istio-system -f istio-installation.yaml
Run this command to watch the progress of the pods during the installation process:
$ oc get pods -n istio-system -w
2.2.3. Updating your application pods
If you selected the Automatic Approval Strategy when you were installing your Operators, then the Operators update the control plane automatically, but not your applications. Existing applications continue to be part of the mesh and function accordingly. The application administrator must restart applications to upgrade the sidecar.
If your deployment uses Automatic sidecar injection, you can update the pod template in the deployment by adding or modifying an annotation. Run the following command to redeploy the pods:
$ oc patch deployment/<deployment> -p '{"spec":{"template":{"metadata":{"annotations":{"kubectl.kubernetes.io/restartedAt": "'`date -Iseconds`'"}}}}}'If your deployment does not use automatic sidecar injection, you must manually update the sidecars by modifying the sidecar container image specified in the deployment or pod.
2.2.4. Configure the Red Hat OpenShift Service Mesh member roll
You must create a ServiceMeshMemberRoll resource named default associated with the Service Mesh in the same project as the ServiceMeshControlPlane.
If Container Network Interface (CNI) plugin is enabled, manual sidecar injection will work, but pods will not be able to communicate with the control plane unless those pods are specified in the ServiceMeshMemberRoll resource.
The member projects are only updated if the Service Mesh control plane installation succeeds.
-
You can add any number of projects, but a project can only belong to one
ServiceMeshMemberRollresource.
The ServiceMeshMemberRoll resource is deleted when its corresponding ServiceMeshControlPlane resource is deleted.
2.2.4.1. Configure the member roll from the OpenShift Container Platform web console
Follow this procedure to add the Bookinfo project to the Service Mesh member roll by using the web console.
Prerequisites
- An installed, verified Red Hat OpenShift Service Mesh Operator.
Procedure
- Log in to the OpenShift Container Platform web console.
- Click to Home → Projects.
- Click Create Project.
- Enter a Project Name (for example, bookinfo), a Display Name, and a Description, then click Create.
- Click Catalog → Installed Operators.
-
Click the Project menu and choose
istio-systemfrom the list. - Click the Istio Service Mesh Member Roll link under Provided APIs for the Red Hat OpenShift Service Mesh Operator.
Click on All Instances, click Create New, and then click Create Istio Service Mesh Member Roll.
NoteIt can take a short time for the Operator to finish creating the projects, therefore you may need to refresh the screen before the web console presents the Create Istio Service Mesh Member Roll button.
- Edit the default Service Mesh Member Roll YAML and add bookinfo to the members list.
- Click Create to save the updated Service Mesh Member Roll.
2.2.4.2. Configure the member roll from the CLI
This example joins the Bookinfo project to the Service Mesh from the CLI.
Prerequisites
- An installed, verified Service Mesh Operator.
-
Name of the project with the
ServiceMeshMemberRollresource. -
Access to the OpenShift Container Platform Command-line Interface (CLI) also known as
oc.
Procedure
- Log in to the OpenShift Container Platform CLI.
-
Create
ServiceMeshMemberRollresource in the same project as theServiceMeshControlPlaneresource. -
Name the resource
default. Add the Bookinfo project to the member list in the
ServiceMeshMemberRoll. In this example, thebookinfoproject is joined to the Service Mesh deployed in the same project as theServiceMeshMembereRollresource.Project configuration example
  apiVersion: maistra.io/v1
  kind: ServiceMeshMemberRoll
  metadata:
    name: default
  spec:
    members:
    # a list of projects joined into the service mesh
    - bookinfo
Next steps
- Customize the Red Hat OpenShift Service Mesh installation.
- Prepare to deploy applications on Red Hat OpenShift Service Mesh.
2.3. Customizing the Red Hat OpenShift Service Mesh installation
You can customize your Red Hat OpenShift Service Mesh by modifying the default Service Mesh custom resource or by creating a new custom resource.
Prerequisites
-
An account with the
cluster-adminrole. - Completed the Preparing to install Red Hat OpenShift Service Mesh process.
- Have installed the operators.
2.3.1. Red Hat OpenShift Service Mesh custom resources
The istio-system project is used as an example throughout the Service Mesh documentation, but you can use other projects as necessary.
A custom resource allows you to extend the API in an Red Hat OpenShift Service Mesh project or cluster. When you deploy Service Mesh it creates a default ServiceMeshControlPlane that you can modify to change the project parameters.
The Service Mesh operator extends the API by adding the ServiceMeshControlPlane resource type, which enables you to create ServiceMeshControlPlane objects within projects. By creating a ServiceMeshControlPlane object, you instruct the Operator to install a Service Mesh control plane into the project, configured with the parameters you set in the ServiceMeshControlPlane object.
This example ServiceMeshControlPlane definition contains all of the supported parameters and deploys Red Hat OpenShift Service Mesh 1.0.10 images based on Red Hat Enterprise Linux (RHEL).
The 3scale Istio Adapter is deployed and configured in the custom resource file. It also requires a working 3scale account (SaaS or On-Premises).
Full example istio-installation.yaml
  apiVersion: maistra.io/v1
  kind: ServiceMeshControlPlane
  metadata:
    name: full-install
  spec:

    istio:
      global:
        proxy:
          resources:
            requests:
              cpu: 100m
              memory: 128Mi
            limits:
              cpu: 500m
              memory: 128Mi

      gateways:
        istio-egressgateway:
          autoscaleEnabled: false
        istio-ingressgateway:
          autoscaleEnabled: false

      mixer:
        policy:
          autoscaleEnabled: false

        telemetry:
          autoscaleEnabled: false
          resources:
            requests:
              cpu: 100m
              memory: 1G
            limits:
              cpu: 500m
              memory: 4G

      pilot:
        autoscaleEnabled: false
        traceSampling: 100

      kiali:
        enabled: true

      grafana:
        enabled: true

      tracing:
        enabled: true
        jaeger:
          template: all-in-one
2.3.2. ServiceMeshControlPlane parameters
The following examples illustrate use of the ServiceMeshControlPlane parameters and the tables provide additional information about supported parameters.
The resources you configure for Red Hat OpenShift Service Mesh with these parameters, including CPUs, memory, and the number of pods, are based on the configuration of your OpenShift cluster. Configure these parameters based on the available resources in your current cluster configuration.
2.3.2.1. Istio global example
Here is an example that illustrates the Istio global parameters for the ServiceMeshControlPlane and a description of the available parameters with appropriate values.
In order for the 3scale Istio Adapter to work, disablePolicyChecks must be false.
Example global parameters
  istio:
    global:
      tag: 1.0.0
      hub: registry.redhat.io/openshift-service-mesh/
      proxy:
        resources:
          requests:
            cpu: 100m
            memory: 128Mi
          limits:
            cpu: 500m
            memory: 128Mi
      mtls:
        enabled: false
      disablePolicyChecks: true
      policyCheckFailOpen: false
      imagePullSecrets:
        - MyPullSecret
Table 2.1. Global parameters
| Parameter | Description | Values | Default value |
|---|---|---|---|
|
| This parameter enables/disables policy checks. |
|
|
|
| This parameter indicates whether traffic is allowed to pass through to the Envoy sidecar when the Mixer policy service cannot be reached. |
|
|
|
| The tag that the Operator uses to pull the Istio images. | A valid container image tag. |
|
|
| The hub that the Operator uses to pull Istio images. | A valid image repository. |
|
|
| This parameter controls whether to enable/disable Mutual Transport Layer Security (mTLS) between services by default. |
|
|
|
| If access to the registry providing the Istio images is secure, list an imagePullSecret here. | redhat-registry-pullsecret OR quay-pullsecret | None |
These parameters are specific to the proxy subset of global parameters.
Table 2.2. Proxy parameters
| Type | Parameter | Description | Values | Default value |
|---|---|---|---|---|
| Resources |
| The amount of CPU resources requested for Envoy proxy. | CPU resources, specified in cores or millicores (for example, 200m, 0.5, 1) based on your environment’s configuration. |
|
|
| The amount of memory requested for Envoy proxy | Available memory in bytes(for example, 200Ki, 50Mi, 5Gi) based on your environment’s configuration. |
| |
| Limits |
| The maximum amount of CPU resources requested for Envoy proxy. | CPU resources, specified in cores or millicores (for example, 200m, 0.5, 1) based on your environment’s configuration. |
|
|
| The maximum amount of memory Envoy proxy is permitted to use. | Available memory in bytes (for example, 200Ki, 50Mi, 5Gi) based on your environment’s configuration. |
|
2.3.2.2. Istio gateway configuration
Here is an example that illustrates the Istio gateway parameters for the ServiceMeshControlPlane and a description of the available parameters with appropriate values.
Example gateway parameters
  gateways:
       istio-egressgateway:
         autoscaleEnabled: false
         autoscaleMin: 1
         autoscaleMax: 5
       istio-ingressgateway:
         autoscaleEnabled: false
         autoscaleMin: 1
         autoscaleMax: 5
Table 2.3. Istio Gateway parameters
| Type | Parameter | Description | Values | Default value |
|---|---|---|---|---|
|
|
| This parameter enables/disables autoscaling. |
|
|
|
|
The minimum number of pods to deploy for the egress gateway based on the | A valid number of allocatable pods based on your environment’s configuration. |
| |
|
|
The maximum number of pods to deploy for the egress gateway based on the | A valid number of allocatable pods based on your environment’s configuration. |
| |
|
|
| This parameter enables/disables autoscaling. |
|
|
|
|
The minimum number of pods to deploy for the ingress gateway based on the | A valid number of allocatable pods based on your environment’s configuration. |
| |
|
|
The maximum number of pods to deploy for the ingress gateway based on the | A valid number of allocatable pods based on your environment’s configuration. |
|
2.3.2.3. Istio Mixer configuration
Here is an example that illustrates the Mixer parameters for the ServiceMeshControlPlane and a description of the available parameters with appropriate values.
Example mixer parameters
mixer:
  enabled: true
  policy:
    autoscaleEnabled: false
  telemetry:
    autoscaleEnabled: false
    resources:
      limits:
        cpu: 500m
        memory: 4G
      requests:
        cpu: 100m
        memory: 1G
Table 2.4. Istio Mixer policy parameters
| Parameter | Description | Values | Default value |
|---|---|---|---|
|
| This parameter enables/disables Mixer. |
|
|
|
| This parameter enables/disables autoscaling. Disable this for small environments. |
|
|
|
|
The minimum number of pods to deploy based on the | A valid number of allocatable pods based on your environment’s configuration. |
|
|
|
The maximum number of pods to deploy based on the | A valid number of allocatable pods based on your environment’s configuration. |
|
Table 2.5. Istio Mixer telemetry parameters
| Type | Parameter | Description | Values | Default |
|---|---|---|---|---|
| Resources |
| The percentage of CPU resources requested for Mixer telemetry. | CPU resources in millicores based on your environment’s configuration. |
|
|
| The amount of memory requested for Mixer telemetry. | Available memory in bytes (for example, 200Ki, 50Mi, 5Gi) based on your environment’s configuration. |
| |
| Limits |
| The maximum percentage of CPU resources Mixer telemetry is permitted to use. | CPU resources in millicores based on your environment’s configuration. |
|
|
| The maximum amount of memory Mixer telemetry is permitted to use. | Available memory in bytes (for example, 200Ki, 50Mi, 5Gi) based on your environment’s configuration. |
|
2.3.2.4. Istio Pilot configuration
Here is an example that illustrates the Istio Pilot parameters for the ServiceMeshControlPlane and a description of the available parameters with appropriate values.
Example pilot parameters
  pilot:
    resources:
      requests:
        cpu: 100m
        memory: 128Mi
    autoscaleEnabled: false
    traceSampling: 100
Table 2.6. Istio Pilot parameters
| Parameter | Description | Values | Default value |
|---|---|---|---|
|
| The percentage of CPU resources requested for Pilot. | CPU resources in millicores based on your environment’s configuration. |
|
|
| The amount of memory requested for Pilot. | Available memory in bytes (for example, 200Ki, 50Mi, 5Gi) based on your environment’s configuration. |
|
|
| This parameter enables/disables autoscaling. Disable this for small environments. |
|
|
|
| This value controls how often random sampling occurs. Note: Increase for development or testing. | A valid percentage. |
|
2.3.3. Configuring Kiali
When the Service Mesh Operator creates the ServiceMeshControlPlane it also processes the Kiali resource. The Kiali Operator then uses this object when creating Kiali instances.
The default Kiali parameters specified in the ServiceMeshControlPlane are as follows:
Example Kiali parameters
apiVersion: maistra.io/v1
kind: ServiceMeshControlPlane
spec:
    kiali:
      enabled: true
      dashboard:
        viewOnlyMode: false
      ingress:
        enabled: true
Table 2.7. Kiali parameters
| Parameter | Description | Values | Default value |
|---|---|---|---|
enabled | This parameter enables/disables Kiali. Kiali is enabled by default. |
|
|
dashboard viewOnlyMode | This parameter enables/disables view-only mode for the Kiali console. When view-only mode is enabled, users cannot use the console to make changes to the Service Mesh. |
|
|
ingress enabled | This parameter enables/disables ingress for Kiali. |
|
|
2.3.3.1. Configuring Kiali for Grafana
When you install Kiali and Grafana as part of Red Hat OpenShift Service Mesh the Operator configures the following by default:
- Grafana is enabled as an external service for Kiali
- Grafana authorization for the Kiali console
- Grafana URL for the Kiali console
Kiali can automatically detect the Grafana URL. However if you have a custom Grafana installation that is not easily auto-detectable by Kiali, you must update the URL value in the ServiceMeshControlPlane resource.
Additional Grafana parameters
spec:
  kiali:
    enabled: true
    dashboard:
      viewOnlyMode: false
      grafanaURL:  "https://grafana-istio-system.127.0.0.1.nip.io"
    ingress:
      enabled: true
2.3.3.2. Configuring Kiali for Jaeger
When you install Kiali and Jaeger as part of Red Hat OpenShift Service Mesh the Operator configures the following by default:
- Jaeger is enabled as an external service for Kiali
- Jaeger authorization for the Kiali console
- Jaeger URL for the Kiali console
Kiali can automatically detect the Jaeger URL. However if you have a custom Jaeger installation that is not easily auto-detectable by Kiali, you must update the URL value in the ServiceMeshControlPlane resource.
Additional Jaeger parameters
spec:
  kiali:
    enabled: true
    dashboard:
      viewOnlyMode: false
      jaegerURL: "http://jaeger-query-istio-system.127.0.0.1.nip.io"
    ingress:
      enabled: true
2.3.4. Configuring Jaeger
When the Service Mesh Operator creates the ServiceMeshControlPlane resource it also creates the Jaeger resource. The Jaeger Operator then uses this object when creating Jaeger instances.
The default Jaeger parameters specified in the ServiceMeshControlPlane are as follows:
Default all-in-one Jaeger parameters
  apiVersion: maistra.io/v1
  kind: ServiceMeshControlPlane
  spec:
    istio:
      tracing:
        enabled: true
        jaeger:
          template: all-in-one
Table 2.8. Jaeger parameters
| Parameter | Description | Values | Default value |
|---|---|---|---|
tracing enabled | This parameter enables/disables tracing in Service Mesh. Jaeger is installed by default. |
|
|
jaeger template | This parameter specifies which Jaeger deployment strategy to use. |
|
|
The default template in the ServiceMeshControlPlane resource is the all-in-one deployment strategy which uses in-memory storage. For production, the only supported storage option is Elasticsearch, therefore you must configure the ServiceMeshControlPlane to request the production-elasticsearch template when you deploy Service Mesh within a production environment.
2.3.4.1. Configuring Elasticsearch
The default Jaeger deployment strategy uses the all-in-one template so that the installation can be completed using minimal resources. However, because the all-in-one template uses in-memory storage, it is only recommended for development, demo, or testing purposes and should NOT be used for production environments.
If you are deploying Service Mesh and Jaeger in a production environment you must change the template to the production-elasticsearch template, which uses Elasticsearch for Jaeger’s storage needs.
Elasticsearch is a memory intensive application. The initial set of nodes specified in the default OpenShift Container Platform installation may not be large enough to support the Elasticsearch cluster. You should modify the default Elasticsearch configuration to match your use case and the resources you have requested for your OpenShift Container Platform installation. You can adjust both the CPU and memory limits for each component by modifying the resources block with valid CPU and memory values. Additional nodes must be added to the cluster if you want to run with the recommended amount (or more) of memory. Ensure that you do not exceed the resources requested for your OpenShift Container Platform installation.
Default production-elasticsearch parameters
  apiVersion: maistra.io/v1
  kind: ServiceMeshControlPlane
  spec:
    istio:
      tracing:
      enabled: true
      ingress:
        enabled: true
      jaeger:
        template: production-elasticsearch
        elasticsearch:
          nodeCount: 3
          redundancyPolicy:
          resources:
            requests:
              cpu: "1"
              memory: "16Gi"
            limits:
              cpu: "1"
              memory: "16Gi"
Table 2.9. Elasticsearch parameters
| Parameter | Description | Values | Default Value | Examples |
|---|---|---|---|---|
tracing: enabled | This parameter enables/disables tracing in Service Mesh. Jaeger is installed by default. |
|
| |
ingress: enabled | This parameter enables/disables ingress for Jaeger. |
|
| |
jaeger template | This parameter specifies which Jaeger deployment strategy to use. |
|
| |
elasticsearch: nodeCount | Number of Elasticsearch nodes to create. | Integer value. | 1 | Proof of concept = 1, Minimum deployment =3 |
requests: cpu | Number of central processing units for requests, based on your environment’s configuration. | Specified in cores or millicores (for example, 200m, 0.5, 1). | 1Gi | Proof of concept = 500m, Minimum deployment =1 |
requests: memory | Available memory for requests, based on your environment’s configuration. | Specified in bytes (for example, 200Ki, 50Mi, 5Gi). | 500m | Proof of concept = 1Gi, Minimum deployment = 16Gi* |
limits: cpu | Limit on number of central processing units, based on your environment’s configuration. | Specified in cores or millicores (for example, 200m, 0.5, 1). | Proof of concept = 500m, Minimum deployment =1 | |
limits: memory | Available memory limit based on your environment’s configuration. | Specified in bytes (for example, 200Ki, 50Mi, 5Gi). | Proof of concept = 1Gi, Minimum deployment = 16Gi* | |
| * Each Elasticsearch node can operate with a lower memory setting though this is not recommended for production deployments. For production use, you should have no less than 16Gi allocated to each Pod by default, but preferably allocate as much as you can, up to 64Gi per Pod. | ||||
Procedure
-
Log in to the OpenShift Container Platform web console as a user with the
cluster-adminrole. - Navigate to Catalogs → Installed Operators.
- Click the Red Hat OpenShift Service Mesh Operator.
- Click the Istio Service Mesh Control Plane tab.
-
Click the name of your control plane file, for example,
basic-install. - Click the YAML tab.
-
Edit the Jaeger parameters, replacing the default
all-in-onetemplate with parameters for theproduction-elasticsearchtemplate, modified for your use case. Ensure that the indentation is correct. - Click Save.
- Click Reload. OpenShift Container Platform redeploys Jaeger and creates the Elasticsearch resources based on the specified parameters.
For more information about configuring Elasticsearch with OpenShift Container Platform, see Configuring Elasticsearch.
2.3.5. 3scale configuration
Here is an example that illustrates the 3scale Istio Adapter parameters for the Red Hat OpenShift Service Mesh custom resource and a description of the available parameters with appropriate values.
Example 3scale parameters
  threeScale:
      enabled: false
      PARAM_THREESCALE_LISTEN_ADDR: 3333
      PARAM_THREESCALE_LOG_LEVEL: info
      PARAM_THREESCALE_LOG_JSON: true
      PARAM_THREESCALE_LOG_GRPC: false
      PARAM_THREESCALE_REPORT_METRICS: true
      PARAM_THREESCALE_METRICS_PORT: 8080
      PARAM_THREESCALE_CACHE_TTL_SECONDS: 300
      PARAM_THREESCALE_CACHE_REFRESH_SECONDS: 180
      PARAM_THREESCALE_CACHE_ENTRIES_MAX: 1000
      PARAM_THREESCALE_CACHE_REFRESH_RETRIES: 1
      PARAM_THREESCALE_ALLOW_INSECURE_CONN: false
      PARAM_THREESCALE_CLIENT_TIMEOUT_SECONDS: 10
      PARAM_THREESCALE_GRPC_CONN_MAX_SECONDS: 60
Table 2.10. 3scale parameters
| Parameter | Description | Values | Default value |
|---|---|---|---|
|
| Whether to use the 3scale adapter |
|
|
|
| Sets the listen address for the gRPC server | Valid port number |
|
|
| Sets the minimum log output level. |
|
|
|
| Controls whether the log is formatted as JSON |
|
|
|
| Controls whether the log contains gRPC info |
|
|
|
| Controls whether 3scale system and backend metrics are collected and reported to Prometheus |
|
|
|
|
Sets the port that the 3scale | Valid port number |
|
|
| Time period, in seconds, to wait before purging expired items from the cache | Time period in seconds |
|
|
| Time period before expiry when cache elements are attempted to be refreshed | Time period in seconds |
|
|
|
Max number of items that can be stored in the cache at any time. Set to | Valid number |
|
|
| The number of times unreachable hosts are retried during a cache update loop | Valid number |
|
|
|
Allow to skip certificate verification when calling |
|
|
|
| Sets the number of seconds to wait before terminating requests to 3scale System and Backend | Time period in seconds |
|
|
| Sets the maximum amount of seconds (+/-10% jitter) a connection may exist before it is closed | Time period in seconds | 60 |
Next steps
- Prepare to deploy applications on Red Hat OpenShift Service Mesh.
2.4. Removing Red Hat OpenShift Service Mesh
This process allows you to remove Red Hat OpenShift Service Mesh from an existing OpenShift Container Platform instance.
2.4.1. Removing the Red Hat OpenShift Service Mesh control plane
You can remove the Service Mesh control plane by using the OpenShift Container Platform web console or the CLI.
2.4.1.1. Removing the control plane with the web console
Follow this procedure to remove the Red Hat OpenShift Service Mesh control plane by using the web console.
Prerequisites
- The Red Hat OpenShift Service Mesh control plane must be deployed.
Procedure
- Log in to the OpenShift Container Platform web console.
-
Click the Project menu and choose the
istio-systemproject from the list. - Navigate to Catalogs → Installed Operators.
- Click on Service Mesh Control Plane under Provided APIs.
-
Click the
ServiceMeshControlPlanemenu .
.
- Click Delete Service Mesh Control Plane.
-
Click Delete on the confirmation dialog window to remove the
ServiceMeshControlPlane.
2.4.1.2. Removing the control plane from the CLI
Follow this procedure to remove the Red Hat OpenShift Service Mesh control plane by using the CLI.
Prerequisites
- The Red Hat OpenShift Service Mesh control plane must be deployed.
-
Access to the OpenShift Container Platform Command-line Interface (CLI) also known as
oc.
When you remove the ServiceMeshControlPlane, Service Mesh tells the Operator to begin uninstalling everything it installed.
You can use the shortened smcp alias in place of servicemeshcontrolplane.
- Log in to the OpenShift Container Platform CLI.
Run this command to retrieve the name of the installed
ServiceMeshControlPlane:$ oc get servicemeshcontrolplanes -n istio-system
Replace
<name_of_custom_resource>with the output from the previous command, and run this command to remove the custom resource:$ oc delete servicemeshcontrolplanes -n istio-system <name_of_custom_resource>
2.4.2. Removing the installed Operators
You must remove the Operators to successfully remove Red Hat OpenShift Service Mesh. Once you remove the Red Hat OpenShift Service Mesh Operator, you must remove the Jaeger Operator, Kiali Operator, and the Elasticsearch Operator.
2.4.2.1. Removing the Red Hat OpenShift Service Mesh Operator
Follow this procedure to remove the Red Hat OpenShift Service Mesh Operator.
Prerequisites
- Access to the OpenShift Container Platform web console.
- The Red Hat OpenShift Service Mesh Operator must be installed.
Procedure
- Log in to the OpenShift Container Platform web console.
- Navigate to Catalogs → Operator Management.
- Click the Project menu, and then click openshift-operators.
-
Click the servicemeshoperator Options menu
, and then click Remove Subscription.
- Select Also completely remove the Operator from the selected namespace, and then click Remove.
2.4.2.2. Removing the Jaeger Operator
Follow this procedure to remove the Jaeger Operator.
Prerequisites
- Access to the OpenShift Container Platform web console.
- The Jaeger Operator must be installed.
Procedure
- Log in to the OpenShift Container Platform web console.
- Navigate to Catalogs → Operator Management.
- Click the Project menu, and then click openshift-operators.
-
Click the jaegeroperator Options menu
, and then click Remove Subscription.
- Select Also completely remove the Operator from the selected namespace, and then click Remove.
2.4.2.3. Removing the Kiali Operator
Follow this procedure to remove the Kiali Operator.
Prerequisites
- Access to the OpenShift Container Platform web console.
- The Kiali Operator must be installed.
Procedure
- Log in to the OpenShift Container Platform web console.
- Navigate to Catalogs → Operator Management.
- Click the Project menu, and then click openshift-operators.
-
Click the kiali-ossm Options menu
, and then click Remove Subscription.
- Select Also completely remove the Operator from the selected namespace, and then click Remove.
2.4.2.4. Removing the Elasticsearch Operator
Follow this procedure to remove the Elasticsearch Operator.
Prerequisites
- Access to the OpenShift Container Platform web console.
- The Elasticsearch Operator must be installed.
Procedure
- Log in to the OpenShift Container Platform web console.
- Navigate to Catalogs → Operator Management.
- Click the Project menu, and then click openshift-operators.
-
Click the elasticsearch-operator Options menu
, and then click Remove Subscription.
- Select Also completely remove the Operator from the selected namespace, and then click Remove.
2.4.2.5. Clean up Operator resources
Follow this procedure to manually remove resources left behind after removing the Red Hat OpenShift Service Mesh Operator by using the OperatorHub interface.
Prerequisites
- An account with cluster administration access.
-
Access to the OpenShift Container Platform Command-line Interface (CLI) also known as
oc.
Procedure
- Log in to the OpenShift Container Platform CLI as a cluster administrator.
Run the following commands to clean up resources after uninstalling the Operators:
NoteReplace
<operator-project>with the name of the project where the Red Hat OpenShift Service Mesh Operator was installed. This is typicallyopenshift-operators.$ oc delete validatingwebhookconfiguration/<operator-project>.servicemesh-resources.maistra.io $ oc delete -n <operator-project> daemonset/istio-node $ oc delete clusterrole/istio-admin clusterrole/istio-cni clusterrolebinding/istio-cni $ oc get crds -o name | grep '.*\.istio\.io' | xargs -r -n 1 oc delete $ oc get crds -o name | grep '.*\.maistra\.io' | xargs -r -n 1 oc delete
Chapter 3. Day Two
3.1. Deploying applications on Red Hat OpenShift Service Mesh
When you deploy an application into the Service Mesh, there are several differences between the behavior of applications in the upstream community version of Istio and the behavior of applications within a Red Hat OpenShift Service Mesh installation.
Prerequisites
3.1.1. Creating control plane templates
You can create reusable configurations with ServiceMeshControlPlane templates. Individual users can extend the templates you create with their own configurations. Templates can also inherit configuration information from other templates. For example, you can create an accounting control plane for the accounting team and a marketing control plane for the marketing team. If you create a development template and a production template, members of the marketing team and the accounting team can extend the development and production templates with team specific customization.
When you configure control plane templates, which follow the same syntax as the ServiceMeshControlPlane, users inherit settings in a hierarchical fashion. The Operator is delivered with a default template with default settings for Red Hat OpenShift Service Mesh. To add custom templates you must create a ConfigMap named smcp-templates in the openshift-operators project and mount the ConfigMap in the Operator container at /usr/local/share/istio-operator/templates.
3.1.1.1. Creating the ConfigMap
Follow this procedure to create the ConfigMap.
Prerequisites
- An installed, verified Service Mesh Operator.
- An account with cluster administrator access.
- Location of the Operator deployment.
-
Access to the OpenShift Container Platform Command-line Interface (CLI) also known as
oc.
Procedure
- Log in to the OpenShift Container Platform CLI as a cluster administrator.
From the CLI, run this command to create the ConfigMap named
smcp-templatesin theopenshift-operatorsproject and replace<templates-directory>with the location of theServiceMeshControlPlanefiles on your local disk:$ oc create configmap --from-file=<templates-directory> smcp-templates -n openshift-operators
Locate the Operator ClusterServiceVersion name.
$ oc get clusterserviceversion -n openshift-operators | grep 'Service Mesh'
maistra.v1.0.0            Red Hat OpenShift Service Mesh   1.0.0                Succeeded
Edit the Operator cluster service version to instruct the Operator to use the
smcp-templatesConfigMap.$ oc edit clusterserviceversion -n openshift-operators maistra.v1.0.0
Add a volume mount and volume to the Operator deployment.
deployments: - name: istio-operator spec: template: spec: containers: volumeMounts: - name: discovery-cache mountPath: /home/istio-operator/.kube/cache/discovery - name: smcp-templates mountPath: /usr/local/share/istio-operator/templates/ volumes: - name: discovery-cache emptyDir: medium: Memory - name: smcp-templates configMap: name: smcp-templates ...- Save your changes and exit the editor.
You can now use the
templateparameter in theServiceMeshControlPlaneto specify a template.apiVersion: maistra.io/v1 kind: ServiceMeshControlPlane metadata: name: minimal-install spec: template: default
3.1.2. Red Hat OpenShift Service Mesh's sidecar injection
Red Hat OpenShift Service Mesh relies on a proxy sidecar within the application’s pod to provide Service Mesh capabilities to the application. You can enable automatic sidecar injection or manage it manually. Red Hat recommends automatic injection using the annotation with no need to label projects. This ensures that your application contains the appropriate configuration for the Service Mesh upon deployment. This method requires fewer privileges and does not conflict with other OpenShift capabilities such as builder pods.
The upstream version of Istio injects the sidecar by default if you have labeled the project. Red Hat OpenShift Service Mesh requires you to opt in to having the sidecar automatically injected to a deployment, so you are not required to label the project. This avoids injecting a sidecar if it is not wanted (for example, in build or deploy pods).
The webhook checks the configuration of pods deploying into all projects to see if they are opting in to injection with the appropriate annotation.
3.1.2.1. Enabling automatic sidecar injection
When deploying an application into the Red Hat OpenShift Service Mesh you must opt in to injection by specifying the sidecar.istio.io/inject annotation with a value of "true". Opting in ensures that the sidecar injection does not interfere with other OpenShift features such as builder pods used by numerous frameworks within the OpenShift ecosystem.
Prerequisites
- Identify the deployments for which you want to enable automatic sidecar injection.
- Locate the application’s YAML configuration file.
Procedure
- Open the application’s configuration YAML file in an editor.
Add
sidecar.istio.io/injectto the configuration YAML with a value of"true"as illustrated here:Sleep test application example
apiVersion: extensions/v1beta1 kind: Deployment metadata: name: sleep spec: replicas: 1 template: metadata: annotations: sidecar.istio.io/inject: "true" labels: app: sleep spec: containers: - name: sleep image: tutum/curl command: ["/bin/sleep","infinity"] imagePullPolicy: IfNotPresent- Save the configuration file.
3.1.3. Updating Mixer policy enforcement
In previous versions of Red Hat OpenShift Service Mesh, Mixer’s policy enforcement was enabled by default. Mixer policy enforcement is now disabled by default. You must enable it before running policy tasks.
Prerequisites
-
Access to the OpenShift Container Platform Command-line Interface (CLI) also known as
oc.
Procedure
- Log in to the OpenShift Container Platform CLI.
Run this command to check the current Mixer policy enforcement status:
$ oc get cm -n istio-system istio -o jsonpath='{.data.mesh}' | grep disablePolicyChecksIf
disablePolicyChecks: true, edit the Service Mesh ConfigMap:$ oc edit cm -n istio-system istio
-
Locate
disablePolicyChecks: truewithin the ConfigMap and change the value tofalse. - Save the configuration and exit the editor.
-
Re-check the Mixer policy enforcement status to ensure it is set to
false.
Next steps
- Deploy Bookinfo on Red Hat OpenShift Service Mesh.
3.2. Configuring your service mesh for distributed tracing
This section describes configuration that is performed in the CRD or in the CR file.
Prerequisites
- Access to an OpenShift Container Platform cluster with cluster-admin user privileges.
- Elasticsearch operator has been installed on the cluster
- Jaeger operator has been installed on the cluster.
3.2.1. Configuring the Elasticsearch index cleaner job
When the Service Mesh Operator creates the ServiceMeshControlPlane it also creates the custom resource (CR) for Jaeger. The Jaeger operator then uses this CR when creating Jaeger instances.
When using Elasticsearch storage, by default a job is created to clean old traces from it. To configure the options for this job, you edit the Jaeger custom resource (CR), to customize it for your use case. The relevant options are listed below.
  apiVersion: jaegertracing.io/v1
  kind: Jaeger
  spec:
    strategy: production
    storage:
      type: elasticsearch
      esIndexCleaner:
        enabled: false
        numberOfDays: 7
        schedule: "55 23 * * *"
Table 3.1. Elasticsearch index cleaner parameters
| Parameter | Values | Description |
|---|---|---|
| enabled | true/ false | Enable or disable the index cleaner job. |
| numberOfDays | integer value | Number of days to wait before deleting an index. |
| schedule | "55 23 * * *" | Cron expression for the job to run |
3.3. Example Application
The Bookinfo example application allows you to test your Red Hat OpenShift Service Mesh 1.0.10 installation on OpenShift Container Platform.
Red Hat does not provide support for the Bookinfo application.
3.3.1. Bookinfo application
The upstream Istio project has an example tutorial called Bookinfo, which is composed of four separate microservices used to demonstrate various Istio features. The Bookinfo application displays information about a book, similar to a single catalog entry of an online book store. Displayed on the page is a description of the book, book details (ISBN, number of pages, and other information), and book reviews.
The Bookinfo application consists of these microservices:
-
The
productpagemicroservice calls thedetailsandreviewsmicroservices to populate the page. -
The
detailsmicroservice contains book information. -
The
reviewsmicroservice contains book reviews. It also calls theratingsmicroservice. -
The
ratingsmicroservice contains book ranking information that accompanies a book review.
There are three versions of the reviews microservice:
-
Version v1 does not call the
ratingsService. -
Version v2 calls the
ratingsService and displays each rating as one to five black stars. -
Version v3 calls the
ratingsService and displays each rating as one to five red stars.
3.3.2. Installing the Bookinfo application
This tutorial walks you through creating a Bookinfo project, deploying the Bookinfo application, and running Bookinfo on OpenShift Container Platform with Service Mesh 1.0.10.
Prerequisites:
- OpenShift Container Platform 4.1 or higher installed.
- Red Hat OpenShift Service Mesh 1.0.10 installed.
-
Access to the OpenShift Container Platform Command-line Interface (CLI) also known as
oc.
Red Hat OpenShift Service Mesh implements auto-injection differently than the upstream Istio project, therefore this procedure uses a version of the bookinfo.yaml file annotated to enable automatic injection of the Istio sidecar for Red Hat OpenShift Service Mesh.
Procedure
- Log in to the OpenShift Container Platform web console as a user with cluster-admin rights.
- Click to Home → Projects.
- Click Create Project.
Enter
bookinfoas the Project Name, enter a Display Name, and enter a Description, then click Create.Alternatively, you can run this command from the CLI to create the
bookinfoproject.$ oc new-project bookinfo
- Click Catalog → Installed Operators.
-
Click the Project menu and use the control plane namespace. In this example, use
istio-system. - Click the Red Hat OpenShift Service Mesh Operator.
Click the Istio Service Mesh Member Roll link.
- If you have already created a Istio Service Mesh Member Roll, click the name, then click the YAML tab to open the YAML editor.
If you have not created a Istio Service Mesh Member Roll, click Create Service Mesh Member Roll.
NoteYou need cluster-admin rights to edit the Istio Service Mesh Member Roll.
Edit the default Service Mesh Member Roll YAML and add
bookinfoto the members list.Bookinfo ServiceMeshMemberRoll example
  apiVersion: maistra.io/v1
  kind: ServiceMeshMemberRoll
  metadata:
    name: default
  spec:
    members:
    - bookinfo
Alternatively, you can run this command from the CLI to add the
bookinfoproject to theServiceMeshMemberRoll. Replace<control plane project>with the name of your control plane project.$ oc -n <control plane project> patch --type='json' smmr default -p '[{"op": "add", "path": "/spec/members", "value":["'"bookinfo"'"]}]'
- Click Create to save the updated Service Mesh Member Roll.
From the CLI, deploy the Bookinfo application in the `bookinfo` project by applying the
bookinfo.yamlfile:$ oc apply -n bookinfo -f https://raw.githubusercontent.com/Maistra/bookinfo/maistra-1.0/bookinfo.yaml
Create the ingress gateway by applying the
bookinfo-gateway.yamlfile:$ oc apply -n bookinfo -f https://raw.githubusercontent.com/Maistra/bookinfo/maistra-1.0/bookinfo-gateway.yaml
Set the value for the
GATEWAY_URLparameter:NoteReplace
<control_plane_project>with the name of your control plane project.$ export GATEWAY_URL=$(oc -n <control_plane_project> get route istio-ingressgateway -o jsonpath='{.spec.host}')
3.3.3. Adding default destination rules
Before you can use the Bookinfo application, you have to add default destination rules. There are two preconfigured YAML files, depending on whether or not you enabled mutual transport layer security (TLS) authentication.
Procedure
To add destination rules, run one of the following commands:
If you did not enable mutual TLS:
$ oc apply -n bookinfo -f https://raw.githubusercontent.com/istio/istio/release-1.1/samples/bookinfo/networking/destination-rule-all.yaml
If you enabled mutual TLS:
$ oc apply -n bookinfo -f https://raw.githubusercontent.com/istio/istio/release-1.1/samples/bookinfo/networking/destination-rule-all-mtls.yaml
3.3.4. Verifying the Bookinfo installation
Before configuring your application, verify that it successfully deployed.
Prerequisites
- OpenShift Container Platform 4.1 or higher installed.
- Red Hat OpenShift Service Mesh 1.0.10 installed.
-
Access to the OpenShift Container Platform Command-line Interface (CLI) also known as
oc.
Procedure
- Log in to the OpenShift Container Platform CLI.
Run this command to confirm that Bookinfo is deployed:
$ curl -o /dev/null -s -w "%{http_code}\n" http://$GATEWAY_URL/productpage-
Alternatively, you can open
http://$GATEWAY_URL/productpagein your browser. You can also verify that all pods are ready with this command:
$ oc get pods -n bookinfo
-
Alternatively, you can open
3.3.5. Removing the Bookinfo application
Follow these steps to remove the Bookinfo application.
Prerequisites
- OpenShift Container Platform 4.1 or higher installed.
- Red Hat OpenShift Service Mesh 1.0.10 installed.
-
Access to the OpenShift Container Platform Command-line Interface (CLI) also known as
oc.
3.3.5.1. Delete the Bookinfo project
Procedure
- Log in to the OpenShift Container Platform web console.
- Click to Home → Projects.
-
Click on the
bookinfomenu
, and then click Delete Project.
Type
bookinfoin the confirmation dialog box, and then click Delete.Alternatively, you can run this command from the CLI to create the
bookinfoproject.$ oc delete project bookinfo
3.3.5.2. Remove the Bookinfo project from the Service Mesh member roll
Procedure
- Log in to the OpenShift Container Platform web console.
- Click Catalog → Installed Operators.
-
Click the Project menu and choose
openshift-operatorsfrom the list. - Click the Istio Service Mesh Member Roll link under Provided APIS for the Red Hat OpenShift Service Mesh Operator.
-
Click the
ServiceMeshMemberRollmenu
and select Edit Service Mesh Member Roll.
Edit the default Service Mesh Member Roll YAML and remove
bookinfofrom the members list.Alternatively, you can run this command from the CLI to remove the
bookinfoproject from theServiceMeshMemberRoll. Replace<control plane project>with the name of your control plane project.$ oc -n <control plane project> patch --type='json' smmr default -p '[{"op": "remove", "path": "/spec/members", "value":["'"bookinfo"'"]}]'
- Click Save to update Service Mesh Member Roll.
3.4. Kiali tutorial
Kiali works with Istio to visualize your service mesh topology to provide visibility into features like circuit breakers, request rates, and more. Kiali offers insights about the mesh components at different levels, from abstract Applications to Services and Workloads. Kiali provides an interactive graph view of your Namespace in real time. It can display the interactions at several levels (applications, versions, workloads) with contextual information and charts on the selected graph node or edge.
This tutorial uses Service Mesh and the Bookinfo tutorial to demonstrate how you can use the Kiali console to view the topography and health of your service mesh.
The Bookinfo example application allows you to test your Red Hat OpenShift Service Mesh 1.0.10 installation on OpenShift Container Platform.
Red Hat does not provide support for the Bookinfo application.
3.4.1. Accessing the Kiali console
The Kiali console provides visualization and observability for your Service Mesh. The Kiali console has different views that provide insights into Service Mesh components at different levels, from Applications to Services to Workloads. It also provides validation for Istio configurations.
Prerequisites
- OpenShift Container Platform 4.1 or higher installed.
- Red Hat OpenShift Service Mesh 1.0.10 installed.
- Kiali enabled during the installation.
- Bookinfo demonstration application installed.
The installation process creates a route to access the Kiali console.
Procedure from the console
- In the OpenShift Container Platform console, navigate to Networking → Routes and search for the Kiali route.
Click the URL listed under Location.
The default login strategy is
openshiftwhich means that you should be automatically logged into the Kiali console using the same user name and password as you use to access the OpenShift Container Platform console. When you first log in you see the Overview page, which provides a quick overview of the health of the various Namespaces that are part of your Service Mesh.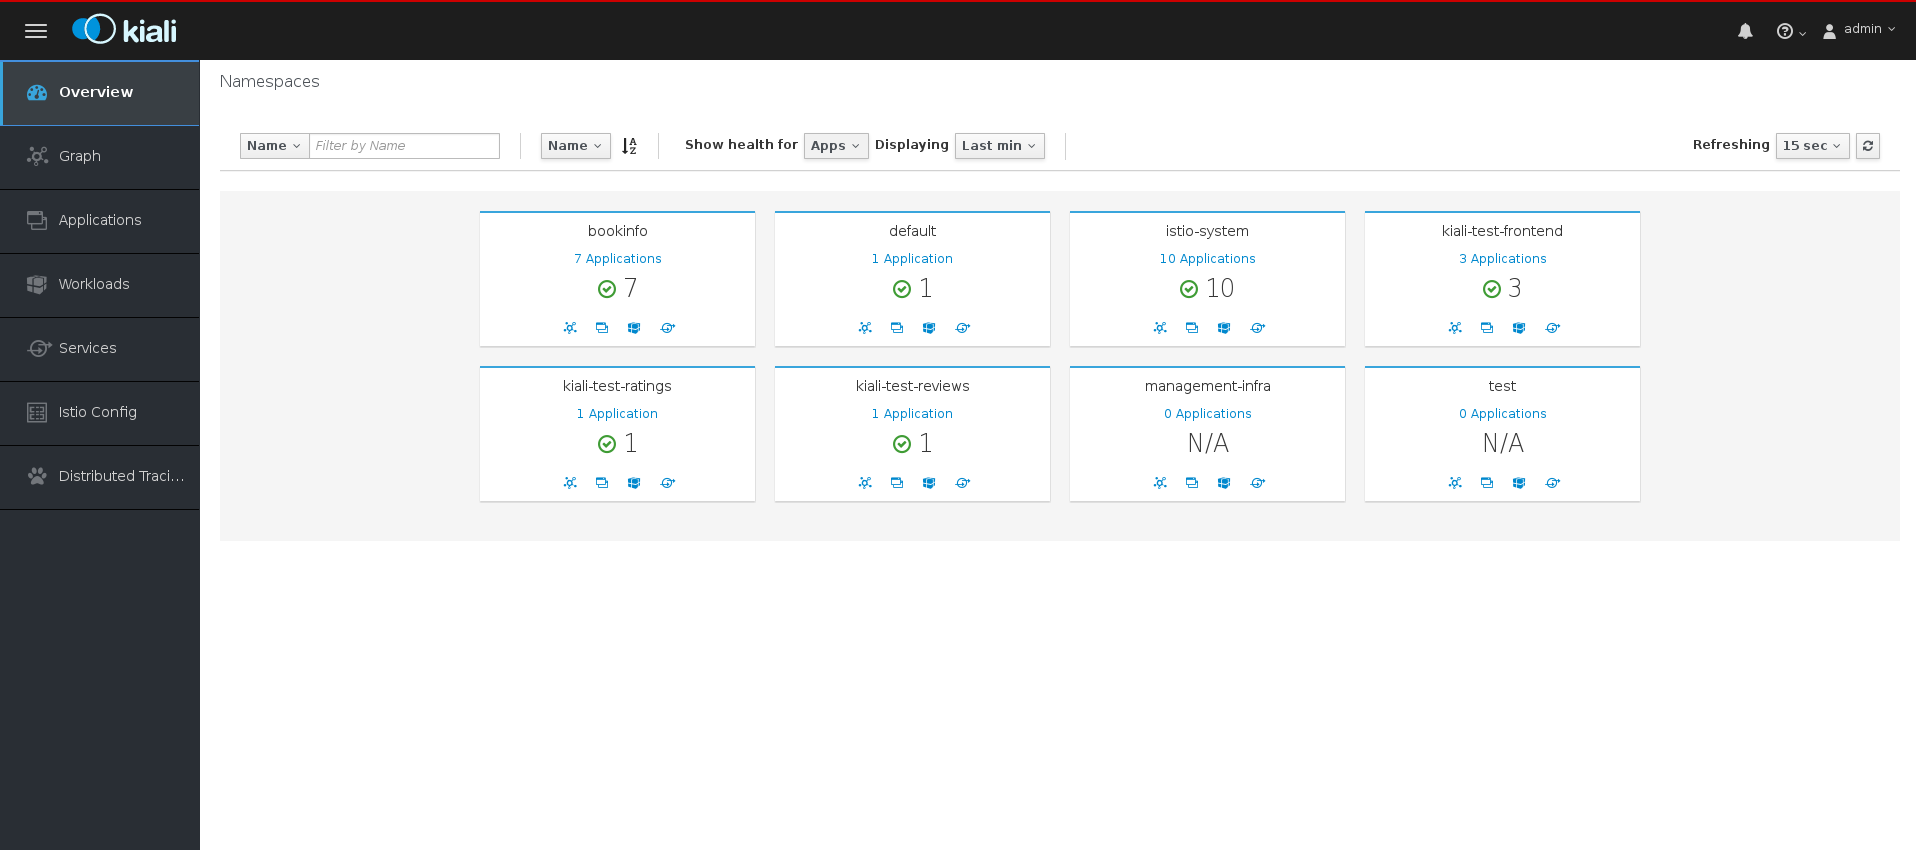
- Use the left navigation or click one of the Namespace icons to view your Applications, Workloads, or Services.
Procedure from the CLI
Run this command from the CLI to obtain the route and Kiali URL:
$ oc get routes
Sample CLI output showing routes
NAME                   HOST/PORT                                                PATH      SERVICES               PORT              TERMINATION   WILDCARD
grafana                grafana-openshift-operators.127.0.0.1.nip.io                          grafana                http                            None
istio-ingress          istio-ingress-openshift-operators.127.0.0.1.nip.io                    istio-ingress          http                            None
istio-ingressgateway   istio-ingressgateway-openshift-operators.127.0.0.1.nip.io             istio-ingressgateway   http                            None
jaeger-query           jaeger-query-openshift-operators.127.0.0.1.nip.io                     jaeger-query           jaeger-query      edge          None
kiali                  kiali-openshift-operators.127.0.0.1.nip.io                            kiali                  <all>                           None
prometheus             prometheus-openshift-operators.127.0.0.1.nip.io                       prometheus             http-prometheus                 None
tracing                tracing-openshift-operators.127.0.0.1.nip.io                          tracing                tracing           edge          None
-
Launch a browser and navigate to https://<KIALI_URL> (in the CLI output example, this is
kiali-openshift-operators.127.0.0.1.nip.io). You should see the Kiali console login screen. - Log in to the Kiali console using the user name and password that you use when logging into the OpenShift Container Platform console.
3.4.2. Exploring the Graph page
The Graph page shows a graph of microservices, which are connected by the requests going through them. On this page, you can see how Applications, Workloads, or Services interact with each other.
Procedure
In the Kiali console, click Graph in the left navigation.
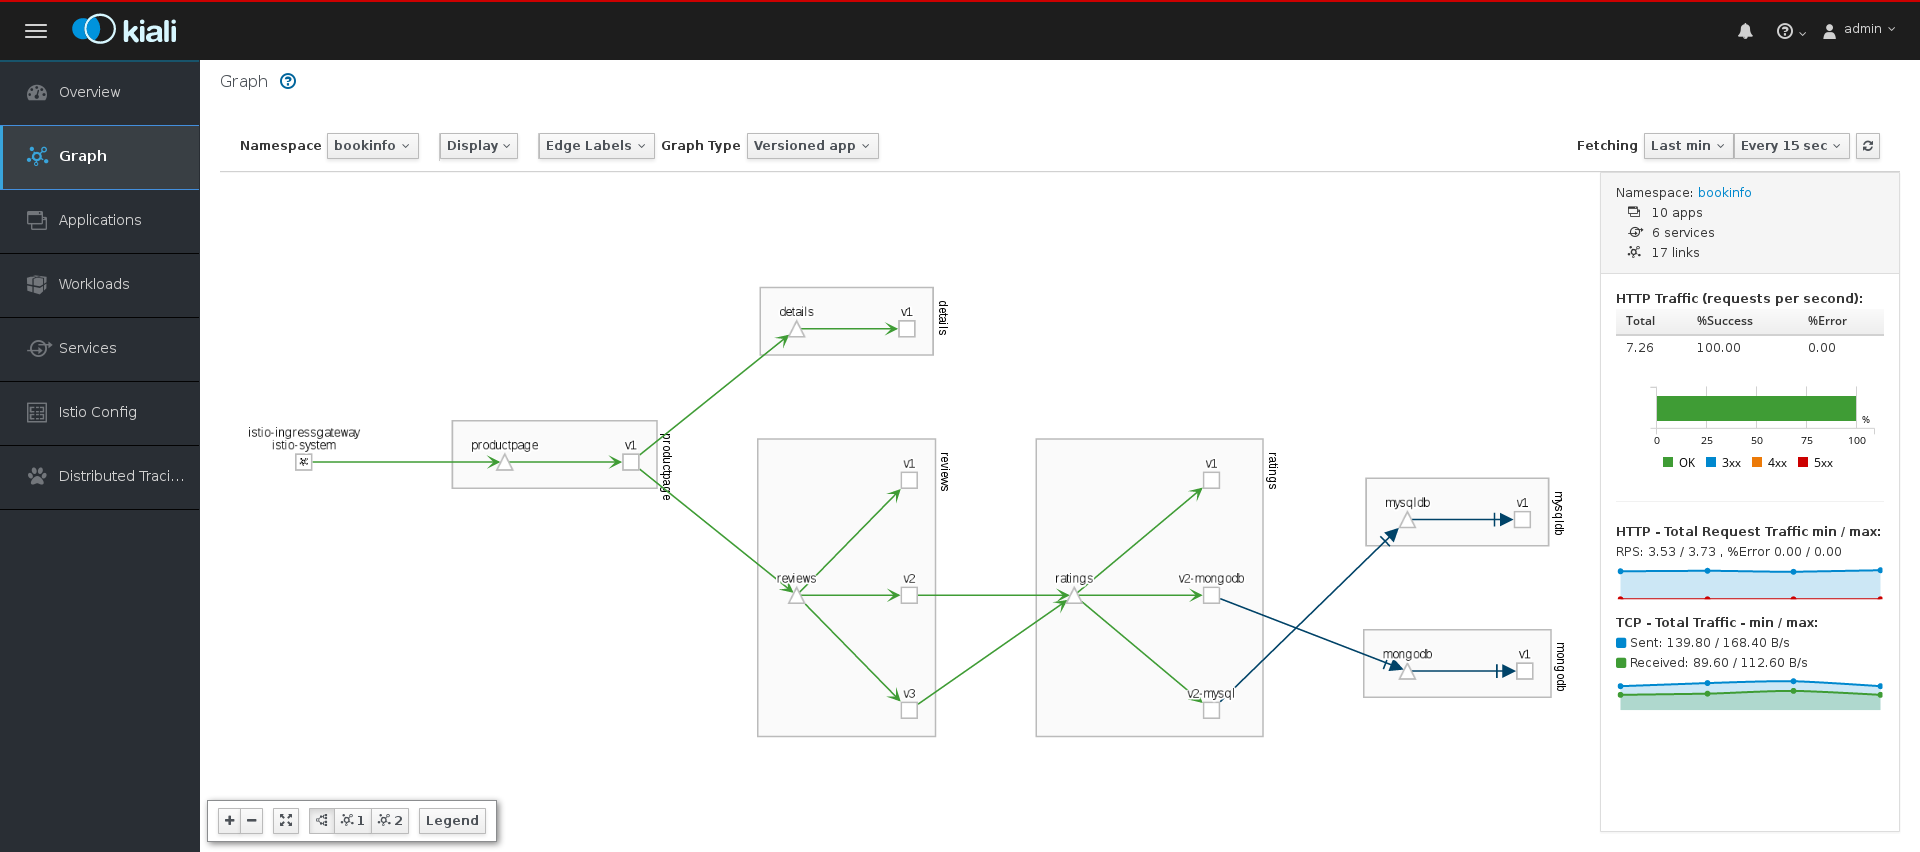
-
If necessary, select
bookinfofrom the Namespace menu. The graph displays the applications in the Bookinfo application. - Click the question mark (?) under the Namespace menu to take the Graph Help Tour.
- Click Done to close the Help Tour.
Click Legend in the lower left corner. Kiali displays the graph legend.

- Close the Graph Legend.
- Hover over the productpage Node. Note how the graph highlights only the incoming and outgoing traffic from the Node.
- Click the productpage Node. Note how the details on the right side of the page change to display the productpage details.
3.4.3. Exploring the Applications page
The Applications page lets you search for and view applications, their health, and other details.
Procedure
- In the Kiali console, click Applications in the left navigation.
-
If necessary, select
bookinfofrom the Namespace menu. The page displays the applications in the selected Namespace and their health. - Hover over the Health icon to view additional health details.
Click the
reviewsService to view the details for that application.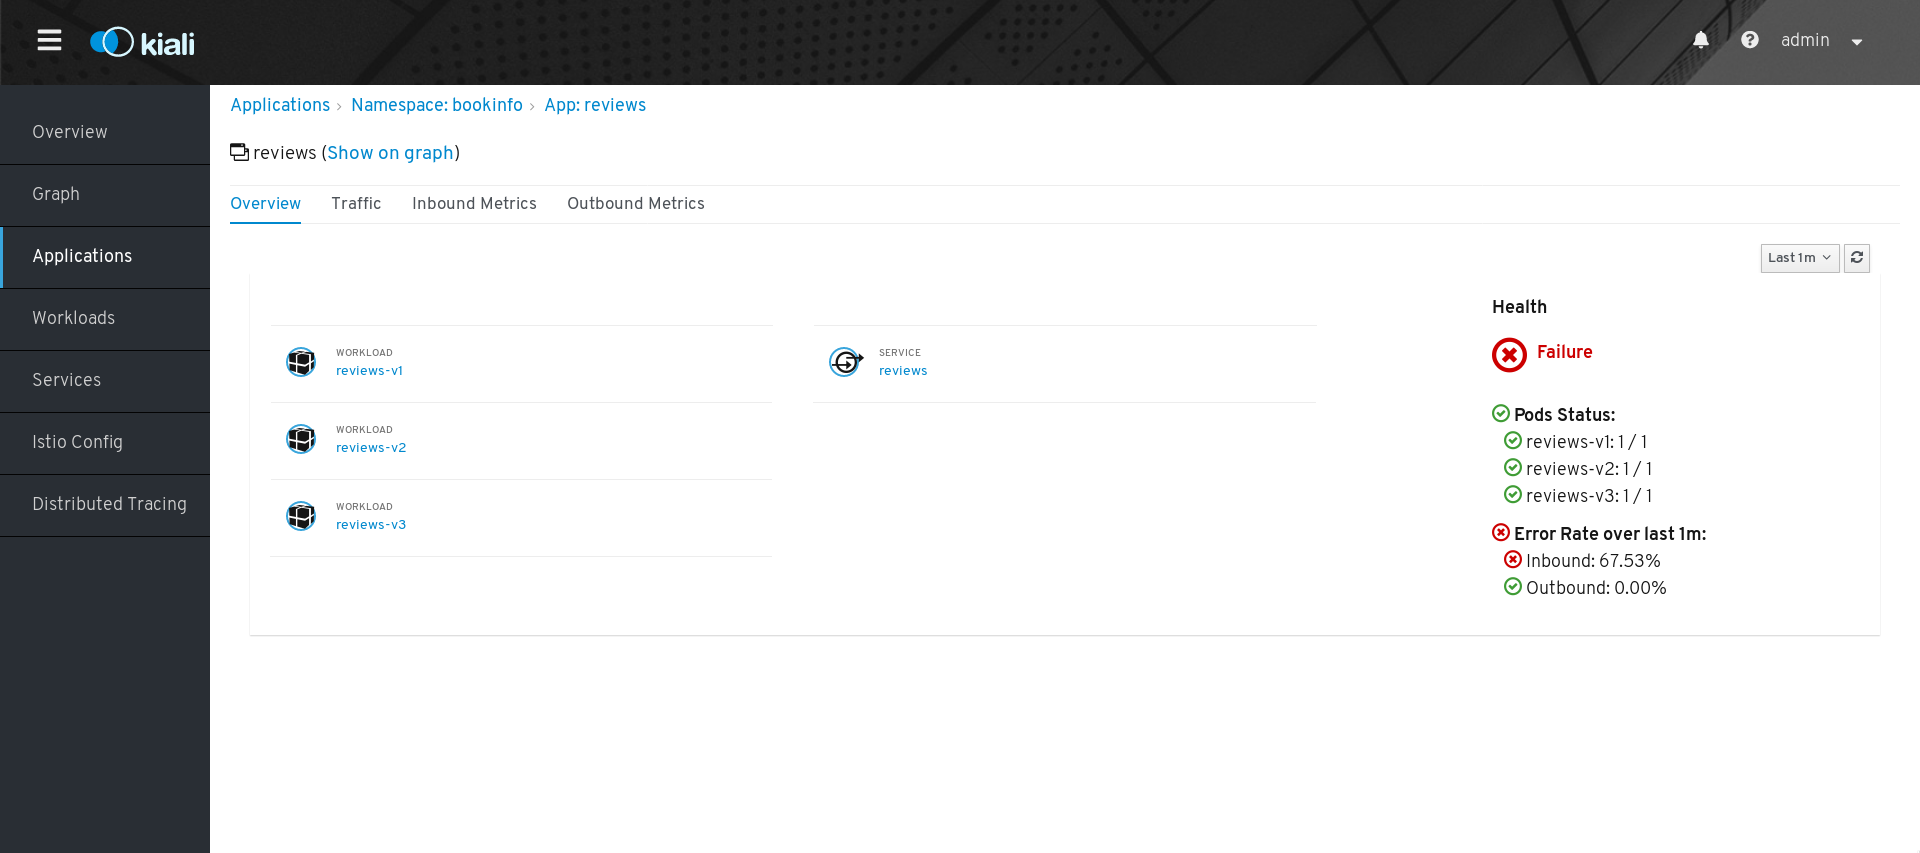
-
On the Applications Details page you can view more detailed health information, and drill down for further details about the three versions of the
reviewsService. - From the Application Details page you can also click tabs to view Traffic and Inbound and Outbound Metrics for the application.
3.4.4. Exploring the Workloads page
The Workloads page lets you search for and view Workloads, their health, and other details.
Procedure
- In the Kiali console, click Workloads in the left navigation.
-
If necessary, select
bookinfofrom the Namespace menu. The page displays the Workloads in the selected Namespace, their health, and labels. -
Click the
reviews-v1Workload to view the details for that Workload. On the Workload Details page you can view an overview of Pods and Services associated with the Workload.
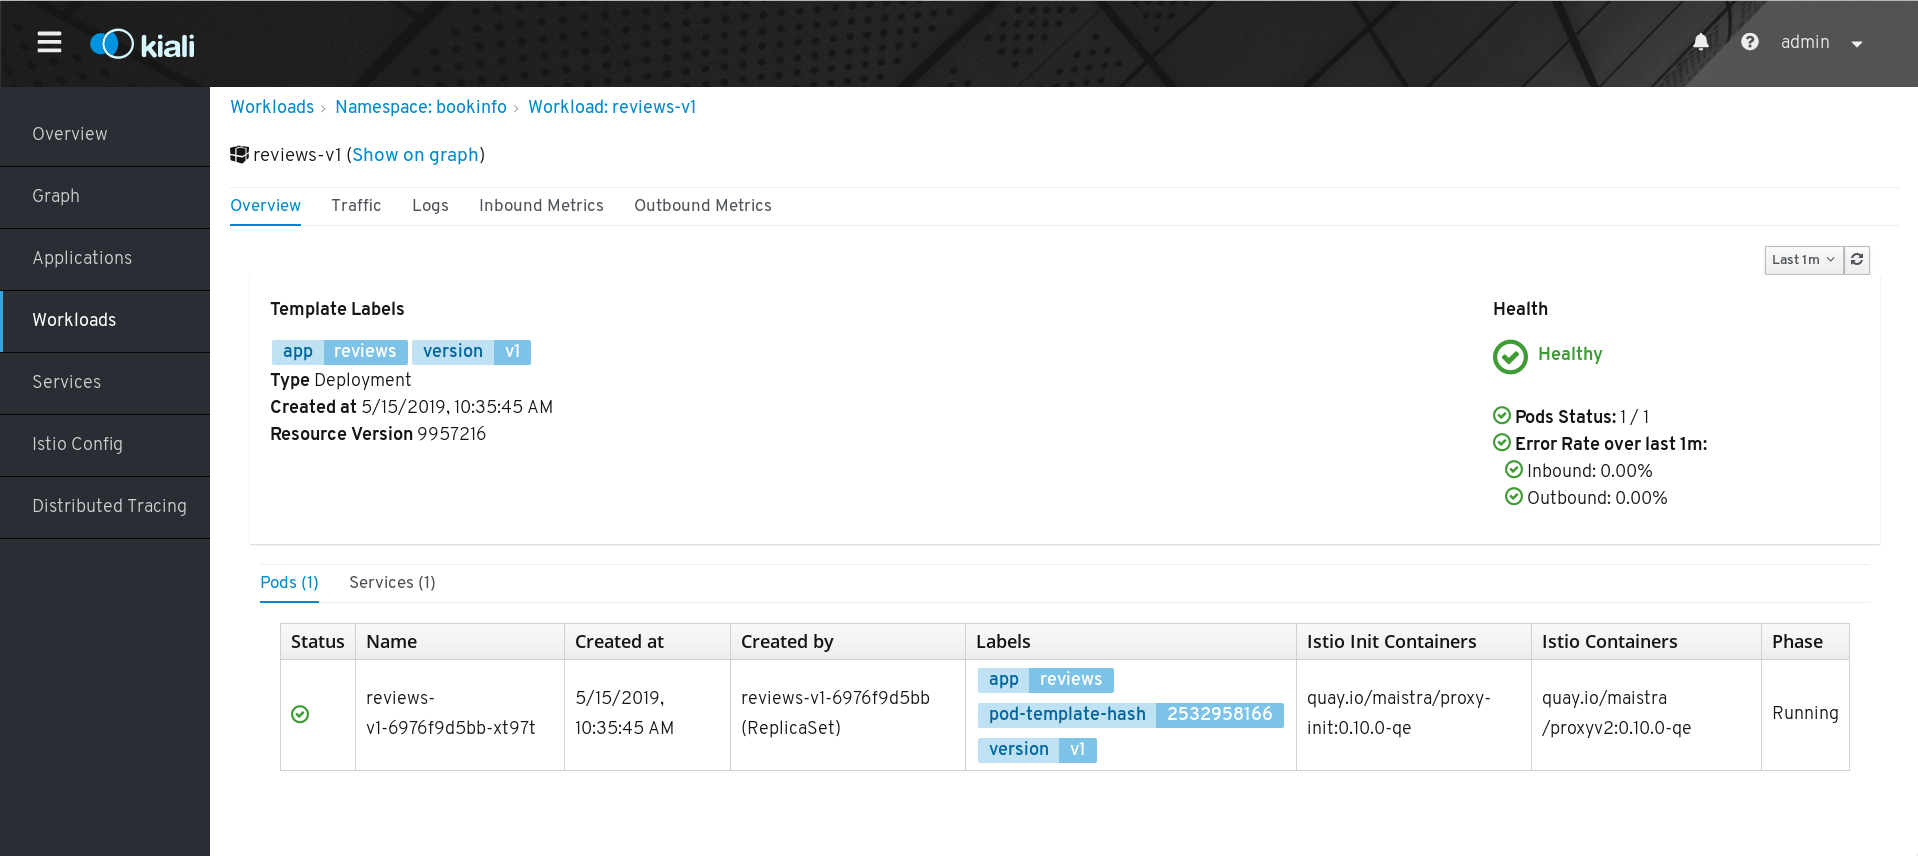
- From the Workload Details page you can also click tabs to view Traffic, Logs, and Inbound and Outbound Metrics for the Workload.
3.4.5. Exploring the Services page
The Services page lets you search for and view Services, their health, and other details.
Procedure
- In the Kiali console, click Services in the left navigation.
-
If necessary, select
bookinfofrom the Namespace menu. The page displays a listing of all the Services that are running in the selected Namespace and additional information about them, such as health status. - Hover over the health icon for any of the Services to view health information about the Service. A Service is considered healthy when it is online and responding to requests without errors.
Click the Reviews Service to view its details. Note that there are three different versions of this Service.
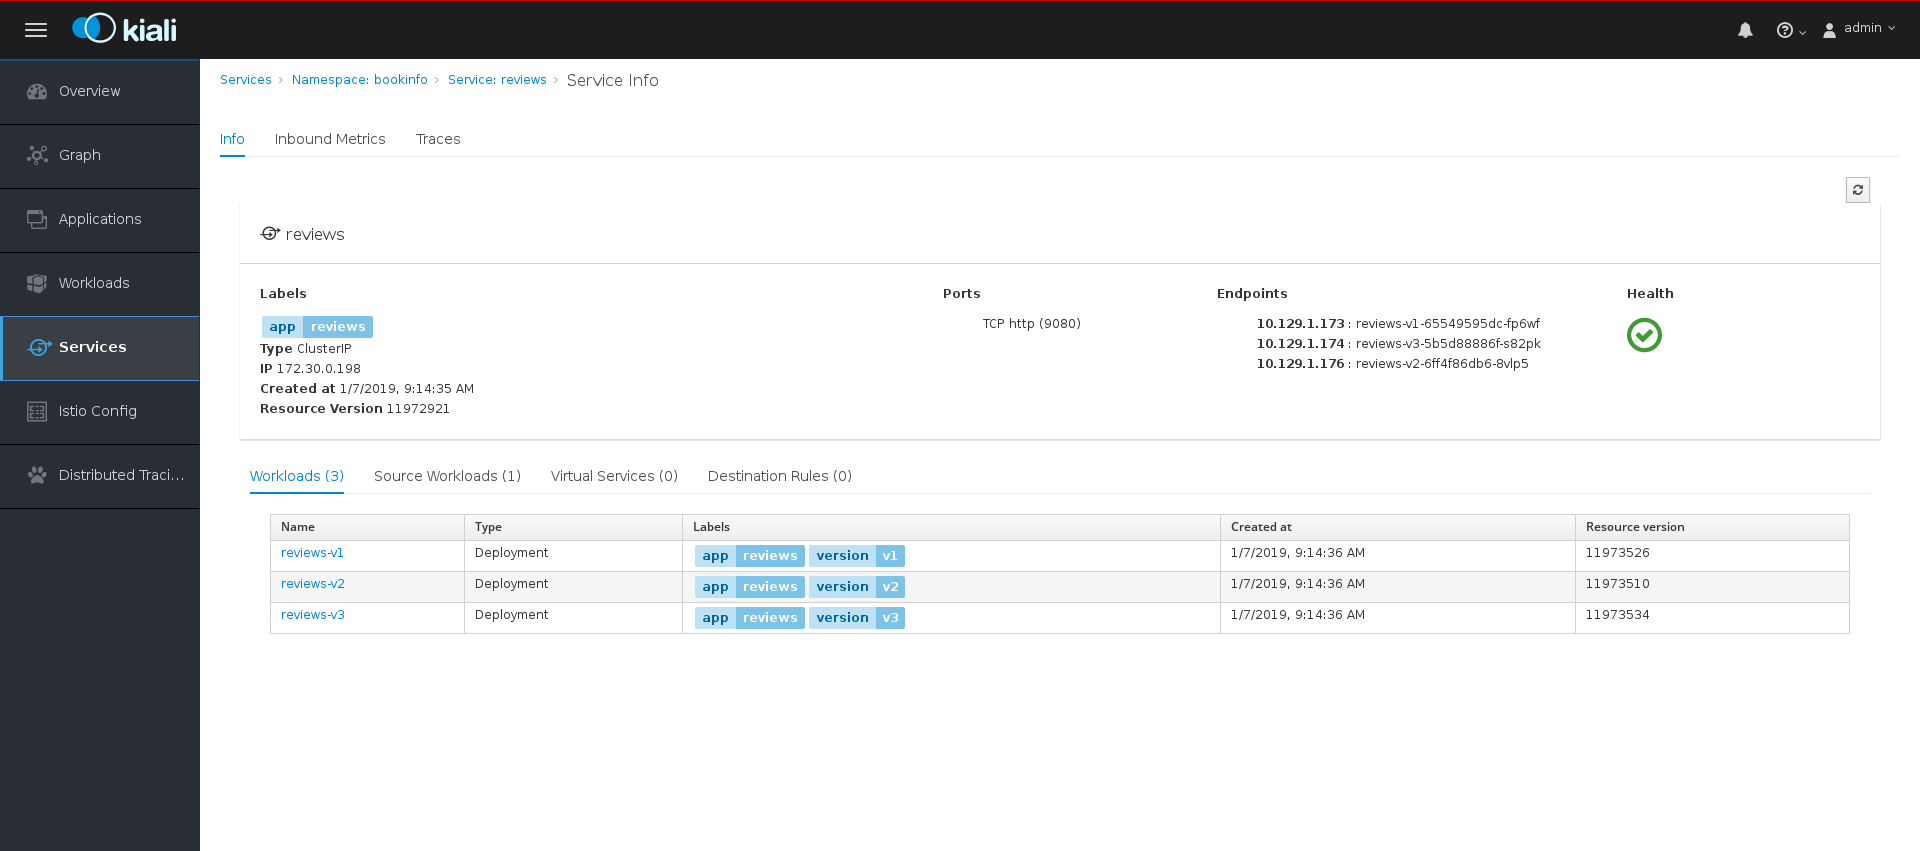
- On the Services Details page you can view an overview of Workloads, virtual Services, and destination rules associated with the Service.
- From the Services Details page you can also click tabs to view Traffic, Inbound Metrics, and Traces for the Service.
Click the Actions menu. From here you can perform the following actions:
- Create Weighted Routing
- Create Matching Routing
- Suspend Traffic
- Delete ALL Traffic Routing
- Click the name of one of the Services to view additional details about that specific version of the Service.
3.4.6. Exploring the Istio Config page
The Istio Config page lets you view all of the currently running configurations to your Service Mesh, such as Circuit Breakers, Destination Rules, Fault Injection, Gateways, Routes, Route Rules, and Virtual Services.
Procedure
- In the Kiali console, click Istio Config in the left navigation.
If necessary, select
bookinfofrom the Namespace menu. The page displays a listing of configurations running in the selected Namespace and validation status.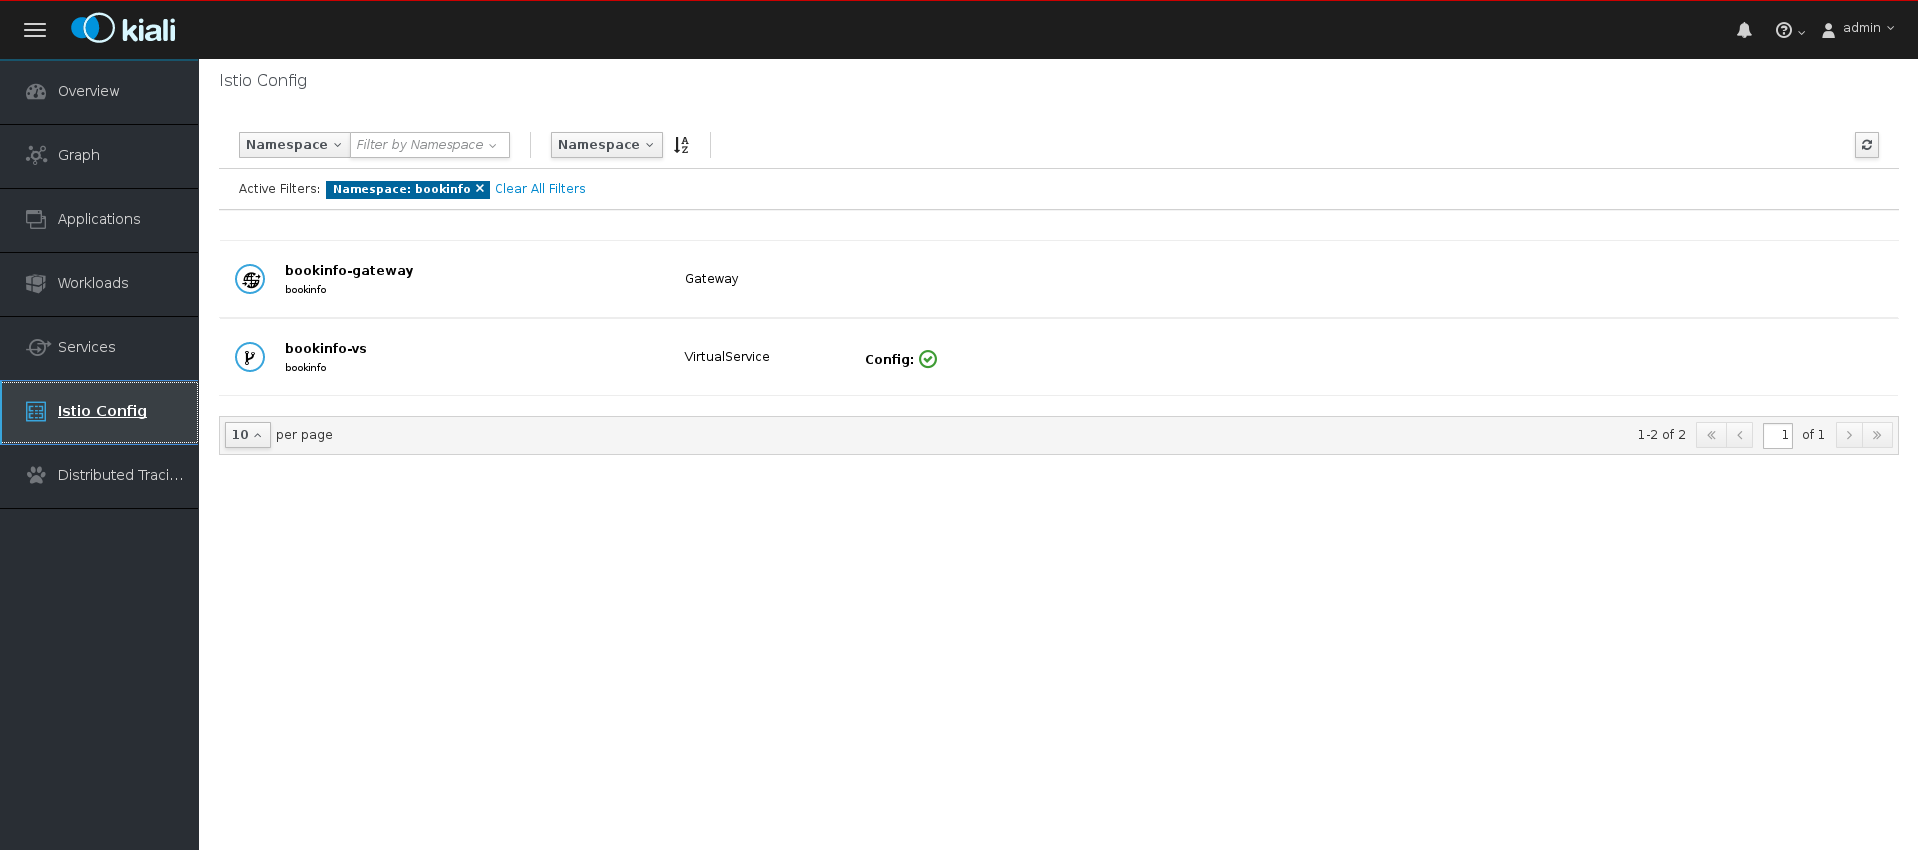
Click one of the configurations to view additional information about the configuration file.
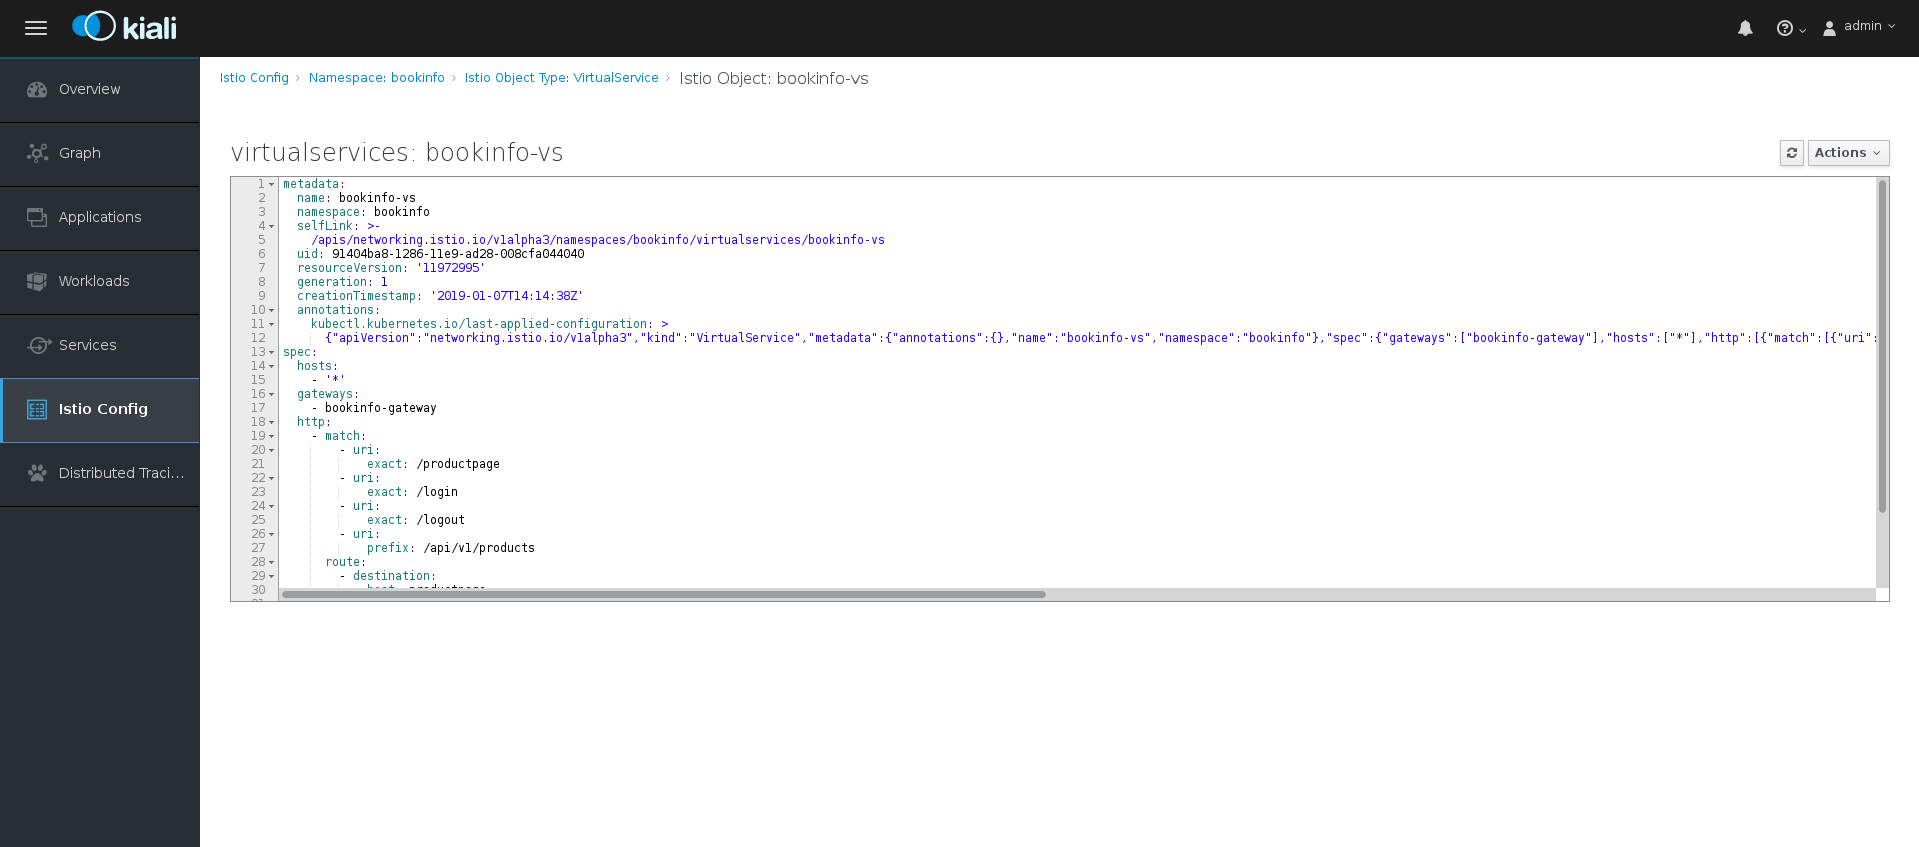
3.5. Distributed tracing tutorial
Jaeger is an open source distributed tracing system. You use Jaeger for monitoring and troubleshooting microservices-based distributed systems. Using Jaeger you can perform a trace, which follows the path of a request through various microservices that make up an application. Jaeger is installed by default as part of the Service Mesh.
This tutorial uses Service Mesh and the bookinfo tutorial to demonstrate how you can use Jeager to perform distributed tracing.
The Bookinfo example application allows you to test your Red Hat OpenShift Service Mesh 1.0.10 installation on OpenShift Container Platform.
Red Hat does not provide support for the Bookinfo application.
3.5.1. Generating traces and analyzing trace data
This tutorial uses Service Mesh and the Bookinfo tutorial to demonstrate how you can perform a trace using the Jaeger component of Red Hat OpenShift Service Mesh.
Prerequisites:
- OpenShift Container Platform 4.1 or higher installed.
- Red Hat OpenShift Service Mesh 1.0.10 installed.
- Jaeger enabled during the installation.
- Bookinfo example application installed.
Procedure
- After you have deployed the Bookinfo application you will need to generate calls to the Bookinfo application so that you have some trace data to analyze. Access http://<GATEWAY_URL>/productpage and refresh the page a few times to generate some trace data.
The installation process creates a route to access the Jaeger console.
- In the OpenShift Container Platform console, navigate to Networking → Routes and search for the Jaeger route, which is the URL listed under Location.
Use the CLI to query for details of the route:
$ export JAEGER_URL=$(oc get route -n bookinfo jaeger-query -o jsonpath='{.spec.host}')
-
Launch a browser and navigate to
https://<JAEGER_URL>. - If necessary, log in using the same user name and password as you use to access the OpenShift Container Platform console.
In the left pane of the Jaeger dashboard, from the Service menu, select "productpage" and click the Find Traces button at the bottom of the pane. A list of traces is displayed, as shown in the following image:
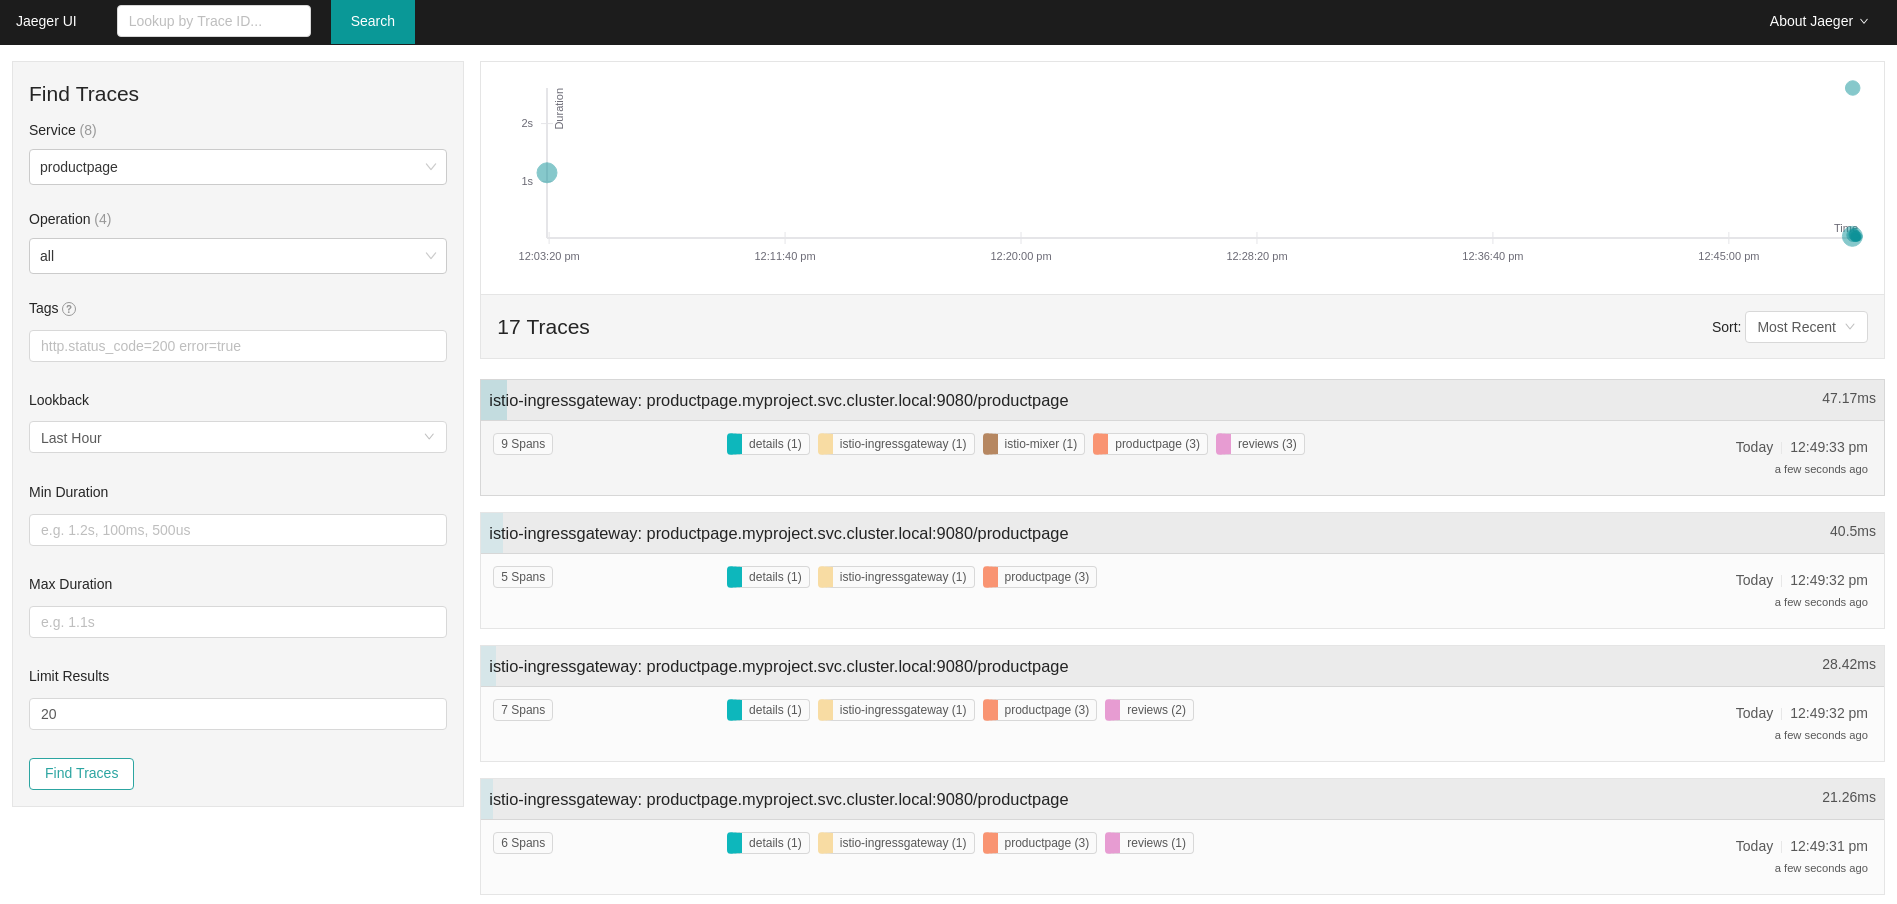
Click one of the traces in the list to open a detailed view of that trace. If you click on the top (most recent) trace, you see the details that correspond to the latest refresh of the
`/productpage.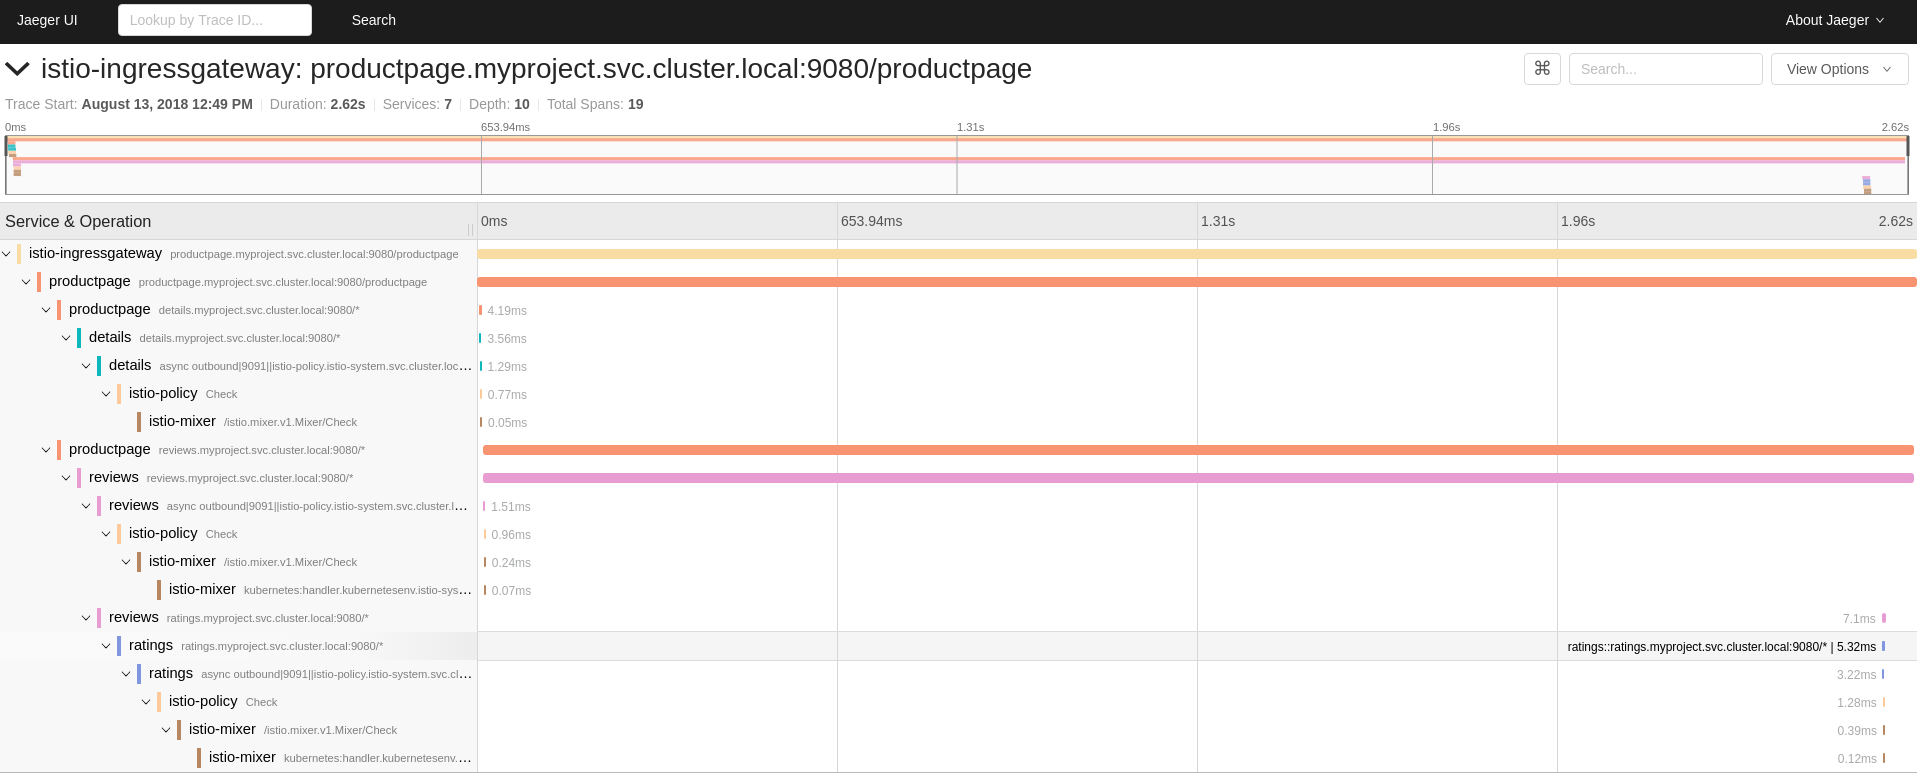
The trace in the previous figure consists of a few nested spans, each corresponding to a Bookinfo Service call, all performed in response to a
`/productpagerequest. Overall processing time was 2.62s, with the details Service taking 3.56ms, the reviews Service taking 2.6s, and the ratings Service taking 5.32ms. Each of the calls to remote Services is represented by a client-side and server-side span. For example, the details client-side span is labeledproductpage details.myproject.svc.cluster.local:9080. The span nested underneath it, labeleddetails details.myproject.svc.cluster.local:9080, corresponds to the server-side processing of the request. The trace also shows calls to istio-policy, which reflect authorization checks made by Istio.
Chapter 4. 3scale adapter
4.1. Using the 3scale Istio adapter
The 3scale Istio Adapter is an optional adapter that allows you to label a service running within the Red Hat OpenShift Service Mesh and integrate that service with the 3scale API Management solution. It is not required for Red Hat OpenShift Service Mesh.
4.1.1. Integrate the 3scale adapter with Red Hat OpenShift Service Mesh
You can use these examples to configure requests to your services using the 3scale Istio Adapter.
Prerequisites:
- Red Hat OpenShift Service Mesh 0.12.0+
- A working 3scale account (SaaS or 3scale 2.5 On-Premises)
- Red Hat OpenShift Service Mesh prerequisites
- Ensure Mixer policy enforcement is enabled. Update Mixer policy enforcement provides instructions to check the current Mixer policy enforcement status and enable policy enforcement.
To configure the 3scale Istio Adapter, refer to Red Hat OpenShift Service Mesh custom resources for instructions on adding adapter parameters to the custom resource file.
Pay particular attention to the kind: handler resource. You must update this with your 3scale credentials and the service ID of the API you want to manage.
Modify the handler configuration with your 3scale configuration.
Handler configuration example
  apiVersion: "config.istio.io/v1alpha2"
  kind: handler
  metadata:
   name: threescale
  spec:
   adapter: threescale
   params:
     service_id: "<SERVICE_ID>"
     system_url: "https://<organization>-admin.3scale.net/"
     access_token: "<ACCESS_TOKEN>"
   connection:
     address: "threescale-istio-adapter:3333"
Optionally, you can provide a backend_url field within the params section to override the URL provided by the 3scale configuration. This may be useful if the adapter runs on the same cluster as the 3scale on-premise instance, and you wish to leverage the internal cluster DNS.
Modify the rule configuration with your 3scale configuration to dispatch the rule to the threescale handler.
Rule configuration example
  apiVersion: "config.istio.io/v1alpha2"
  kind: rule
  metadata:
    name: threescale
  spec:
    match: destination.labels["service-mesh.3scale.net"] == "true"
    actions:
      - handler: threescale.handler
        instances:
          - threescale-authorization.instance
4.1.1.1. Generating 3scale custom resources
The adapter includes a tool that allows you to generate the handler, instance, and rule custom resources.
Table 4.1. Usage
| Option | Description | Required | Default value |
|---|---|---|---|
|
| Produces help output for available options | No | |
|
| Unique name for this URL, token pair | Yes | |
|
| Namespace to generate templates | No | istio-system |
|
| 3scale access token | Yes | |
|
| 3scale Admin Portal URL | Yes | |
|
| 3scale backend URL. If set, it overrides the value that is read from system configuration | No | |
|
| 3scale API/Service ID | No | |
|
| 3scale authentication pattern to specify (1=Api Key, 2=App Id/App Key, 3=OIDC) | No | Hybrid |
|
| File to save produced manifests to | No | Standard output |
|
| Outputs the CLI version and exits immediately | No |
4.1.1.1.1. Generate templates from URL examples
This example generates templates allowing the token, URL pair to be shared by multiple services as a single handler:
$ 3scale-gen-config --name=admin-credentials --url="https://<organization>-admin.3scale.net:443" --token="[redacted]"
This example generates the templates with the service ID embedded in the handler:
$ 3scale-gen-config --url="https://<organization>-admin.3scale.net" --name="my-unique-id" --service="123456789" --token="[redacted]"
4.1.1.2. Generating manifests from a deployed adapter
Run this command to generate manifests from a deployed adapter in the
istio-systemnamespace:$ export NS="istio-system" URL="https://replaceme-admin.3scale.net:443" NAME="name" TOKEN="token" oc exec -n ${NS} $(oc get po -n ${NS} -o jsonpath='{.items[?(@.metadata.labels.app=="3scale-istio-adapter")].metadata.name}') \ -it -- ./3scale-config-gen \ --url ${URL} --name ${NAME} --token ${TOKEN} -n ${NS}-
This will produce sample output to the terminal. Edit these samples if required and create the objects using the
oc createcommand. When the request reaches the adapter, the adapter needs to know how the service maps to an API on 3scale. You can provide this information in two ways:
- Label the workload (recommended)
-
Hard code the handler as
service_id
Update the workload with the required annotations:
NoteYou only need to update the service ID provided in this example if it is not already embedded in the handler. The setting in the handler takes precedence.
$ export CREDENTIALS_NAME="replace-me"
export SERVICE_ID="replace-me"
export DEPLOYMENT="replace-me"
patch="$(oc get deployment "${DEPLOYMENT}"
patch="$(oc get deployment "${DEPLOYMENT}" --template='{"spec":{"template":{"metadata":{"labels":{ {{ range $k,$v := .spec.template.metadata.labels }}"{{ $k }}":"{{ $v }}",{{ end }}"service-mesh.3scale.net/service-id":"'"${SERVICE_ID}"'","service-mesh.3scale.net/credentials":"'"${CREDENTIALS_NAME}"'"}}}}}' )"
oc patch deployment "${DEPLOYMENT}" --patch ''"${patch}"''
4.1.1.3. Routing service traffic through the adapter
Follow these steps to drive traffic for your service through the 3scale adapter.
Prerequisites
- Credentials and service ID from your 3scale administrator.
Procedure
-
Match the rule
destination.labels["service-mesh.3scale.net/credentials"] == "threescale"that you previously created in the configuration, in thekind: ruleresource. -
Add the above label to
PodTemplateSpecon the Deployment of the target workload to integrate a service. the value,threescale, refers to the name of the generated handler. This handler stores the access token required to call 3scale. -
Add the
destination.labels["service-mesh.3scale.net/service-id"] == "replace-me"label to the workload to pass the service ID to the adapter via the instance at request time.
4.1.2. Configure the integration settings in 3scale
Follow this procedure to configure the 3scale integration settings.
For 3scale SaaS customers, Red Hat OpenShift Service Mesh is enabled as part of the Early Access program.
Procedure
- Navigate to [your_API_name] → Integration → Configuration.
- At the top of the Integration page click on edit integration settings in the top right corner.
- Under the Service Mesh heading, click the Istio option.
- Scroll to the bottom of the page and click Update Service.
4.1.3. Caching behavior
Responses from 3scale System APIs are cached by default within the adapter. Entries will be purged from the cache when they become older than the cacheTTLSeconds value. Also by default, automatic refreshing of cached entries will be attempted seconds before they expire, based on the cacheRefreshSeconds value. You can disable automatic refreshing by setting this value higher than the cacheTTLSeconds value.
Caching can be disabled entirely by setting cacheEntriesMax to a non-positive value.
By using the refreshing process, cached values whose hosts become unreachable will be retried before eventually being purged when past their expiry.
4.1.4. Authenticating requests
This release supports the following authentication methods:
- Standard API Keys: single randomized strings or hashes acting as an identifier and a secret token.
- Application identifier and key pairs: immutable identifier and mutable secret key strings.
- OpenID authentication method: client ID string parsed from the JSON Web Token.
4.1.4.1. Applying authentication patterns
Modify the instance custom resource, as illustrated in the following authentication method examples, to configure authentication behavior. You can accept the authentication credentials from:
- Request headers
- Request parameters
- Both request headers and query parameters
When specifying values from headers, they must be lower case. For example, if you want to send a header as User-Key, this must be referenced in the configuration as request.headers["user-key"].
4.1.4.1.1. API key authentication method
Service Mesh looks for the API key in query parameters and request headers as specified in the user option in the subject custom resource parameter. It checks the values in the order given in the custom resource file. You can restrict the search for the API key to either query parameters or request headers by omitting the unwanted option.
In this example, Service Mesh looks for the API key in the user_key query parameter. If the API key is not in the query parameter, Service Mesh then checks the user-key header.
API key authentication method example
apiVersion: "config.istio.io/v1alpha2"
kind: instance
metadata:
  name: threescale-authorization
  namespace: istio-system
spec:
  template: authorization
  params:
    subject:
      user: request.query_params["user_key"] | request.headers["user-key"] | ""
    action:
      path: request.url_path
      method: request.method | "get"
If you want the adapter to examine a different query parameter or request header, change the name as appropriate. For example, to check for the API key in a query parameter named “key”, change request.query_params["user_key"] to request.query_params["key"].
4.1.4.1.2. Application ID and application key pair authentication method
Service Mesh looks for the application ID and application key in query parameters and request headers, as specified in the properties option in the subject custom resource parameter. The application key is optional. It checks the values in the order given in the custom resource file. You can restrict the search for the credentials to either query parameters or request headers by not including the unwanted option.
In this example, Service Mesh looks for the application ID and application key in the query parameters first, moving on to the request headers if needed.
Application ID and application key pair authentication method example
apiVersion: "config.istio.io/v1alpha2"
kind: instance
metadata:
  name: threescale-authorization
  namespace: istio-system
spec:
  template: authorization
  params:
    subject:
        app_id: request.query_params["app_id"] | request.headers["app-id"] | ""
        app_key: request.query_params["app_key"] | request.headers["app-key"] | ""
    action:
      path: request.url_path
      method: request.method | "get"
If you want the adapter to examine a different query parameter or request header, change the name as appropriate. For example, to check for the application ID in a query parameter named identification, change request.query_params["app_id"] to request.query_params["identification"].
4.1.4.1.3. OpenID authentication method
To use the OpenID Connect (OIDC) authentication method, use the properties value on the subject field to set client_id, and optionally app_key.
You can manipulate this object using the methods described previously. In the example configuration shown below, the client identifier (application ID) is parsed from the JSON Web Token (JWT) under the label azp. You can modify this as needed.
OpenID authentication method example
  apiVersion: "config.istio.io/v1alpha2"
  kind: instance
  metadata:
    name: threescale-authorization
  spec:
    template: threescale-authorization
    params:
      Subject:
  properties:
          app_key: request.query_params["app_key"] | request.headers["app-key"] | ""
          client_id: request.auth.claims["azp"] | ""
      action:
        path: request.url_path
        method: request.method | "get"
          service: destination.labels["service-mesh.3scale.net/service-id"] | ""
For this integration to work correctly, OIDC must still be done in 3scale for the client to be created in the identity provider (IdP). You should create end-user authentication for the service you want to protect in the same namespace as that service. The JWT is passed in the Authorization header of the request.
In the sample Policy defined below, replace issuer and jwksUri as appropriate.
OpenID Policy example
  apiVersion: authentication.istio.io/v1alpha1
  kind: Policy
  metadata:
    name: jwt-example
    namespace: bookinfo
  spec:
    origins:
      - jwt:
          issuer: >-
            http://keycloak-keycloak.34.242.107.254.nip.io/auth/realms/3scale-keycloak
          jwksUri: >-
  http://keycloak-keycloak.34.242.107.254.nip.io/auth/realms/3scale-keycloak/protocol/openid-connect/certs
    principalBinding: USE_ORIGIN
    targets:
      - name: productpage
4.1.4.1.4. Hybrid authentication method
You can choose to not enforce a particular authentication method and accept any valid credentials for either method. If both an API key and an application ID/application key pair are provided, Service Mesh uses the API key.
In this example, Service Mesh checks for an API key in the query parameters, then the request headers. If there is no API key, it then checks for an application ID and key in the query parameters, then the request headers.
Hybrid authentication method example
apiVersion: "config.istio.io/v1alpha2"
kind: instance
metadata:
  name: threescale-authorization
spec:
  template: authorization
  params:
    subject:
      user: request.query_params["user_key"] | request.headers["user-key"] |
      properties:
        app_id: request.query_params["app_id"] | request.headers["app-id"] | ""
        app_key: request.query_params["app_key"] | request.headers["app-key"] | ""
        client_id: request.auth.claims["azp"] | ""
    action:
      path: request.url_path
      method: request.method | "get"
        service: destination.labels["service-mesh.3scale.net/service-id"] | ""
4.1.5. 3scale Adapter metrics
The adapter, by default reports various Prometheus metrics that are exposed on port 8080 at the /metrics endpoint. These metrics provide insight into how the interactions between the adapter and 3scale are performing. The service is labeled to be automatically discovered and scraped by Prometheus.
Chapter 5. Service Mesh Release Notes
Chapter 6. Red Hat OpenShift Service Mesh Release Notes
6.1. Red Hat OpenShift Service Mesh overview
Red Hat OpenShift Service Mesh is a platform that provides behavioral insight and operational control over the service mesh, providing a uniform way to connect, secure, and monitor microservice applications.
The term service mesh describes the network of microservices that make up applications in a distributed microservice architecture and the interactions between those microservices. As a service mesh grows in size and complexity, it can become harder to understand and manage.
Based on the open source Istio project, Red Hat OpenShift Service Mesh adds a transparent layer on existing distributed applications without requiring any changes to the service code. You add Red Hat OpenShift Service Mesh support to services by deploying a special sidecar proxy throughout your environment that intercepts all network communication between microservices. You configure and manage the service mesh using the control plane features.
Red Hat OpenShift Service Mesh provides an easy way to create a network of deployed services that provides discovery, load balancing, service-to-service authentication, failure recovery, metrics, and monitoring. A service mesh also provides more complex operational functionality, including A/B testing, canary releases, rate limiting, access control, and end-to-end authentication.
6.2. Getting support
If you experience difficulty with a procedure described in this documentation, visit the Red Hat Customer Portal at http://access.redhat.com. Through the customer portal, you can:
- Search or browse through the Red Hat Knowledgebase of technical support articles about Red Hat products
- Submit a support case to Red Hat Global Support Services (GSS)
- Access other product documentation
If you have a suggestion for improving this guide or have found an error, please submit a Bugzilla report at http://bugzilla.redhat.com against Product for the Documentation component. Please provide specific details, such as the section number, guide name, and Service Mesh version so we can easily locate the content.
6.3. Red Hat OpenShift Service Mesh supported configurations
The following are the only supported configurations for the Red Hat OpenShift Service Mesh 1.0.10:
- Red Hat OpenShift Container Platform version 4.1.
OpenShift Online and OpenShift Dedicated are not supported for Red Hat OpenShift Service Mesh 1.0.10.
- The deployment must be contained to a single OpenShift Container Platform cluster that is not federated.
- This release of Red Hat OpenShift Service Mesh is only available on OpenShift Container Platform x86_64.
- Red Hat OpenShift Service Mesh is only suited for OpenShift Container Platform Software Defined Networking (SDN) configured as a flat network with no external providers.
- This release only supports configurations where all Service Mesh components are contained in the OpenShift cluster in which it operates. It does not support management of microservices that reside outside of the cluster, or in a multi-cluster scenario.
- This release only supports configurations that do not integrate external services such as virtual machines.
6.3.1. Supported configurations for Kiali on Red Hat OpenShift Service Mesh
- The Kiali observability console is only supported on the two most recent releases of the Chrome, Edge, Firefox, or Safari browsers.
6.3.2. Supported Mixer adapters
This release only supports the following Mixer adapter:
- 3scale Istio Adapter
Red Hat OpenShift Service Mesh provides a number of key capabilities uniformly across a network of services:
- Traffic Management - Control the flow of traffic and API calls between services, make calls more reliable, and make the network more robust in the face of adverse conditions.
- Service Identity and Security - Provide services in the mesh with a verifiable identity and provide the ability to protect service traffic as it flows over networks of varying degrees of trustworthiness.
- Policy Enforcement - Apply organizational policy to the interaction between services, ensure access policies are enforced and resources are fairly distributed among consumers. Policy changes are made by configuring the mesh, not by changing application code.
- Telemetry - Gain understanding of the dependencies between services and the nature and flow of traffic between them, providing the ability to quickly identify issues.
6.3.3. New features Red Hat OpenShift Service Mesh 1.0.10
This release of Red Hat OpenShift Service Mesh addresses Common Vulnerabilities and Exposures (CVEs).
6.3.4. New features Red Hat OpenShift Service Mesh 1.0.9
This release of Red Hat OpenShift Service Mesh addresses Common Vulnerabilities and Exposures (CVEs).
6.3.5. New features Red Hat OpenShift Service Mesh 1.0.8
This release of Red Hat OpenShift Service Mesh addresses compatibility issues with OpenShift Container Platform 4.4. You must upgrade Red Hat OpenShift Service Mesh to 1.0.8 before you upgrade from OpenShift Container Platform 4.3 to OpenShift Container Platform 4.4.
6.3.6. New features Red Hat OpenShift Service Mesh 1.0.7
This release of Red Hat OpenShift Service Mesh addresses Common Vulnerabilities and Exposures (CVEs).
6.3.7. New features Red Hat OpenShift Service Mesh 1.0.6
This release contains internal improvements.
6.3.8. New features Red Hat OpenShift Service Mesh 1.0.5
This release contains internal improvements.
6.3.9. New features Red Hat OpenShift Service Mesh 1.0.4
This release of Red Hat OpenShift Service Mesh adds support for Kiali 1.0.9, and addresses Common Vulnerabilities and Exposures (CVEs).
6.3.10. New features Red Hat OpenShift Service Mesh 1.0.3
This release of Red Hat OpenShift Service Mesh adds support for Kiali 1.0.8, and addresses Common Vulnerabilities and Exposures (CVEs).
6.3.11. New features Red Hat OpenShift Service Mesh 1.0.2
This release of Red Hat OpenShift Service Mesh adds support for Istio 1.1.17, Jaeger 1.13.1, Kiali 1.0.7, and the 3scale Istio Adapter 1.0 and OpenShift Container Platform 4.2.
6.3.12. New features Red Hat OpenShift Service Mesh 1.0.1
This release of Red Hat OpenShift Service Mesh adds support for Istio 1.1.11, Jaeger 1.13.1, Kiali 1.0.6, and the 3scale Istio Adapter 1.0 and OpenShift Container Platform 4.1.
6.3.13. New features Red Hat OpenShift Service Mesh 1.0
This release of Red Hat OpenShift Service Mesh adds support for Istio 1.1.11, Jaeger 1.13.1, Kiali 1.0.5, and the 3scale Istio Adapter 1.0 and OpenShift Container Platform 4.1.
Other notable changes in this release include the following:
- The Kubernetes Container Network Interface (CNI) plug-in is always on.
- The control plane is configured for multitenancy by default. Single tenant, cluster-wide control plane configurations are deprecated.
- The Elasticsearch, Jaeger, Kiali, and Service Mesh Operators are installed from OperatorHub.
- You can create and specify control plane templates.
- Automatic route creation was removed from this release.
6.4. Known issues
These limitations exist in Red Hat OpenShift Service Mesh at this time:
- Red Hat OpenShift Service Mesh does not support IPv6, as it it not supported by the upstream Istio project, nor fully supported by OpenShift.
- Graph layout - The layout for the Kiali graph can render differently, depending on your application architecture and the data to display (number of graph nodes and their interactions). Because it is difficult if not impossible to create a single layout that renders nicely for every situation, Kiali offers a choice of several different layouts. To choose a different layout, you can choose a different Layout Schema from the Graph Settings menu.
While Kafka publisher is included in the release as part of Jaeger, it is not supported.
6.4.1. Red Hat OpenShift Service Mesh known issues
These are the known issues in Red Hat OpenShift Service Mesh at this time:
- Istio-14743 Due to limitations in the version of Istio that this release of Red Hat OpenShift Service Mesh is based on, there are several applications that are currently incompatible with Service Mesh. See the linked community issue for details.
MAISTRA-858 The following Envoy log messages describing deprecated options and configurations associated with Istio 1.1.x are expected:
- [2019-06-03 07:03:28.943][19][warning][misc] [external/envoy/source/common/protobuf/utility.cc:129] Using deprecated option 'envoy.api.v2.listener.Filter.config'. This configuration will be removed from Envoy soon.
- [2019-08-12 22:12:59.001][13][warning][misc] [external/envoy/source/common/protobuf/utility.cc:174] Using deprecated option 'envoy.api.v2.Listener.use_original_dst' from file lds.proto. This configuration will be removed from Envoy soon.
- MAISTRA-681 and KIALI-2686 When the control plane has many namespaces, it can lead to performance issues.
- MAISTRA-622 In Maistra 0.12.0/TP12, permissive mode does not work. The user has the option to use Plain text mode or Mutual TLS mode, but not permissive.
- MAISTRA-465 The Maistra operator fails to create a service for operator metrics.
-
MAISTRA-453 If you create a new project and deploy pods immediately, sidecar injection does not occur. The operator fails to add the
maistra.io/member-ofbefore the pods are created, therefore the pods must be deleted and recreated for sidecar injection to occur. MAISTRA-348 To access a TCP service by using the ingress gateway on a port other than 80 or 443, use the service hostname provided by the AWS load balancer rather than the OpenShift router.
The istio-ingressgateway route hostname (for example,
istio-ingressgateway-istio-system.apps.[cluster name].openshift.com) works with port 80 or port 443 traffic. However, that route hostname does not support other port traffic.To access service(s) running on the ingress gateway TCP port(s), you can retrieve the istio-ingressgateway external hostname (for example,
[uuid].[aws region].elb.amazonaws.com) and then check traffic by using that external hostname value.To retrieve the external IP hostname value, issue this command:
$ oc -n istio-system get service istio-ingressgateway -o jsonpath='{.status.loadBalancer.ingress[0].hostname}'- MAISTRA-193 Unexpected console info messages are visible when health checking is enabled for citadel.
- MAISTRA-158 Applying multiple gateways referencing the same hostname will cause all gateways to stop functioning.
MAISTRA-806 Evicted Istio Operator Pod causes mesh and CNI not to deploy.
If the
istio-operatorpod is evicted while deploying the control pane, delete the evictedistio-operatorpod.
6.4.2. Kiali known issues
- KIALI-3262 In the Kiali console, when you click on Distributed Tracing in the navigation or on a Traces tab, you are asked to accept the certificate, and then asked to provide your OpenShift login credentials. This happens due to an issue with how the framework displays the Trace pages in the Console. The Workaround is to open the URL for the Jaeger console in another browser window and log in. Then you can view the embedded tracing pages in the Kiali console.
- KIALI-3239 If a Kiali Operator pod has failed with a status of “Evicted” it blocks the Kiali operator from deploying. The workaround is to delete the Evicted pod and redeploy the Kiali operator.
- KIALI-3118 After changes to the ServiceMeshMemberRoll, for example adding or removing projects, the Kiali pod restarts and then displays errors on the Graph page while the Kiali pod is restarting.
- KIALI-3070 This bug only affects custom dashboards, not the default dashboards. When you select labels in metrics settings and refresh the page, your selections are retained in the menu but your selections are not displayed on the charts.
- KIALI-2206 When you are accessing the Kiali console for the first time, and there is no cached browser data for Kiali, the “View in Grafana” link on the Metrics tab of the Kiali Service Details page redirects to the wrong location. The only way you would encounter this issue is if you are accessing Kiali for the first time.
- KIALI-507 Kiali does not support Internet Explorer 11. This is because the underlying frameworks do not support Internet Explorer. To access the Kiali console, use one of the two most recent versions of the Chrome, Edge, Firefox or Safari browser.
6.5. Fixed issues
The following issues been resolved in the current release:
6.5.1. Red Hat OpenShift Service Mesh fixed issues
-
MAISTRA-684 The default Jaeger version in the
istio-operatoris 1.12.0, which does not match Jaeger version 1.13.1 that shipped in Red Hat OpenShift Service Mesh 0.12.TechPreview. - MAISTRA-572 Jaeger cannot be used with Kiali. In this release Jaeger is configured to use the OAuth proxy, but is also only configured to work through a browser and does not allow service access. Kiali cannot properly communicate with the Jaeger endpoint and it considers Jaeger to be disabled. See also TRACING-591.
MAISTRA-357 In OpenShift 4 Beta on AWS, it is not possible, by default, to access a TCP or HTTPS service through the ingress gateway on a port other than port 80. The AWS load balancer has a health check that verifies if port 80 on the service endpoint is active.
The load balancer health check only checks the first port defined in the Istio ingress gateway ports list. This port is configured as 80/HTTP:31380/TCP. Without a service running on this port, the load balancer health check fails.
To check HTTPS or TCP traffic by using an ingress gateway, you must have an existing HTTP service, for example, the Bookinfo sample application product page running on the ingress gateway port 80. Alternatively, using the AWS EC2 console, you can change the port that the load balancer uses to perform the health check, and replace 80 with the port your service actually uses.
6.5.2. Kiali fixed issues
- KIALI-3096 Runtime metrics fail in Service Mesh. There is an oauth filter between the Service Mesh and Prometheus, requiring a bearer token to be passed to Prometheus before access will be granted. Kiali has been updated to use this token when communicating to the Prometheus server, but the application metrics are currently failing with 403 errors.
- OSSM-90 Traces not available on the service details page.
- OSSM-92 Cancelling unsaved changes on the VS/DR YAML edit page does not cancel the changes.
- OSSM-93 IstioConfigList can’t filter by two or more names.
- OSSM-99 Workloads generated from direct Pod without labels may crash Kiali.