
Chapter 1. Features
In 21.0.0.4, Admin Center joins Open Liberty, providing a web-based GUI to help configure, manage, and monitor your running server, along with support for viewing and interacting with Java Batch jobs and OpenID Connect (OIDC) client and token management. MicroProfile Context Propagation is updated to version 1.2, which addresses the difference in how MicroProfile Config 2.0 treats empty value configuration properties. To help keep your bits secure, Kerberos authentication is now supported for LDAP connections, and we’ve added Single Sign-On (SSO) LTPA and JWT support for authentication filters. Also present in this release are a number of other enhancements: automatic cleanup of leaked connections, more control over thread dumps during hung requests, and the ability to specify the location of your expanded applications.
In Open Liberty 21.0.0.4:
- Admin Center 1.0
- MicroProfile Context Propagation 1.2
- LDAP connection supports Kerberos authentication
- Single Sign-On (SSO) LTPA and JWT support authentication filter
- Control thread dump collection for hung requests in the Request Timing feature
- Automatic cleanup of leaked connections
- Specify location for expanded applications
1.1. Run your apps using 21.0.0.4
If you’re using Maven, here are the coordinates:
<dependency>
    <groupId>io.openliberty</groupId>
    <artifactId>openliberty-runtime</artifactId>
    <version>21.0.0.4</version>
    <type>zip</type>
</dependency>
Or for Gradle:
dependencies {
    libertyRuntime group: 'io.openliberty', name: 'openliberty-runtime', version: '[21.0.0.4,)'
}
Or if you’re using Docker:
FROM open-liberty
1.2. Admin Center 1.0
The Admin Center 1.0 feature provides a web-based GUI to help configure, manage, and monitor your running server, along with support for viewing and interacting with Java Batch jobs and OpenID Connect (OIDC) client and token management.
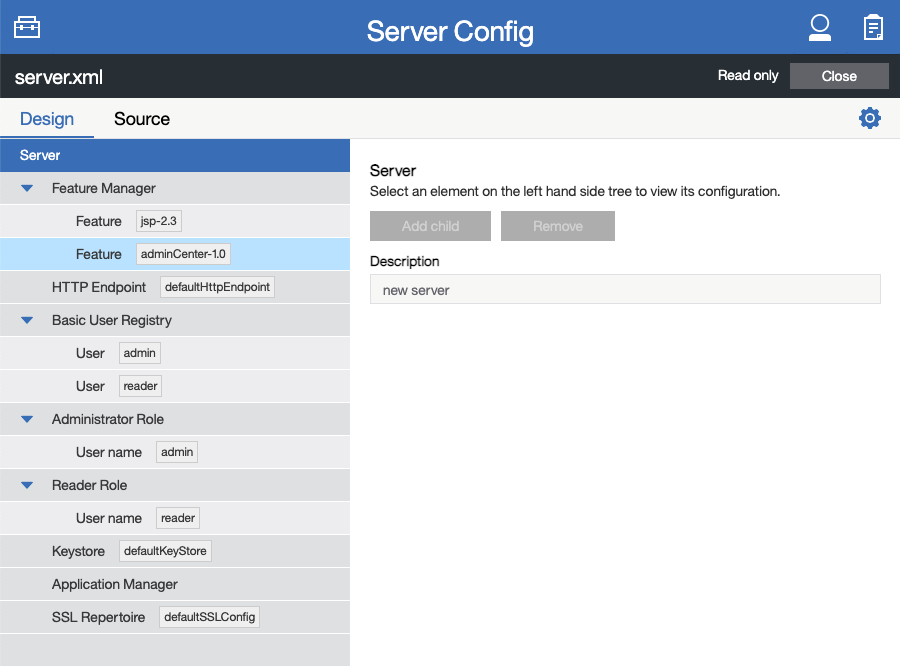
In order to enable Admin Center, you’ll need to add the adminCenter-1.0 feature, and an authorized user. Since, for security reasons, Admin Center requires HTTPS, you’ll also need to make sure you have configured the httpsPort and keyStore.
For example:
<server description="Admin Center example">

  <!-- Enable features -->
  <featureManager>
    <feature>adminCenter-1.0</feature>
  </featureManager>

  <!-- To access this server from a remote client add a host attribute to the following element, e.g. host="*" -->
  <httpEndpoint id="defaultHttpEndpoint"
    host="*"
    httpPort="9080"
    httpsPort="9443" />

  <!-- Define a user with Administrator role -->
  <quickStartSecurity userName="admin" userPassword="adminpwd" />

  <keyStore id="defaultKeyStore" password="Liberty"/>

</server>
Once the server starts, you’ll be able to access the Admin Center login page via https://host_name:port_number/adminCenter/ so if your loopback address is mapped to localhost, you would navigate to https://localhost:9443/adminCenter/ on the machine running your server.
Note: your browser might show a security prompt that you’ll need to accept due to using a self-signed certificate.

Stay tuned for a blog specifically regarding Admin Center which will showcase the various tools and functionality it provides.
1.3. MicroProfile Context Propagation 1.2
MicroProfile Context Propagation is a stand-alone MicroProfile specification. MicroProfile Context Propagation enables you to create completion stages that behave deterministically with respect to thread context and leverages the autonomic tuning of the Open Liberty global thread pool for asynchronous dependent stages.
The 1.2 release of MicroProfile Context Propagation aligns with the MicroProfile 4.0 platform, specifically addressing a difference in how MicroProfile Config 2.0 treats empty value configuration properties. When using MicroProfile Config to specify an empty list of thread context types for MicroProfile Context Propagation to use as defaults, use a value of None rather than an empty value. An empty value in MicroProfile Config 2.0 indicates to override any lower ordinal config sources and instead use the built-in default value for the property. For example, the combination of mp.context.ManagedExecutor.cleared=None and mp.context.ManagedExecutor.propagated=Remaining causes every context type to be propagated.
To enable the MicroProfile Context Propagation 1.2 feature, add the following to your server configuration:
<featureManager>
  <feature>mpContextPropagation-1.2</feature>
  <!-- other features used by example code... -->
  <feature>servlet-4.0</feature>
  <feature>jdbc-4.2</feature>
  <feature>jndi-1.0</feature>
</featureManager>
Example usage within a Servlet:
private ManagedExecutor executor;

public void init(ServletConfig config) throws ServletException {
    executor = ManagedExecutor.builder()
                .propagated(ThreadContext.APPLICATION)
                .cleared(ThreadContext.ALL_REMAINING)
                .build();
}

public void destroy() {
    executor.shutdownNow();
}

public void doGet(HttpServletRequest req, HttpServletResponse resp)
    throws ServletException, IOException {
    ...
    executor.copy(unmanagedCompletionStage).thenAcceptAsync(value -> {
        // requires java:comp namespace of the application,
        DataSource ds = InitialContext.doLookup("java:comp/env/jdbc/ds");
        ...
    });
}
For more information please see: * MicroProfile Context Propagation 1.2 specification * JavaDoc
1.4. LDAP connection supports Kerberos authentication
LDAP bind operations are used to authenticate clients (and the users or applications behind them) to the directory server. This establishes an authorization identity that is used for subsequent operations that are processed on that connection, and specifies the LDAP protocol version that the client uses. Before this update, the LdapRegistry element supported binding either anonymously or by using simple authentication with a user (bindDN) and password (bindPassword). This update adds an option to bind to LDAP: GSSAPI/Kerberos. Kerberos is an authentication mechanism that allows a client to authenticate by a Key Distribution Center (KDC). In Open Liberty 21.0.0.4, you can use either a Kerberos credential cache (ccache) or a Kerberos keytab file.
To update an LdapRegistry to use the GSSAPI/Kerberos option, you can set the bind authentication mechanism type using the new LdapRegistry attribute, bindAuthMechanism:
bindAuthMechanism="GSSAPI"
You also need the Kerberos principal or Service Principal Name:
krb5Principal="user1@EXAMPLE.COM"
If you are using a Kerberos ticket cache also known as a credential cache or ccache, add the Kerberos ticket cache file name to the LdapRegistry with the new attribute, krb5TicketCache:
krb5TicketCache="${server.config.dir}/security/krb5-user1.cc"Set the Kerberos configuration file name (for example, krb5.conf or krb5.ini) using the Kerberos element:
<kerberos configFile="${server.config.dir}/security/krb5.conf"/>If you are using a Kerberos keytab file, set the Kerberos keytab file name using the Kerberos element:
<kerberos keytab="${server.config.dir}/security/krb5.keytab" configFile="${server.config.dir}/security/krb5.conf"/>If the Kerberos configuration file is not defined in the Kerberos element, Open Liberty will attempt to resolve the configuration file location by using the JDK default locations.
For the Kerberos credentials, the locations are checked in the following order: the ticket cache (if provided), the configured keytab file, and finally the JDK default location.
The following example shows how to configure the LdapRegistry element using a Kerberos ticket cache and Kerberos config file:
<kerberos configFile="${server.config.dir}/security/krb5.conf"/>

<ldapRegistry id="LDAP" realm="SampleLdapADRealm" host="ldap_hostname" port="389" ignoreCase="true" baseDN="DC=example,DC=com" bindAuthMechanism="GSSAPI" krb5Principal="user1@EXAMPLE.COM" krb5TicketCache="${server.config.dir}/security/krb5-user1.cc" ldapType="Custom" />
The following example shows how to configure an LDAP Registry using a Kerberos keytab and Kerberos config file:
<kerberos keytab="${server.config.dir}/security/krb5.keytab" configFile="${server.config.dir}/security/krb5.conf" />

<ldapRegistry id="LDAP" realm="SampleLdapADRealm" host="ldap_hostname" port="389" ignoreCase="true" baseDN="DC=example,DC=com" bindAuthMechanism="GSSAPI" krb5Principal="user1@EXAMPLE.COM" ldapType="Custom" />
To enable this new function in your app, add the LDAP User Registry 3.0 feature to your server.xml file:
<featureManager>
  <feature>ldapRegistry-3.0</feature>
</featureManager>
For more information on LdapRegistry, see the LDAP User Registry documentation.
1.5. Single Sign-On (SSO) LTPA and JWT support authentication filter
With this new enhancement users can now use the authentication filter to select which HTTP servlet request should use LTPA and JWT for the SSO authentications.
Users can configure an authentication filter to specify whether certain requests for protected resources are authenticated with LTPA. If the request meets the criteria that are specified in the authentication filter, then the request can authenticate with LTPA to access the protected resource. Conversely, if the request does not meet the criteria that are configured in the LTPA authentication filter, then the user is prompted to provide login credentials.
<ltpa keysFileName="yourLTPAKeysFileName.keys" keysPassword="keysPassword" expiration="120" authFilterRef="myAuthFilter"/>

<authFilter id="myAuthFilter">
         <requestUrl id="myRequestUrl" urlPattern="/SimpleServlet" matchType="contains"/>
</authFilter>
In the example above, request has a LTPA cookie and URLs that contain the /SimpleServlet pattern are authenticated by LTPA SSO authentication. However, if the request has a LTPA cookie but the URLs do not contain the /SimpleServlet pattern are authenticated by other authentication mechanisms.
Or users can configure an authentication filter to specify whether certain requests for protected resources are authenticated with JWT SSO. If the request meets the criteria that are specified in the authentication filter, then the request can authenticate with JWT to access the protected resource. Conversely, if the request does not meet the criteria that are configured in the JWT SSO authentication filter, then the user is prompted to provide login credentials.
<jwtSso cookieName="myjwt" jwtBuilderRef="myBuilder" authFilterRef="myAuthFilter"/>
<authFilter id="myAuthFilter">
         <requestUrl id="myRequestUrl" urlPattern="/SimpleServlet" matchType="notContain"/>
</authFilter>
In the example above, same as for the LTPA authentication filter example: the request has JWT cookie and URLs that contain the /SimpleServlet pattern are authenticated by JWT SSO authentication. However, if the request has a JWT cookie but the URLs do not contain the /SimpleServlet pattern are authenticated by other authentication mechanisms.
For more information see:
1.6. Control thread dump collection for hung requests in the Request Timing feature
The Request Timing feature (requestTiming-1.0) provides diagnostic information when the duration of any request exceeds the configured threshold. It provides a way to monitor requests with respect to time. The feature can automatically detect slow and hung requests and provide detailed diagnostic information; warning messages, thread stacks, and the creation of thread dumps.
When a hung request is detected in the Request Timing feature, a warning message is written in the messages log file along with a dump of the events that happened during the request. Following that, a set of three thread dumps will be initiated, 1 minute apart. After the completion of the three thread dumps, further set of three thread dumps are created only if new requests are detected to be hanging.
Some operations teams do not want so many thread dumps to be generated due to performance overhead on requests that are known to be long. In previous Open Liberty releases, there was no option to disable the thread dumps from being generated.
In 21.0.0.4, you can now control whether the Request Timing feature collects thread dumps. By setting the new enableThreadDumps Request Timing server configuration attribute to false, thread dumps will not be created during hung requests. If enableThreadDumps is set to true or not specified at all, thread dumps will still be created.
The new Request Timing server configuration attribute can be configured in your server.xml as follows:
<requestTiming includeContextInfo="true" slowRequestThreshold="120s" hungRequestThreshold="10s" sampleRate="1" enableThreadDumps="false"></requestTiming>`
The enableThreadDumps server configuration attribute can also be used in embedded Request Timing sub-elements: <servletTiming/> or <jdbcTiming/>, as follows:
<requestTiming includeContextInfo="true" slowRequestThreshold="120s" hungRequestThreshold="10s" sampleRate="1">
    <servletTiming appName="MyApp" servletName="MyServletApp" slowRequestThreshold="100s" hungRequestThreshold="5s" enableThreadDumps="false"/>
</requestTiming>`
An embedded <servletTiming/> or <jdbcTiming/> configuration in the server.xml file overrides the configured slow and hung request threshold that are defined in <requestTiming/>.
For more information on the Request Timing feature, please refer to the following documentations:
1.7. Automatic cleanup of leaked connections
Liberty connection management is enhanced with the ability to automatically detect and close unsharable connections that are left open by the application across the end of a request.
Occasionally, application code might forget to close an unsharable connection that it obtains, which prevents the connection from being returned to the connection pool for use by other requests. Over time, these leaked connections can degrade performance and eventually exhaust the connection pool. Liberty connection management now has the ability to detect and automatically close these leaked connections to prevent this from happening.
To take advantage of this new capability, configure one of the Liberty features that leverages the connectionManager element. For example, JDBC:
<featureManager>
  <feature>jdbc-4.2</feature>
  <feature>jndi-1.0</feature>
  <!-- more features -->
</featureManager>
Configure your data sources and connection factories as usual, which automatically leverage the new capability (to disable it, configure autoCloseConnections="false" on a <connectionManager>).
<dataSource id="DefaultDataSource">
  <connectionManager maxPoolSize="10"/>
  <jdbcDriver libraryRef="PostgreSQL"/>
  <properties.postgresql databaseName="TESTDB" serverName="localhost" portNumber="5432"/>
</dataSource>

<library id="PostgreSQL">
  <file name="/usr/local/postgresql/postgresql-42.2.18.jar"/>
</library>
Find out more at Open Liberty Connection Manager Documentation
1.7.1. Specify location for expanded applications
With this enhancement users are now able to specify a expansion location (expandLocation) on the applicationManager configuration to be utilized when the autoExpand attribute is set to "true". As currently implemented, when an application is autoExpanded the default location for the expanded files are hard coded to ${server.config.dir}/apps/expanded/.
Now with this enhancement in place, you can configure that location to a new value on the filesystem. For example, the following configuration snippet would cause the application to be expanded at ${server.config.dir}/myApps/{appname}/:
<applicationManager autoExpand="true" expandLocation="${server.config.dir}/myApps/" />This enhancement gives users more flexibility regarding the location of their expanded applications.
Find out more at Open Liberty Application Manager Documentation