
Web Console Guide
Use the Migration Toolkit for Applications web console to group your applications into projects for analysis.
Abstract
Making open source more inclusive
Red Hat is committed to replacing problematic language in our code, documentation, and web properties. We are beginning with these four terms: master, slave, blacklist, and whitelist. Because of the enormity of this endeavor, these changes will be implemented gradually over several upcoming releases. For more details, see our CTO Chris Wright’s message.
Chapter 1. Introduction
1.1. About the Web Console Guide
This guide is for engineers, consultants, and others who want to use the Migration Toolkit for Applications (MTA) to migrate or modernize Java applications or other components. It describes how to install and use the web console to manage migration or modernization projects and analyze applications.
1.2. About the Migration Toolkit for Applications
What is the Migration Toolkit for Applications?
The Migration Toolkit for Applications (MTA) is an extensible and customizable rule-based tool that simplifies the migration and modernization of Java applications.
MTA examines application artifacts, including project source directories and application archives, and then produces an HTML report highlighting areas needing changes. MTA supports many migration paths including the following examples:
- Upgrading to the latest release of Red Hat JBoss Enterprise Application Platform
- Migrating from Oracle WebLogic or IBM WebSphere Application Server to Red Hat JBoss Enterprise Application Platform
- Containerizing applications and making them cloud-ready
- Migrating from Java Spring Boot to Quarkus
- Updating from Oracle JDK to OpenJDK
For more information about use cases and migration paths, see the MTA for developers web page.
How does the Migration Toolkit for Applications simplify migration?
The Migration Toolkit for Applications looks for common resources and known trouble spots when migrating applications. It provides a high-level view of the technologies used by the application.
MTA generates a detailed report evaluating a migration or modernization path. This report can help you to estimate the effort required for large-scale projects and to reduce the work involved.
How do I learn more?
See the Introduction to the Migration Toolkit for Applications to learn more about the features, supported configurations, system requirements, and available tools in the Migration Toolkit for Applications.
1.3. About the web console
The web console for the Migration Toolkit for Applications allows a team of users to assess and prioritize migration and modernization efforts for a large number of applications. It allows you to group applications into projects for analysis and provides numerous reports that highlight the results.
Chapter 2. Installing the web console
You can install the web console on Linux, Windows, macOS, or Red Hat OpenShift Container Platform.
2.1. Installing the web console on Linux, Windows, or macOS
You can install the web console on Linux, Windows, or macOS operating systems and access the web console in a browser.
The web console has been tested with Chrome and Firefox.
Prerequisites
Java Development Kit (JDK) installed. MTA supports the following JDKs:
- OpenJDK 1.8
- OpenJDK 11
- Oracle JDK 1.8
- Oracle JDK 11
- 8 GB RAM
-
macOS installation: the value of
maxprocmust be2048or greater.
Procedure
-
Navigate to the MTA Download page and download the web console
Local install & OpenShiftfile. Extract the
.zipfile to a directory of your choice.NoteIf you are installing on a Windows operating system:
-
Extract the
.zipfile to a folder namedmtato avoid aPath too longerror. - If a Confirm file replace window is displayed during extraction, click Yes to all.
The installation directory is referred to as
<MTA_HOME>in this guide.-
Extract the
Start the web console:
Linux operating system:
$ <MTA_HOME>/run_mta.sh
Windows operating system:
C:\<MTA_HOME>\run_mta.bat
Open a browser and navigate to
http://localhost:8080/mta-web. The web console login page is displayed in your browser.Figure 2.1. Web console login page
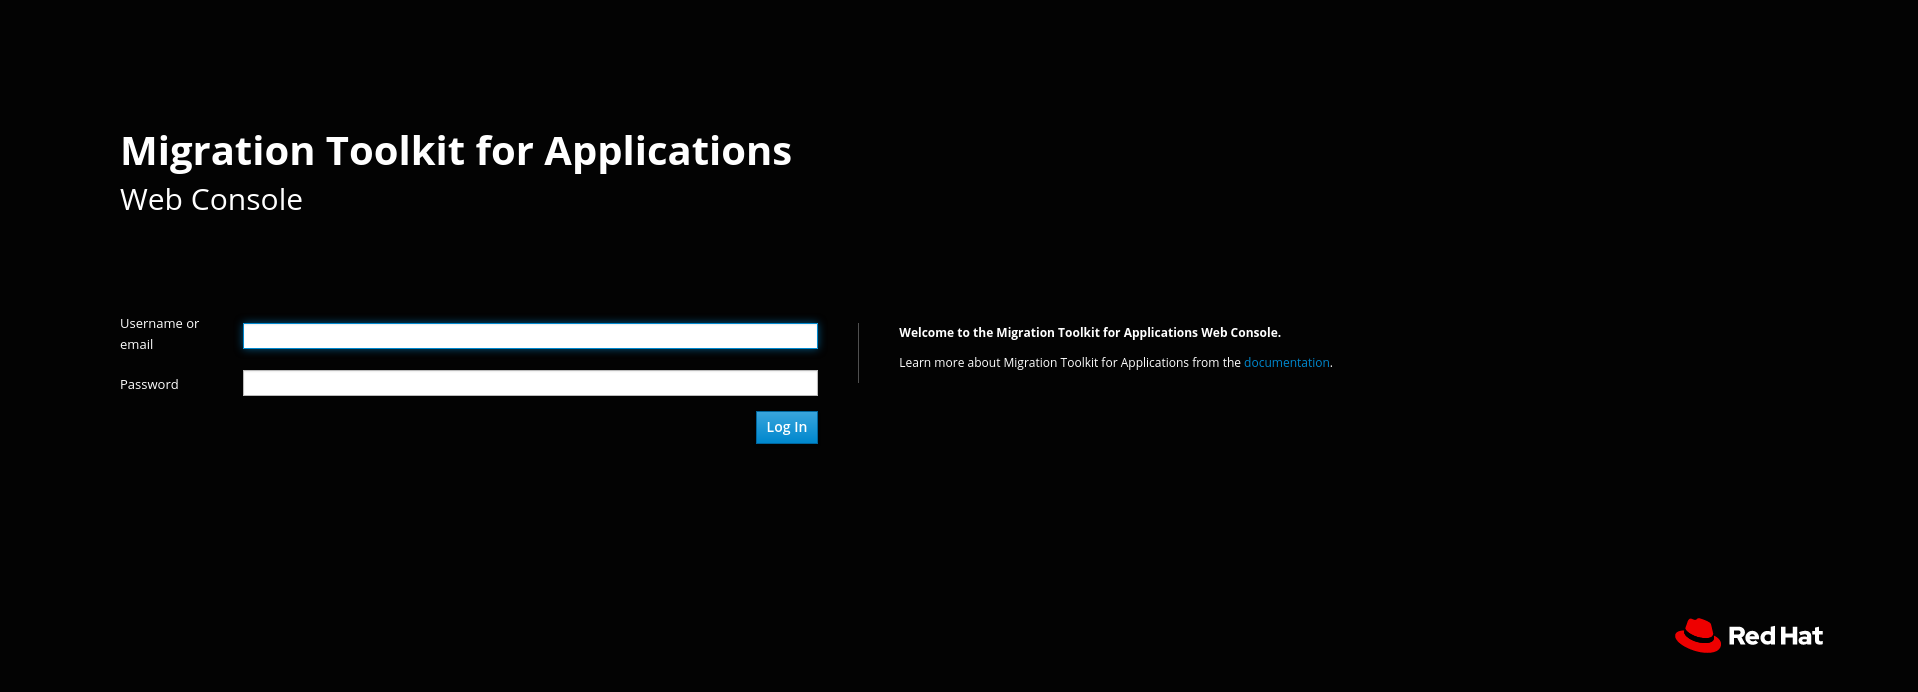
The default user is
mtaand the default password ispassword.
2.2. Installing the web console on OpenShift Container Platform
You can install the web console on OpenShift Container Platform 4.6 and later versions with the Migration Toolkit for Applications Operator.
You can install the web console on OpenShift Container Platform 4.2-4.5 by importing a template and instantiating it to create the web console application.
2.2.1. Installing the web console on OpenShift Container Platform 4.6 and later
You can install the web console on OpenShift Container Platform 4.6 and later versions with the Migration Toolkit for Applications Operator.
The Migration Toolkit for Applications Operator is a Community Operator. Red Hat provides no support for Community Operators.
Prerequisites
- 4 vCPUs, 8 GB RAM, and 40 GB persistent storage.
One or more projects in which you can install the web console.
ImportantDo not install the web console in a default project.
-
cluster-adminprivileges to install the Migration Toolkit for Applications Operator. -
project-admin-userprivileges to install the web console application in a project.
Installing the Migration Toolkit for Applications Operator
-
Log in to the OpenShift web console as a user with
cluster-adminprivileges. - Click Operators → OperatorHub.
- Use the Search by keyword field to locate the Migration Toolkit for Applications Operator.
- Click Install.
- Select a project from the Installed Namespace list and click Install.
- Click Operators → Installed Operators to verify that the Operator is installed.
Installing the web console application
-
Log in to the OpenShift web console as a user with
project-admin-userprivileges. - Switch to the Developer perspective and click +Add.
- In the Add view, click Operator Backed.
- Click the Migration Toolkit for Applications Operator.
- Click Create.
- Review the application settings and click Create.
-
In the Topology view, click the
mta-web-consoleapplication and then click the Resources tab. -
Click the
secure-mta-web-consoleroute to open the web console in a new browser window. -
Enter the user name
mtaand the passwordpasswordand click Log in.
Figure 2.2. Web console login page
2.2.2. Installing the web console on OpenShift Container Platform 4.2-4.5
You can install the web console on OpenShift Container Platform 4.2-4.5 by importing a template and instantiating it to create the web console application.
Prerequisites
- 4 vCPUs, 8 GB RAM, and 40 GB persistent storage.
One or more projects in which you can install the web console.
ImportantDo not install the web console in a default project.
Procedure
-
Navigate to the MTA Download page and download the web console
Local install & OpenShiftfile. -
Extract the
.zipfile to a directory, for example,MTA_HOME. - Launch the OpenShift web console.
- Click the Import YAML button in the upper-right corner of the web console.
- Select mta from the Project list.
Copy the contents of the appropriate template from the
MTA_HOME/openshift/templates/directory into the Import YAML field.Two templates are provided, one for shared storage and one without shared storage.
- Click Create.
- Switch to the Developer perspective and click +Add.
- In the Add view, click From Catalog.
- Click the Migration Toolkit for Applications template.
- Click Instantiate Template.
- Review the application settings and click Create.
-
In the Topology view, click the
mta-web-consoleapplication and then click the Resources tab. -
Click the
secure-mta-web-consoleroute to open the web console in a new browser window. -
Enter the user name
mtaand the passwordpasswordand click Log in.
Figure 2.3. Web console login page
2.2.3. Troubleshooting a web console installation on OpenShift
This section describes how to troubleshoot a web console installation on OpenShift Container Platform.
2.2.3.1. Downloading logs using the OpenShift console
You can download pod logs using the OpenShift console.
Procedure
- Open the OpenShift console and navigate to Applications → Pods.
-
Click the
mta-web-consolepod. - Click Logs.
- Click Download to download and save a log.
2.2.3.2. Downloading logs using the CLI
You can download pod logs using the CLI.
Procedure
Obtain the pod names:
$ oc get pods -n <project-name>
The output resembles the following:
NAME                       READY     STATUS      RESTARTS   AGE
eap-builder-1-build        0/1       Completed   0          1d
mta-postgresql-1-hfbdn     1/1       Running     0          1d
mta-sso-1-build            0/1       Completed   0          1d
mta-web-console-1-build    0/1       Completed   0          1d
mta-web-console-1-vt7s5    1/1       Running     1          1d
sso-1-wjl2n                1/1       Running     1          1d
Use
oc logsto examine the pod log:$ oc logs <pod>
NoteYou can redirect the output to obtain a copy of the current log:
$ oc logs <pod> > ./<pod>.log
2.2.3.3. No route to host error
The No route to host error in the mta-web-console-executor log indicates that the mta-web-console-executor pod cannot connect to the mta-web-console pod:
13:44:03,501 SEVERE [org.jboss.windup.web.messaging.executor.ExecutorBootstrap] (main) Could not start messaging listener due to: Failed to connect to any server. Servers tried: [http-remoting://192.0.2.4:8080 (java.net.NoRouteToHostException: No route to host)]: javax.naming.CommunicationException: Failed to connect to any server. Servers tried: [http-remoting://192.0.2.4:8080 (java.net.NoRouteToHostException: No route to host)]
This error occurs because the mta-web-console-executor pod starts running before the mta-web-console pod.
Check the mta-web-console-executor log after the mta-web-console pod has been running for a few minutes.
2.2.3.4. Insufficient resources
The following conditions indicate insufficient resources:
The
mta-web-consolepod is not running and the following error is displayed on the Events tab of the Pod Details screen in the OpenShift console:0/9 nodes are available: 4 Insufficient cpu, 4 MatchNodeSelector, 9 Insufficient memory.
The
mta-web-console-deploy,mta-web-console-executor-deploy, andmta-web-console-postgresql-deploypods time out and the following error is displayed in the logs:error: update acceptor rejected mta-web-console-executor-1: Pods for rc 'mta/mta-web-console-executor-1' took longer than 600 seconds to become available
To resolve these problems:
- Install and run the cluster capacity tool to determine how many pods you can schedule.
Change the load on the cluster resources by performing one of the following actions:
- Increase the limit ranges or the resource quotas of your project.
- Reduce the requested resources of your project. The web console requires a minimum of 4 vCPUs and 8 GB RAM.
- Run fewer jobs.
- Redeploy the web console.
2.2.3.5. Reporting issues
MTA uses Jira as its issue tracking system. If you encounter an issue executing MTA, submit a Jira issue.
Chapter 3. Using the web console to analyze applications
You can create a project in the web console to analyze your applications.
Each project groups the applications for a specific analysis, which you can configure with custom rules and labels.
The analysis process generates reports that describe the readiness of your applications for migration or modernization.
3.1. Creating a project
You can create a project in the web console with the Create project wizard.
Procedure
- In the web console, click Projects.
- Click Create project.
- Enter a unique name for the project, an optional description, and click Next.
To upload applications, click the Upload tab, click Browse, select the application files you want to upload, and click Close.
Uploading applications stores them directly on the MTA server.
To register a server path, click the Server path tab and enter the Server-side path of the application in the field.
Registering the server path of an application ensures that MTA always uses the latest version.
- Click Next.
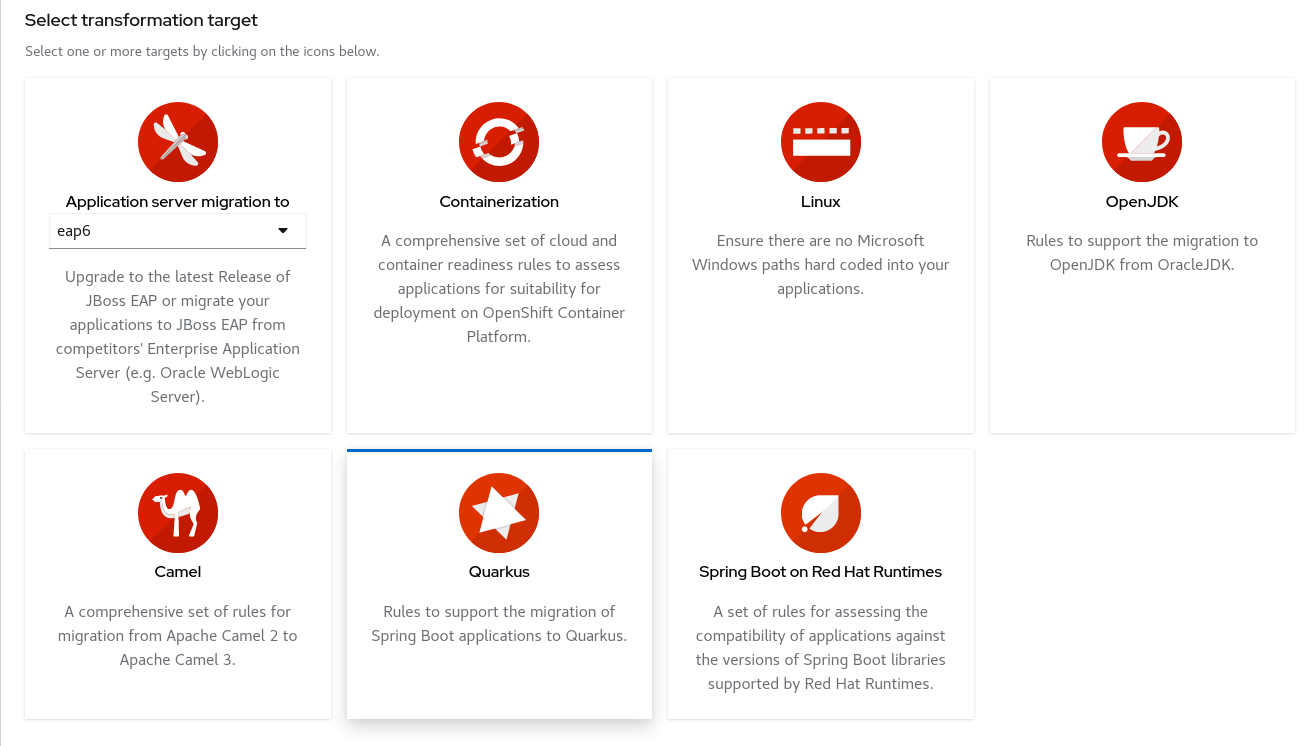
Click one or more transformation targets.
- Click Next.
- Select packages and click > to include them in the analysis.
- Click Next.
If you want to add a custom rule, click Add rule.
See the Rules Development Guide for more information.
To upload a ruleset file, click the Upload tab, click Browse, select one or more files, and click Close.
A ruleset file must have an
.mta.xmlor.windup.xmlextension. The uploaded file is stored on the MTA server.To register the server path of a ruleset file, click the Server path tab, enter the Rules path, and click Save.
Registering the server path ensures that the MTA server always uses the latest version of the ruleset files.
- Click Next.
If you want to add a custom label, click Add label.
To upload a labelset file, click the Upload tab, click Browse, select one or more files, and click Close.
A labelset file must have an
.mta.label.xmlor.windup.label.xmlextension. The uploaded file is stored on the MTA server.To register a server path, click the Server path tab, enter the Labels path of the label files in the field, and click Save.
Registering the server path ensures that the MTA server always uses the latest version of the labelset files.
- Click Next.
Review the following Advanced options and make any necessary changes:
- Target
- Source
- Exclude tags: Rules with these tags are not processed.
-
Additional classpath: Enter a space-delimited list of additional
.jarfiles or directories so that they are available for decompilation or other analysis. - Application name
- Mavenize group ID
- Ignore path: Enter a path for files to exclude from analysis.
- Export CSV: Exports the report data as a CSV file.
- Disable Tattletale: Disables generation of a Tattletale report for each application.
- Class Not Found analysis: Enables analysis of Java files that are not available on the class path. This option should not be used if some classes are unavailable for analysis.
- Compatible Files report: Generating a Compatible Files report might take a long time for large applications.
- Exploded app: The input directory contains the unpackaged source files of an application.
- Keep work dirs: Retains temporary files, for example, the graph database or extracted archive files, for debugging purposes.
- Skip reports: HTML reports are not generated. Must be enabled if you enabled Export CSV.
- Allow network access: This option reduces performance.
- Mavenize: Creates a Maven project directory structure based on the structure and content of the application.
- Source mode: Application files are raw source files, not compiled binaries.
- Click Next.
Review your project and click Save or Save and run.
The project is displayed in the Projects screen.
3.2. Running a saved analysis
You can run a saved analysis.
Procedure
- In the web console, click Analysis results.
- Select a project.
- Click Run analysis.
A progress bar displays the progress of your analysis.
3.3. Viewing analysis results
The results of all analyses are grouped and listed by project on the Analysis results screen.
Procedure
In the web console, click Analysis results.
- Select a project from the list.
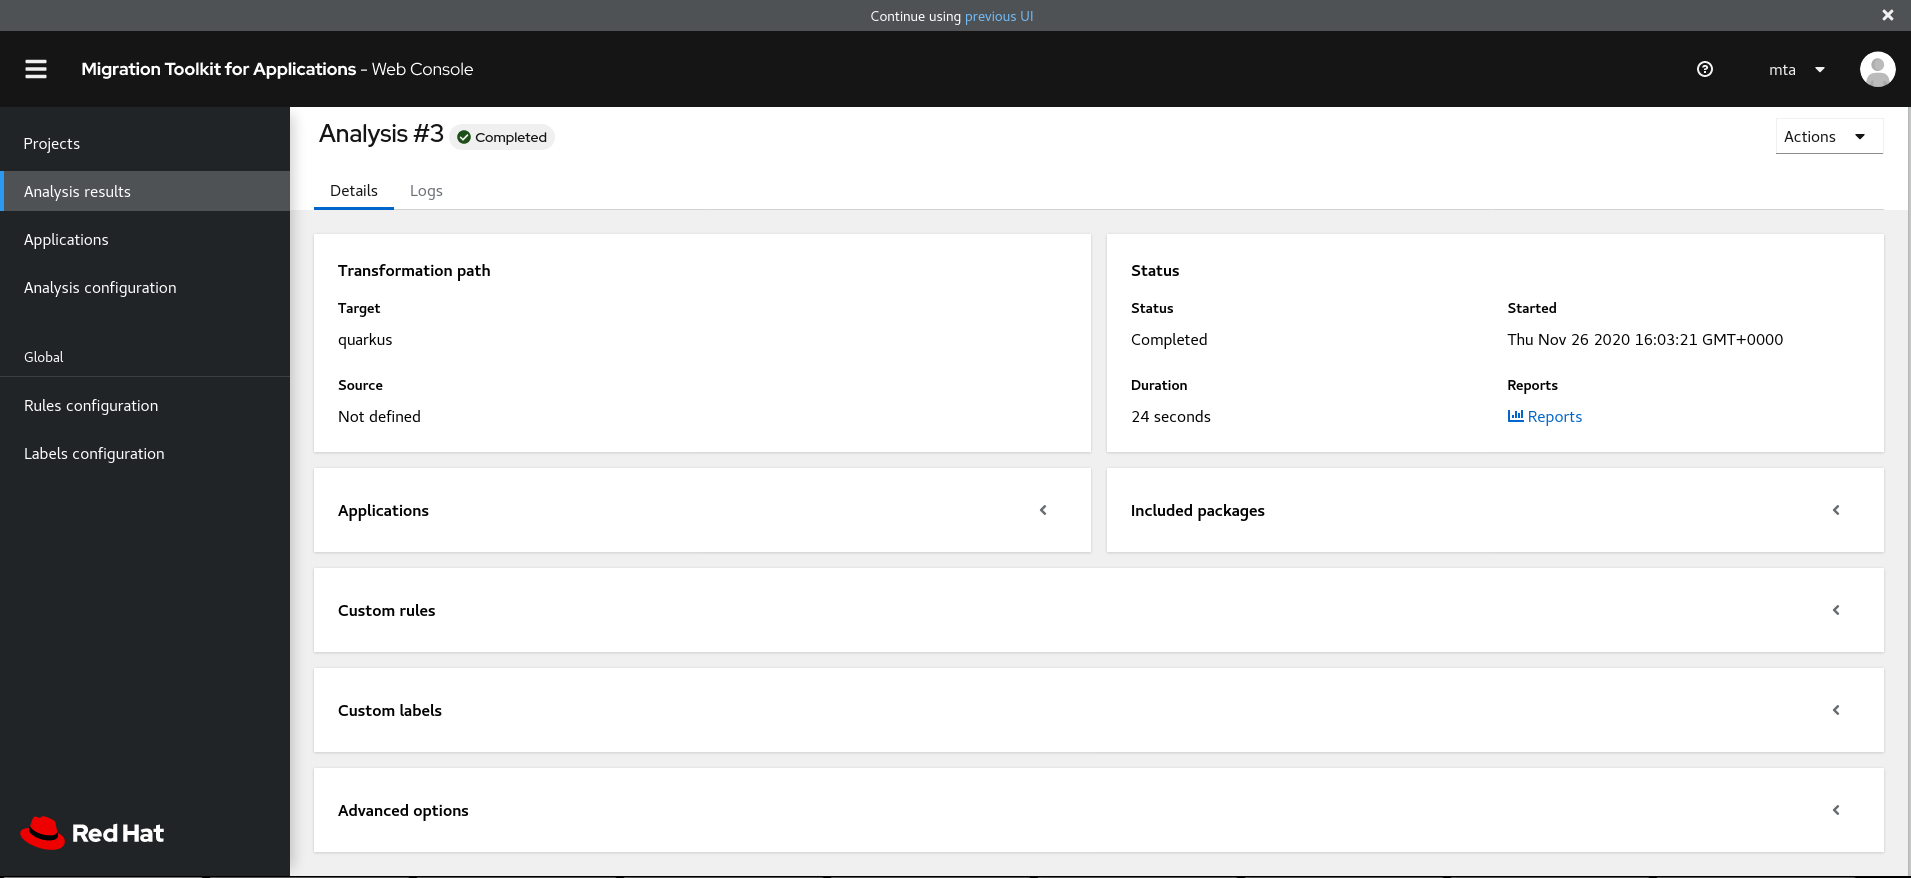
Click the number of the analysis you want to review.
The results are displayed in the Results screen, which contains two tabs: Details and Logs.
The Details tab displays important details of the analysis, such as status, start date, duration, and configuration settings.
Figure 3.1. Analysis details screen
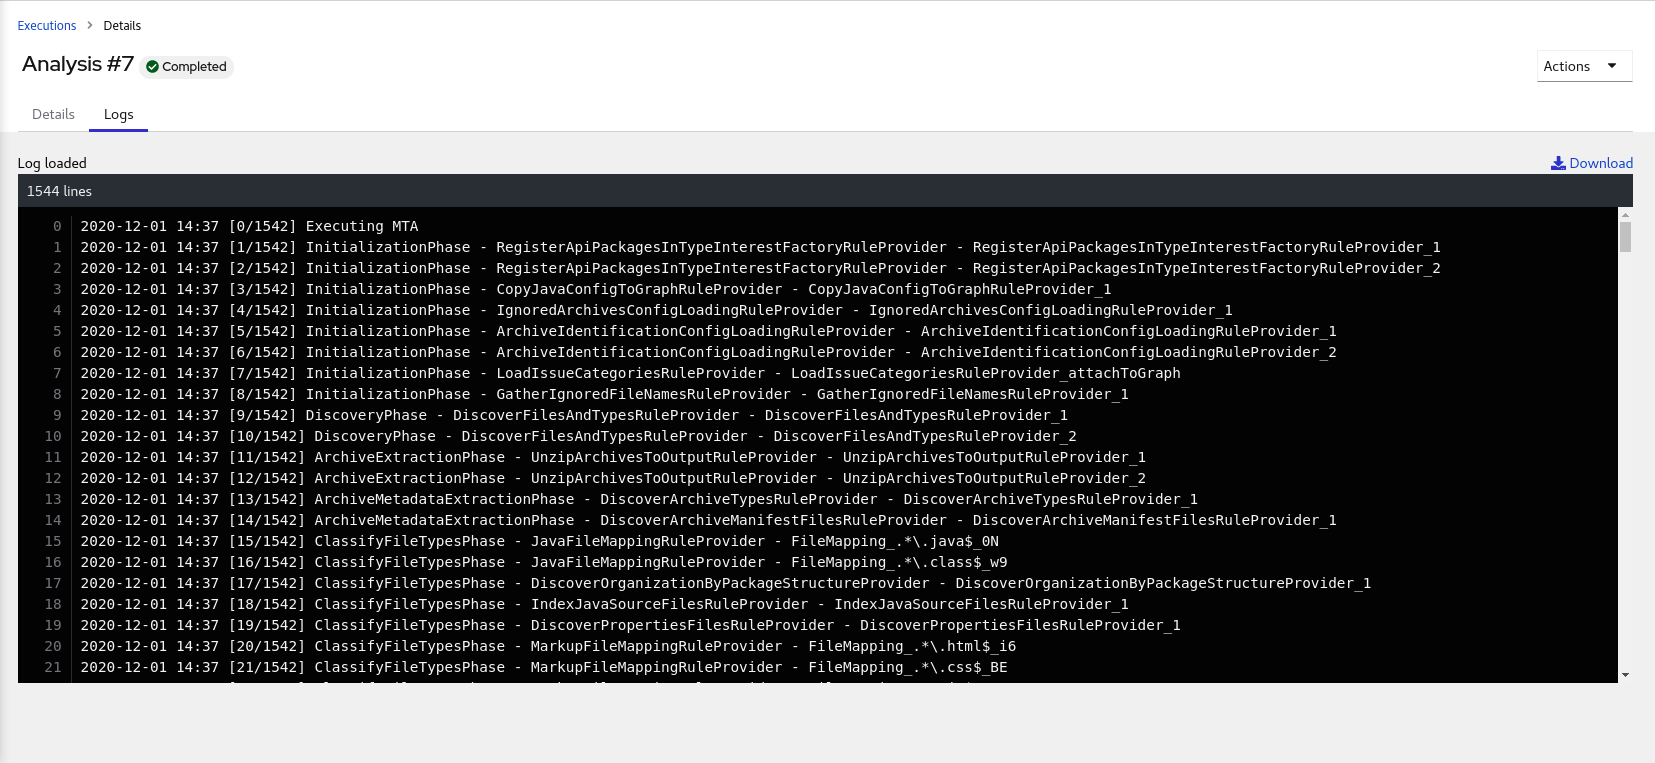
The Logs tab displays the logs generated during the analysis.
Figure 3.2. Analysis logs screen
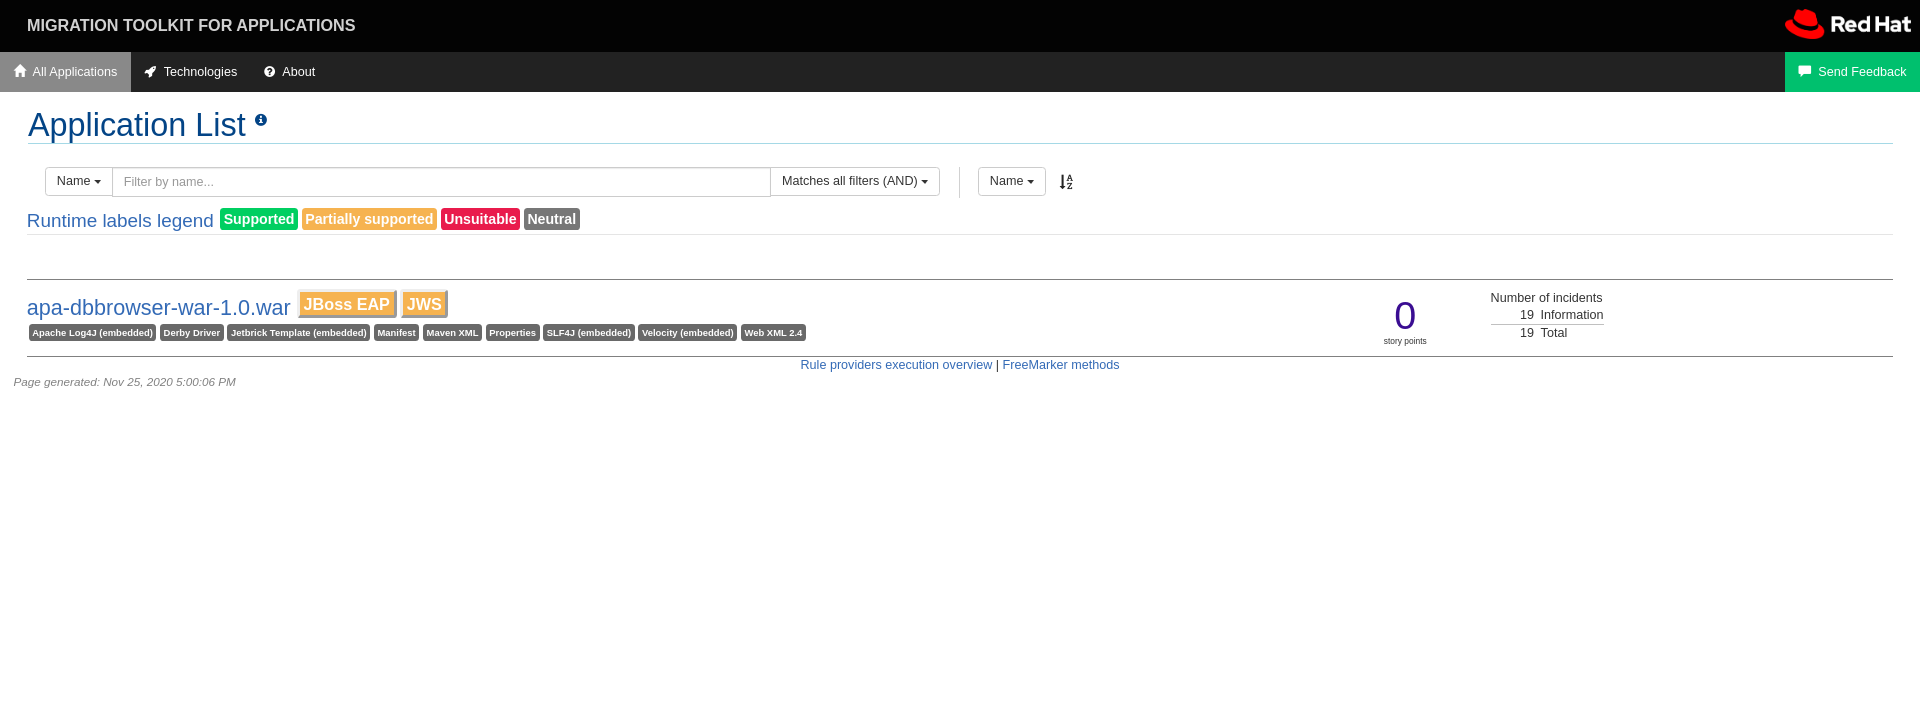
3.4. Reviewing reports
The MTA web console provides a set of detailed reports that can help you decide if you need to make any changes to your applications. You access these reports from the Analysis results screen.
The reports are described in detail in MTA reports in the CLI Guide.
Procedure
- In the web console, click Analysis results.
Click the Reports icon
 beside the analysis you want to investigate.
The All applications screen of the reports is displayed.
3.5. Updating an analysis configuration
You can update an analysis configuration, for example, with a different transformation target, advanced option, or a custom rule. Then you can run the updated analysis in your project.
Procedure
In the web console, click Analysis configuration.
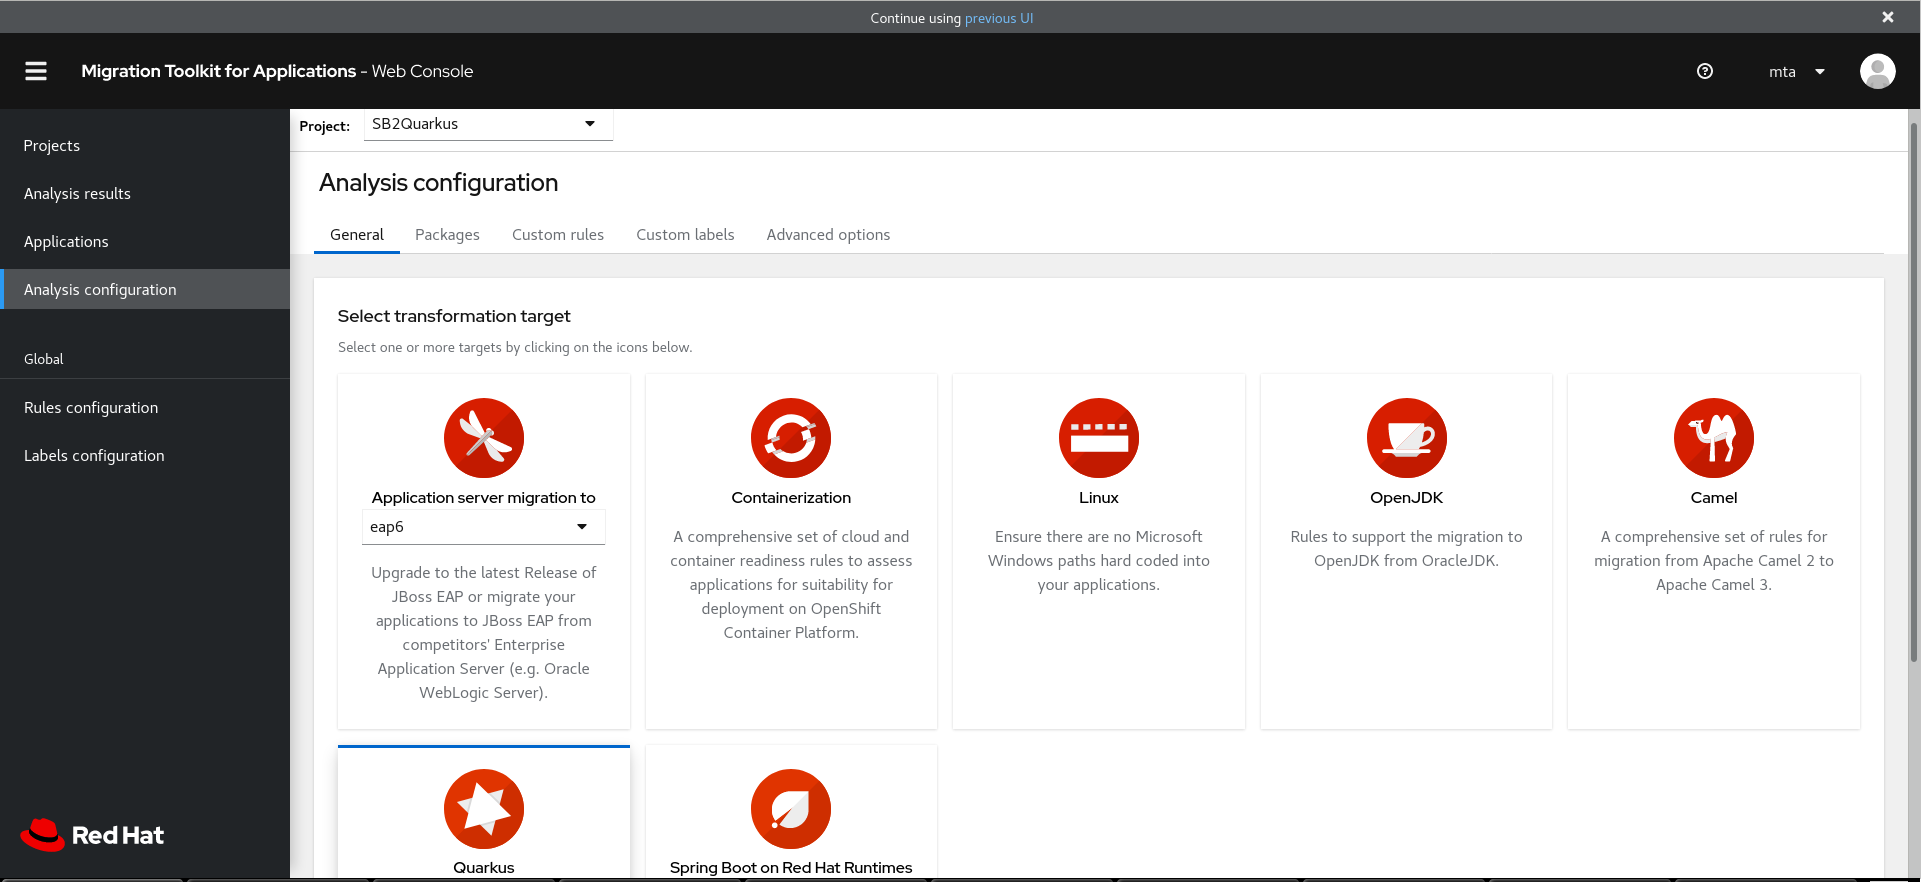
- Select a Project.
- Click the appropriate tabs and make your changes.
Click Save or Save and run.
The project is displayed in the Projects screen.
3.6. Adding global custom rules
MTA includes a preconfigured set of global rules, which apply to all projects.
You can define your own custom global rules.
For information on writing custom MTA rules, see the MTA Rules Development Guide.
Procedure
- In the web console, click Rules configuration.
- Click Add rules.
To upload a ruleset file, click the Upload tab, click Browse, select one or more files, and click Close.
A ruleset file must have an
.mta.xmlor.windup.xmlextension. The uploaded file is stored on the MTA server.To register the server path of a ruleset file, click the Server path tab, enter the Rules path, and click Save.
Registering the server path ensures that the MTA server always uses the latest version of the ruleset files.
The Custom rules list displays the rules.
3.7. Adding global custom labels
MTA includes a preconfigured set of global labels, which apply to all projects.
You can define your own custom global labels.
Procedure
- In the web console, click Labels configuration.
- Click Add label.
To upload a labelset file, click the Upload tab, click Browse, select one or more files, and click Close.
A labelset file must have an
.mta.label.xmlor.windup.label.xmlextension. The uploaded file is stored on the MTA server.To register the server path of a labelset file, click the Server path tab, enter the Labels path, and click Save.
Registering the server path ensures that the MTA server always uses the latest version of the labelset files.
The Custom labels list displays the labels.
Chapter 4. Configuring authentication for the web console
You can configure the web console to require authentication, which is handled by Red Hat Single Sign-On. When enabled, users will be required to authenticate before being granted access to the web console.
It is recommended to complete the following steps to configure authentication for the web console.
Enable authentication for the web console.
NoteIf you have installed web console on OpenShift, authentication is already enabled and cannot be disabled.
- Change the administrative user’s credentials.
- Remove the default web console user.
- Add web console users.
4.1. Enabling authentication for web console
If you have installed web console on OpenShift, authentication is already enabled and cannot be disabled.
Run the following script to require users to log in before accessing the web console. This script configures the Red Hat Single Sign-On login page to require users to authenticate before granting access to the web console.
$ <MTA_HOME>/switch_to_authentication_required.sh
In a Windows environment, use the switch_to_authentication_required.bat script.
Now, whenever you start the web console, users will be required to authenticate to access it.
4.2. Changing the administrative user’s credentials
When you enable authentication for the web console, a default administrative user is provided with the username admin and password password. You should change this password so that only those that are authorized can make further changes to web console users.
Follow these steps to change the default administrative user’s password.
- Make sure that the web console is running.
Open the Red Hat Single Sign-On administration console.
For a
.zipinstallation:-
Navigate to
http://localhost:8080/auth/in a browser. - Select Administration Console to access the Red Hat Single Sign-On administration console.
-
Navigate to
For an OpenShift installation:
Navigate to
<OPENSHIFT_URL>/console/project/mta/overviewin a browser.NoteIf you renamed the OpenShift project when deploying, replace
mtawith the name of your project.- Click the link in the SSO HTTPS application and add "/auth" to the end of the URL.
- Select Administration Console to access the Red Hat Single Sign-On administration console.
-
Log in with the default credentials of
adminandpassword. - In the upper left corner, select the Master realm from the drop down.
- In the left-side navigation menu, select Users and then click View all users.
- From the admin user’s row, click Edit.
- Select the Credentials tab.
- Enter the new password in the New Password and Password Confirmation fields.
- Change the Temporary field to OFF to not require the user to change the password upon next login.
- Click Reset Password and then click Change password in the popup.
You can also remove this default administrative user completely and create your own administrative users. However, be sure to add the new users before removing the default user.
4.3. Removing the default web console user
A default web console user is provided with the web console with the username mta and password password. When you enable authentication for the web console, you should remove this user so that the web console can only be accessed by authorized users.
Follow these steps to remove the default web console user.
- Make sure that the web console is running.
Open the Red Hat Single Sign-On administration console.
For a
.zipinstallation:-
Navigate to
http://localhost:8080/auth/in a browser. - Select Administration Console to access the Red Hat Single Sign-On administration console.
-
Navigate to
For an OpenShift installation:
Navigate to
<OPENSHIFT_URL>/console/project/mta/overviewin a browser.NoteIf you renamed the OpenShift project when deploying, replace
mtawith the name of your project.- Click the link in the SSO HTTPS application and add "/auth" to the end of the URL.
- Select Administration Console to access the Red Hat Single Sign-On administration console.
-
Log in with an administrative user’s credentials. The default credentials are
adminandpassword. - In the upper left corner, select the mta realm from the drop down.
- From the left-side navigation menu, select Users and then click View all users.
- From the mta user’s row, click Delete and confirm.
4.4. Adding a web console user
When authentication is enabled for the web console, administrators will need to add users so that they can access the web console.
Follow these steps to add a new web console user.
- Make sure that the web console is running.
Open the Red Hat Single Sign-On administration console.
For a
.zipinstallation:-
Navigate to
http://localhost:8080/auth/in a browser. - Select Administration Console to access the Red Hat Single Sign-On administration console.
-
Navigate to
For an OpenShift installation:
Navigate to
<OPENSHIFT_URL>/console/project/mta/overviewin a browser.NoteIf you renamed the OpenShift project when deploying, replace
mtawith the name of your project.- Click the link in the SSO HTTPS application and add "/auth" to the end of the URL.
- Select Administration Console to access the Red Hat Single Sign-On administration console.
-
Log in with an administrative user’s credentials. The default credentials are
adminandpassword. - In the upper left corner, select the mta realm from the drop down.
- From the left-side navigation menu, select Users and then click Add user.
- Enter the Username, First Name, Last Name, and any other required fields and click Save.
- Once the user has been added, select the Credentials tab.
- Enter a temporary password in the New Password and Password Confirmation fields, and leave the Temporary field set to ON.
- Click Reset Password and then click Change password in the confirmation popup.
The user is enabled by default and will be required to set a new password when they log in to the web console with this temporary password.
Revised on 2022-02-22 12:45:32 UTC