-
Language:
English
-
Language:
English
Red Hat Training
A Red Hat training course is available for JBoss Enterprise Application Platform Common Criteria Certification
11.9.9. Creating Scoped Roles
Scoped Roles are user-defined roles that grant the permissions of one of the standard roles but only for one or more specified server groups or hosts. This topic shows how to create scoped roles.
Only users in the SuperUser or Administrator roles can perform this configuration.
Scoped Role configuration in the management console can be found by following these steps:
- Login to the Management Console
- Click on the Administration tab
- Expand the Access Control item on the left and select Role Assignment
- Select ROLES tab, and then the Scoped Roles tab within it.

Figure 11.7. Scoped Role Configuration in the Management Console
The Scoped Roles section of the Management Console consists of two main areas, a table containing a list of the currently configured scoped roles, and the Selection panel which displays the details of the role currently selected in the table.
The following procedures show how to perform configuration tasks for Scoped Roles.
Procedure 11.22. Add a New Scoped Role
- Login to the Management Console
- Navigate tot he Scoped Roles area of the Roles tab.
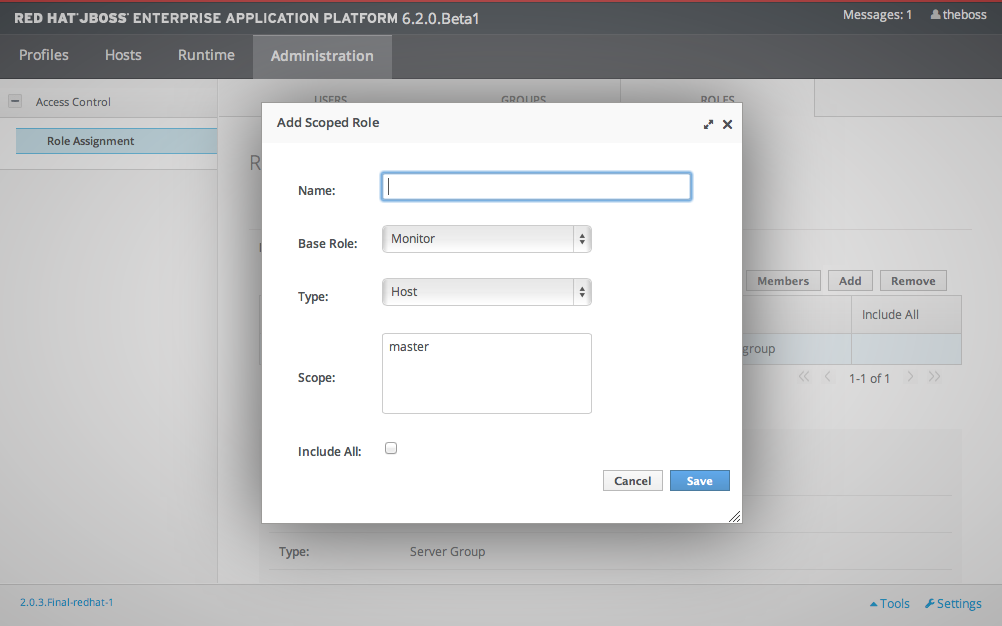
- Click the Add button. The Add Scoped Role dialog appears.

Figure 11.8. Add Scoped Role Dialog
- Specify the following details:
- Name, the unique name for the new scoped role.
- Base Role, the role which this role will base its permissions on.
- Type, whether this role will be restricted to hosts or server groups.
- Scope, the list of hosts or server groups that the role is restricted to. Multiple entries can be selected.
- Include All, should this role automatically include all users. Defaults to no.
- Click the Save button and the dialog will close and the newly created role will appear in the table.
Procedure 11.23. Edit a Scoped Role
- Login to the Management Console
- Navigate to the Scoped Roles area of the Roles tab.
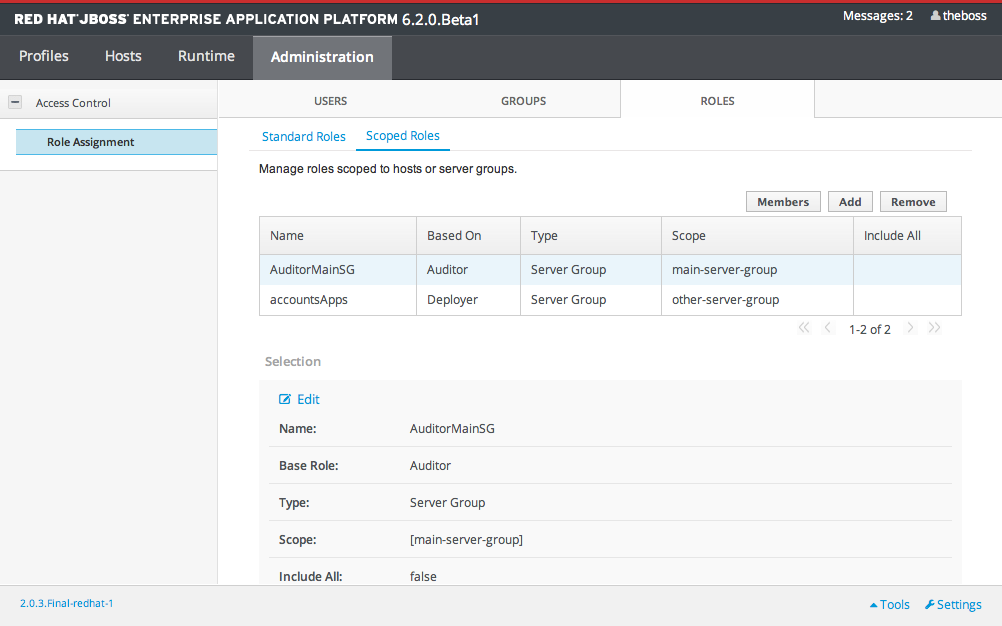
- Click on the scoped role you want to edit in the table. The details of that role appears in the Selection panel below the table.

Figure 11.9. Role Selected
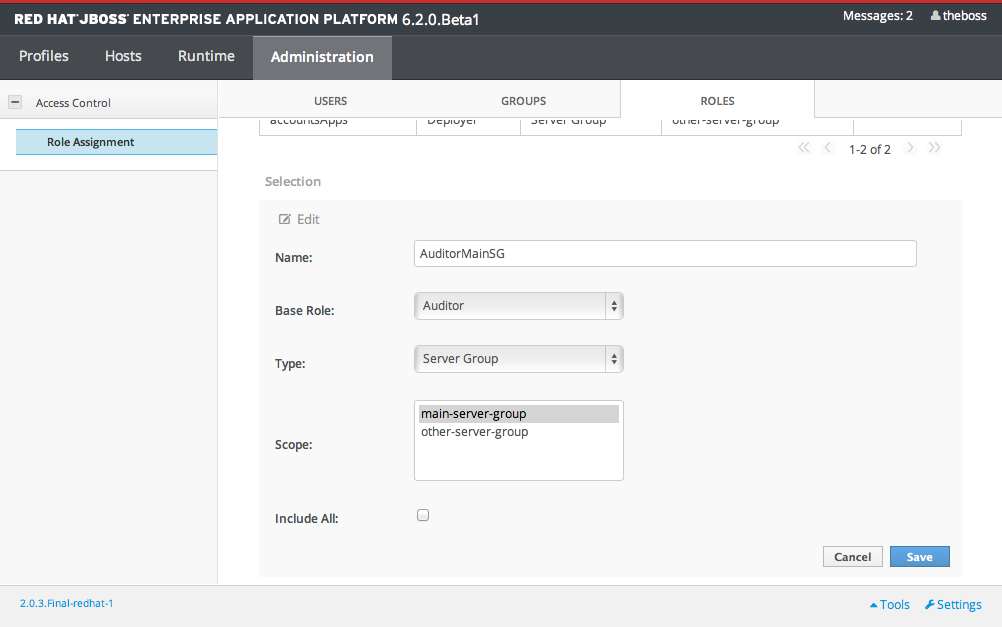
- Click the Edit link in the Selection panel. The Selection panel enters edit mode.

Figure 11.10. Selection Panel in Edit Mode
- Update the details you need to change and click the Save button. The Selection panel returns to it's previous state. Both the Selection panel and table show the newly updated details.
Procedure 11.24. View Scoped Role Members
- Login to the Management Console
- Navigate to the Scoped Roles area of the Roles tab.
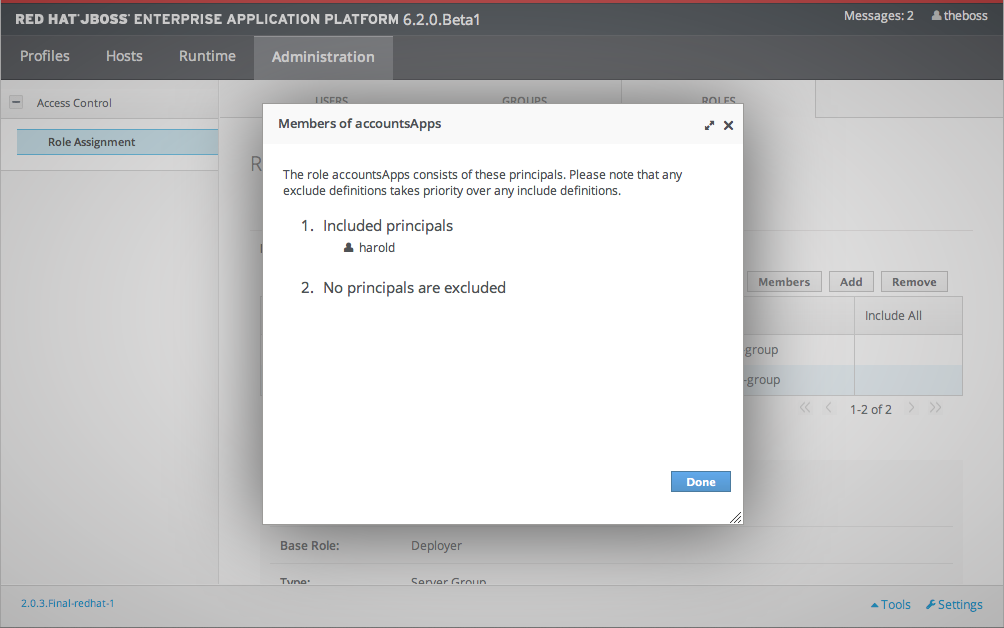
- Click on the scoped role in the table that you want to view the Members of, then click the Members button. The Members of role dialog appears. It shows users and groups that are included or excluded from the role.

Figure 11.11. Role Membership Dialog
- Click the Done button when you have finished reviewing this information.
Procedure 11.25. Delete a Scoped Role
Important
A Scoped Role cannot be deleted if users or groups are assigned to it. Remove the role assignments first, and then delete it.
- Login to the Management Console
- Navigate to the Scoped Roles area of the Roles tab.
- Select the scoped role to be removed in the table.
- Click the Remove button. The Remove Scoped Role dialog appears.
- Click the Confirm button.The dialog closes and the role is removed.

