
Red Hat Training
A Red Hat training course is available for JBoss Enterprise Application Platform Common Criteria Certification
Common Criteria Configuration Guide
for use with JBoss Enterprise Application Platform 5 Common Criteria Certification
Edition 5.1.1
Abstract
Chapter 1. Introduction
1.1. Purpose of this Document
/jboss-as directory in the JBoss Enterprise Application Platform root installation directory. For example, if you used the ZIP installation package and extracted the JBoss Enterprise Application Platform binary to your Linux /home directory, JBOSS_HOME refers to the home/[user]/jboss-eap-[version]/jboss-as/ directory. If you installed JBoss Enterprise Application Platform with the ISO distribution, JBOSS_HOME refers to /var/lib/jbossas.
1.2. What is a Common Criteria Compliant System?
1.3. Certified Documentation
- PDF documentation bundle
- on-line
Warning
Chapter 2. Requirements for the Evaluated Configuration
2.1. Software Requirements
2.1.1. Java Virtual Machine
- Sun JRE 1.6.x
- IBM JRE 1.6.x
- OpenJDK JRE 1.6.x
Important
2.1.2. Operating System
- Red Hat Enterprise Linux 6 x86
- Red Hat Enterprise Linux 6 x86-64
- Red Hat Enterprise Linux 5 x86
- Red Hat Enterprise Linux 5 x86-64
- Red Hat Enterprise Linux 4 x86
- Red Hat Enterprise Linux 4 x86-64
- Solaris 10 SPARC 64
- Solaris 10 x86-64
- Solaris 10 x86
- Solaris 9 SPARC (64-bit)
- Solaris 9 SPARC (32-bit)
- Solaris 9 x86
- Microsoft Windows Server 2008 x86-64
- Microsoft Windows Server 2008 x86
- Microsoft Windows Server 2003 x86-64
- Microsoft Windows Server 2003 x86
2.1.3. Database Servers
Table 2.1. Allowed 5.1.0 Database and JDBC Driver Versions
| Database | JDBC Driver |
|---|---|
| IBM DB2 9.7 |
IBM DB2 JDBC Universal Driver Architecture version 4.9.78
Driver download: http://www-947.ibm.com/support/entry/portal/Overview/Software/Information_Management/IBM_Data_Server_Client_Packages
$ sha256sum db2jcc4.jar 23e82e3e0474a8d914c7106293c47c47b2701270b76a78256a34da672f11f07b ./db2-97/jdbc4/db2jcc4.jar |
| Oracle 10g R2 (v10.2.0.4) |
Oracle 10g R2 version 10.2.0.4
Driver download: http://www.oracle.com/technology/software/tech/java/sqlj_jdbc/index.html.
$ sha256sum ojdbc14.jar 7ba80b6ee4f3433f88c8d878fb0dbc7d04fea736c2a6df8d34af1a4f970670a6 ./oracle10g/jdbc4/ojdbc14.jar |
| Oracle 11g R1 (v11.1.0.7.0) |
Oracle 11g R1 version 11.2.0.1.0
Driver download: http://www.oracle.com/technology/software/tech/java/sqlj_jdbc/index.html.
$ sha256sum ojdbc6.jar 0414637bc6876df9f611463e846ffe2753aaf2a29a32a822bb889be0d5494a1f ./oracle11gR1/jdbc4/ojdbc6.jar |
| Oracle 11g R1 RAC v(11.1.0.7.0) |
Oracle 11g RAC version 11.2.0.1.0
Driver download: http://www.oracle.com/technology/software/tech/java/sqlj_jdbc/index.html.
$ sha256sum ojdbc6.jar 0414637bc6876df9f611463e846ffe2753aaf2a29a32a822bb889be0d5494a1f ./oracle11gR1RAC/jdbc4/ojdbc6.jar |
| Oracle 11g R2 |
Oracle JDBC Driver version 11.2.0.1.0
Driver download: http://www.oracle.com/technology/software/tech/java/sqlj_jdbc/index.html.
$ sha256sum ojdbc6.jar 0414637bc6876df9f611463e846ffe2753aaf2a29a32a822bb889be0d5494a1f ./oracle11gR2/jdbc4/ojdbc6.jar |
| Oracle 11g R2 RAC |
Oracle JDBC Driver version 11.2.0.1.0
Driver download: http://www.oracle.com/technology/software/tech/java/sqlj_jdbc/index.html.
$ sha256sum ojdbc6.jar 0414637bc6876df9f611463e846ffe2753aaf2a29a32a822bb889be0d5494a1f ./oracle11gR2RAC/jdbc4/ojdbc6.jar |
| MySQL v5.0 (v5.0.79) |
MySQL Connector/J version 5.0.8
Driver download: http://dev.mysql.com/downloads/connector/j/.
$ sha256sum mysql-connector-java-5.0.8.zip 94c4eb6185ec2e8e9d6609903ad66c7b015ffb349cfe984c0538a1a02e675538 ./mysql50/jdbc4/mysql-connector-java-5.0.8-bin.jar |
| MySQL v5.1 (v5.1.36) |
MySQL Connector/J version 5.1.13
Driver download: http://dev.mysql.com/downloads/connector/j/.
$ sha256sum mysql-connector-java-5.1.13.zip 90492c85fad7301740e2aa2c0c86d9473b04baab3cd2870f99f8955c569f671d ./mysql51/jdbc4/mysql-connector-java-5.1.13-bin.jar |
| Microsoft SQL Server 2005 |
Microsoft SQL Server 2005 JDBC driver v3.0
Driver download: http://www.microsoft.com/downloads/details.aspx?familyid=99B21B65-E98F-4A61-B811-19912601FDC9&displaylang=en.
$ sha256sum sqljdbc4.jar 306170cb246935349121f854ddab0d70e30c66d511bda8fe173cd2f2b8d1718b ./mssql2005/jdbc4/sqljdbc4.jar |
| Microsoft SQL Server 2008 |
Microsoft SQL Server JDBC Driver 3.0
Driver download: http://www.microsoft.com/downloads/details.aspx?FamilyId=6D483869-816A-44CB-9787-A866235EFC7C&displaylang=en.
$ sha256sum sqljdbc4.jar
af3c54d8857ebbfdc34a9c5a51a7ee91e7dfa583205c81b6e0ee6208efe96e04
./mssql2008/jdbc4/sqljdbc4.jar
Note
The JDBC 3.0 driver for MS SQL Server 2008 has changed elements of the date/time dialect which causes the <methodname> org.hibernate.test.hql.ASTParserLoadingTest</methodname> test and the <methodname>org.hibernate.test.stateless. StatelessSessionTest</methodname> tests to fail.
|
| PostgreSQL v8.2.17 |
JDBC4 Postgresql Driver, version 8.2-510
Driver download: http://jdbc.postgresql.org/download.
$ sha256sum postgresql-8.2-510.jdbc4.jar 5c9e0c334b2d1dcda17c34a36309a331ebd62ae3104fddabcca69695fdc48c23 ./postgresql82/jdbc4/postgresql-8.2-510.jdbc4.jar |
| PostgreSQL v8.3.11 |
JDBC4 Postgresql Driver, version 8.3-605
Driver download: http://jdbc.postgresql.org/download.
$ sha256sum postgresql-8.3-605.jdbc4.jar b007b5f90258ccf98346d51fcd4475bd7d0dc089492442dceb321baddb2bb777 ./postgresql83/jdbc4/postgresql-8.3-605.jdbc4.jar |
| Sybase ASE 15.0.3 |
Sybase jConnect JDBC driver v7 (Build 26502)
Driver download: http://publib.boulder.ibm.com/infocenter/db2luw/v9/index.jsp?topic=/com.ibm.db2.udb.uprun.doc/doc/r0011932.htm
$ sha256sum jconn4-26502.jar 44cec7a2dc3dfe9b968c1c12c8f06e0c2ad412da0c34fb6b2137805608a4442b ./sybase15/jdbc4/jconn4-26502.jar |
Note
sha256sum command line examples given are accurate for most Linux and Unix operating systems. Mac OS X includes the equivalent command shasum -a 256.
2.1.4. Database Servers
Table 2.2. Allowed 5.1.1 Database and JDBC Driver Versions
| Database | JDBC Driver |
|---|---|
| IBM DB2 9.7 |
IBM DB2 JDBC Universal Driver Architecture version 4.12.55
Driver download: http://www-947.ibm.com/support/entry/portal/Overview/Software/Information_Management/IBM_Data_Server_Client_Packages
$ sha256sum db2jcc4.jar 23e82e3e0474a8d914c7106293c47c47b2701270b76a78256a34da672f11f07b ./db2-97/jdbc4/db2jcc4.jar |
| Oracle 10g R2 (v10.2.0.4) |
Oracle 10g R2 version 10.2.0.5
Driver download: http://www.oracle.com/technology/software/tech/java/sqlj_jdbc/index.html.
$ sha256sum ojdbc14.jar 7ba80b6ee4f3433f88c8d878fb0dbc7d04fea736c2a6df8d34af1a4f970670a6 ./oracle10g/jdbc4/ojdbc14.jar |
| Oracle 11g R1 (v11.1.0.7.0) |
Oracle 11g R1 version 11.1.0.7
Driver download: http://www.oracle.com/technology/software/tech/java/sqlj_jdbc/index.html.
$ sha256sum ojdbc6.jar 0414637bc6876df9f611463e846ffe2753aaf2a29a32a822bb889be0d5494a1f ./oracle11gR1/jdbc4/ojdbc6.jar |
| Oracle 11g R1 RAC v(11.1.0.7.0) |
Oracle 11g RAC version 11.1.0.7
Driver download: http://www.oracle.com/technology/software/tech/java/sqlj_jdbc/index.html.
$ sha256sum ojdbc6.jar 0414637bc6876df9f611463e846ffe2753aaf2a29a32a822bb889be0d5494a1f ./oracle11gR1RAC/jdbc4/ojdbc6.jar |
| Oracle 11g R2 |
Oracle JDBC Driver version 11.2.0.2.0
Driver download: http://www.oracle.com/technology/software/tech/java/sqlj_jdbc/index.html.
$ sha256sum ojdbc6.jar 0414637bc6876df9f611463e846ffe2753aaf2a29a32a822bb889be0d5494a1f ./oracle11gR2/jdbc4/ojdbc6.jar |
| Oracle 11g R2 RAC |
Oracle JDBC Driver version 11.2.0.1.0
Driver download: http://www.oracle.com/technology/software/tech/java/sqlj_jdbc/index.html.
$ sha256sum ojdbc6.jar 0414637bc6876df9f611463e846ffe2753aaf2a29a32a822bb889be0d5494a1f ./oracle11gR2RAC/jdbc4/ojdbc6.jar |
| MySQL v5.0 (v5.0.79) |
MySQL Connector/J version 5.0.8
Driver download: http://dev.mysql.com/downloads/connector/j/.
$ sha256sum mysql-connector-java-5.0.8.zip 94c4eb6185ec2e8e9d6609903ad66c7b015ffb349cfe984c0538a1a02e675538 ./mysql50/jdbc4/mysql-connector-java-5.0.8-bin.jar |
| MySQL v5.1 (v5.1.36) |
MySQL Connector/J 5.1.17
Driver download: http://dev.mysql.com/downloads/connector/j/.
$ sha256sum mysql-connector-java-5.1.17.zip 90492c85fad7301740e2aa2c0c86d9473b04baab3cd2870f99f8955c569f671d ./mysql51/jdbc4/mysql-connector-java-5.1.13-bin.jar |
| Microsoft SQL Server 2005 |
Microsoft SQL Server 2005 JDBC driver v3.0.1301.101
Driver download: http://www.microsoft.com/downloads/details.aspx?familyid=99B21B65-E98F-4A61-B811-19912601FDC9&displaylang=en.
$ sha256sum sqljdbc4.jar 306170cb246935349121f854ddab0d70e30c66d511bda8fe173cd2f2b8d1718b ./mssql2005/jdbc4/sqljdbc4.jar |
| Microsoft SQL Server 2008 R2 |
Microsoft SQL Server JDBC Driver 3.0.1301.101
Driver download: http://www.microsoft.com/downloads/details.aspx?FamilyId=6D483869-816A-44CB-9787-A866235EFC7C&displaylang=en.
$ sha256sum sqljdbc4.jar
af3c54d8857ebbfdc34a9c5a51a7ee91e7dfa583205c81b6e0ee6208efe96e04
./mssql2008/jdbc4/sqljdbc4.jar
Note
The JDBC 3.0 driver for MS SQL Server 2008 has changed elements of the date/time dialect which causes the <methodname> org.hibernate.test.hql.ASTParserLoadingTest</methodname> test and the <methodname>org.hibernate.test.stateless. StatelessSessionTest</methodname> tests to fail.
|
| PostgreSQL v8.2.17 |
JDBC4 Postgresql Driver, version 8.2-511
Driver download: http://jdbc.postgresql.org/download.
$ sha256sum postgresql-8.2-510.jdbc4.jar 5c9e0c334b2d1dcda17c34a36309a331ebd62ae3104fddabcca69695fdc48c23 ./postgresql82/jdbc4/postgresql-8.2-510.jdbc4.jar |
| PostgreSQL v8.3.11 |
JDBC4 Postgresql Driver, version 8.3-606
Driver download: http://jdbc.postgresql.org/download.
$ sha256sum postgresql-8.3-605.jdbc4.jar b007b5f90258ccf98346d51fcd4475bd7d0dc089492442dceb321baddb2bb777 ./postgresql83/jdbc4/postgresql-8.3-605.jdbc4.jar |
| Sybase ASE 15.0.3 |
Sybase jConnect JDBC driver v7 (Build 26502/EBF17993)
Driver download: http://publib.boulder.ibm.com/infocenter/db2luw/v9/index.jsp?topic=/com.ibm.db2.udb.uprun.doc/doc/r0011932.htm
$ sha256sum jconn4-26502.jar 44cec7a2dc3dfe9b968c1c12c8f06e0c2ad412da0c34fb6b2137805608a4442b ./sybase15/jdbc4/jconn4-26502.jar |
Note
sha256sum command line examples given are accurate for most Linux and Unix operating systems. Mac OS X includes the equivalent command shasum -a 256.
2.2. Physical Requirements
2.3. Personnel Requirements
2.4. Connectivity Requirements
2.4.1. Cluster Connectivity Requirements
- the network protocol is TCP
- the destination port is 8080 or 8443
2.5. Configuration Requirements
production server configuration to comply with CC requirements. It is recommended, however, to back up the production configuration prior to making the changes shown in the following subsections.
JBOSS_HOME/server/production directory. If you are using Microsoft Windows you can use Windows Explorer to make a copy of this folder using copy-paste and rename the copy to production.backup.
cp -pr JBOSS_HOME/server/production JBOSS_HOME/server/production.backup
2.5.1. General Restrictions
- JBossWS
- The WS CFX and WS Native stack are allowed. The WS Metro stack is not allowed in the evaluated configuration.
- Management Consoles
- The following deployed applications must be secured so they are accessible by trusted administrators only. The applications must be removed from the certified configuration if this condition is not met.
- JMX Console (
jmx-console.war)Location:jboss-as/server/production/deploy/jmx-console.war/ - Web Console (
web-console.war)Location:jboss-as/server/production/deploy/management/ - Administration Console (
admin-console.war)Location:jboss-as/server/production/deploy/admin-console.war/
If you do not intend to use one or more of the management consoles, delete the entire directory related to each. Doing this guarantees that unauthorized users will not be able to access your system through an unused, and potentially unsecured management console.
2.5.2. Setup Configuration
Procedure 2.1. Evaluated Configuration Setup Configuration
Disable Simple Network Management Protocol (SNMP)
Delete the directoryJBOSS_HOME/server/production/deploy/snmp-adaptor.sar$ rm -rf JBOSS_HOME/server/production/deploy/snmp-adaptor.sar
Disable Remote Method Invocation (RMI) under the Internet Inter-ORB Protocol (IIOP)
To disable RMI/IIOP delete following files:JBOSS_HOME/server/production/conf/jacorb.propertiesJBOSS_HOME/server/production/deploy/iiop-service.xmlJBOSS_HOME/server/production/lib/jacorb.jar
$ rm JBOSS_HOME/server/production/conf/jacorb.properties
$ rm JBOSS_HOME/server/production/deploy/iiop-service.xml
$ rm JBOSS_HOME/server/production/lib/jacorb.jar
Disable AJP from JBoss Web.
Comment out the following section fromJBOSS_HOME/server/production/deploy/jbossweb.sar/server.xml:<Connector protocol="AJP/1.3" port="8009" address="${jboss.bind.address}" redirectPort="8443" />Disable Clustering High-Availability JNDI service (port 1102)
To disable clustering HA, do the following:- Delete the file
JBOSS_HOME/server/production/deploy/cluster/hajndi-jboss-beans.xmlrm JBOSS_HOME/server/production/deploy/cluster/hajndi-jboss-beans.xml
- Disable the HA Naming service interface via HTTP by commenting out following <mbean> definition in
JBOSS_HOME/server/production/deploy/httpha-invoker.sar/META-INF/jboss-service.xml:<mbean code="org.jboss.invocation.http.server.HttpProxyFactory" name="jboss:service=invoker,type=http,target=HAJNDI">
Enable Password Hashing
Use password hashing and do not store plain text passwords on the server.Note
For more information regarding configuring password hashing, refer to the Password Hashing section in the JBoss Security Guide.Disable Technology Preview Components
Ensure Technology Preview components are disabled.Note
Section 2.5.8, “Technology Preview Components” details the components shipped with JBoss Enterprise Application Platform that must be disabled, and how to disable them.
2.5.3. Configuring Audit Logging
Important
Procedure 2.2. Monitor Server Startup and Shutdown Events
JBOSS_HOME/server/production/conf/jboss-log4j.xml
Uncomment Security Audit Appender
Uncomment the following block.<!-- Security AUDIT Appender --> <appender name="AUDIT" class="org.jboss.logging.appender.DailyRollingFileAppender"> <errorHandler class="org.jboss.logging.util.OnlyOnceErrorHandler"/> <param name="File" value="${jboss.server.log.dir}/audit.log"/> <param name="Append" value="true"/> <param name="DatePattern" value="'.'yyyy-MM-dd"/> <layout class="org.apache.log4j.PatternLayout"> <param name="ConversionPattern" value="%d %-5p [%c] (%t:%x) %m%n"/> </layout> </appender>Uncomment Security Audit Provider
Uncomment the following block:<!-- Category specifically for Security Audit Provider --> <category name="org.jboss.security.audit.providers.LogAuditProvider" additivity="false"> <priority value="TRACE"/> <appender-ref ref="AUDIT"/> </category>
Configure SecurityInterceptor logging level
Set the logging level of theSecurityInterceptorclass toTRACEby adding the <priority> element to the root <category> element.<category name="org.jboss.ejb.plugins.SecurityInterceptor"> <priority value="TRACE" /> <appender-ref ref="AUDIT" /> </category>
Enable logging for ServerImpl log messages
Set the priority and appender-ref levels for the Microcontainer bootstrap by adding the <category> block as specified.<category name="org.jboss.bootstrap.microcontainer"> <priority value="INFO"/> <appender-ref ref="AUDIT"/> </category>
Enable logging for web-based requests
If you need additional logging for web-based requests, uncomment theAccessLogValveinJBOSS_HOME/server/production/deploy/jbossweb.sar/server.xml.<Valve className="org.apache.catalina.valves.AccessLogValve" prefix="localhost_access_log." suffix=".log" pattern="common" directory="${jboss.server.home.dir}/log" resolveHosts="false" />The access log is saved in thelogdirectory of the server configuration.Update ConversionPattern
Update the ConversionPattern parameter in the appender/layout element to show thread information by replacing the Default Pattern with the Full Pattern:<!--The full pattern: Date MS Priority [Category] (Thread:NDC) Message --> <param name="ConversionPattern" value="%d %-5r %-5p [%c] (%t:%x) %m%n"/>
2.5.4. Security Configuration
2.5.4.1. JBoss SX
org.jboss.security.auth.spi.UsersRolesLoginModuleorg.jboss.security.auth.spi.LdapLoginModuleorg.jboss.security.auth.spi.DatabaseServerLoginModuleorg.jboss.security.auth.spi.BaseCertLoginModule
org.jboss.security.plugins.JaasSecurityManagerorg.jboss.security.plugins.JaasSecurityDomain
org.jboss.security.authorization.modules.DelegatingAuthorizationModuleorg.jboss.security.integration.JNDIBasedSecurityRegistrationorg.jboss.security.auth.certs.SubjectDNMapping
2.5.4.2. JAAS Seam Configuration
2.5.4.3. Securing MBean Invokers
httpha-invoker.sar found in the deploy directory is a service that provides RMI/HTTP access for EJBs and the JNDI Naming service. This includes a servlet that processes posts of marshaled org.jboss.invocation.Invocation objects that represent invocations that should be dispatched onto the MBeanServer. Effectively this allows access to MBeans that support the detached invoker operation via HTTP when sending appropriately formatted HTTP posts. This servlet has to be protected against the use by unprivileged users. To secure this access point you need to secure the JMXInvokerServlet servlet found in the httpha-invoker.sar/invoker.war/WEB-INF/web.xml descriptor.
JBOSS_HOME/server/production/deploy/httpha-invoker.sar/invoker.war/WEB-INF/web.xml (deployment descriptor of the JMXInvokerServlet servlet) and remove the following lines from the web-app/security-constraint/web-resource-collection node:
<http-method>GET</http-method>
<http-method>POST</http-method>
jmx-invoker-service.xml is a service that exposes the JMX MBeanServer interface via an RMI compatible interface using the RMI/JRMP detached invoker service. This interface has to be made unavailable to unprivileged users which can be done by using the org.jboss.jmx.connector.invoker.AuthenticationInterceptor interceptor for performing identification and authentication using JAAS. Additionally, access control has to be configured using the interceptors of either org.jboss.jmx.connector.invoker.RolesAuthorization or org.jboss.jmx.connector.invoker.ExternalizableRolesAuthorization.
Note
2.5.4.4. JBoss Web
org.jboss.web.tomcat.security.JBossWebRealm) cannot be replaced. The same is true for the authenticator classes defined for each authentication method (BASIC, CLIENT-CERT, DIGEST, FORM, NONE) in JBOSS_HOME/server/production/deployers/jbossweb.deployer/META-INF/war-deployers-jboss-beans.xml.
allRolesMode within JBOSS_HOME/server/production/deploy/jbossweb.sar/server.xml must be set to strict. This requires the authenticated user to be assigned to one of the web-app/security-role/role-name roles in order to be authorized.
<Realm className="org.jboss.web.tomcat.security.JBossWebRealm"
  certificatePrincipal="org.jboss.security.auth.certs.SubjectDNMapping"
allRolesMode="strict" />
2.5.4.5. EJB Authorization Policy
org.jboss.security.authorization.modules.DelegatingAuthorizationModuleorg.jboss.security.authorization.modules.JACCAuthorizationModule
security-policies-jboss-beans.xml and extend the configuration using the settings in the application-specific security domain contained in the EJB.
JACCAuthorizationModule or DelegatingAuthorizationModule, refer to the Authentication chapter in the Security Guide.
2.5.5. Java Security Manager Policy File
- Install the jbossas-security-policy-cc package.
- Configure the Java Security Manager to use the policy file.
security_cc.policy file, which is installed in the JBOSS_HOME/bin/ directory.
run.conf (Linux) or run.conf.bat (Windows) file. For complete instructions on configuring the JSM to use the security_cc.policy, refer to the Using the Security Manager section in the Security Guide.
2.5.6. Database Configuration
production server profile.
Procedure 2.3. Configure Database
Create DefaultDS file
Create a default DS file for the desired database. Examples of this file are located inJBOSS_HOME/docs/examples/jca.Important
ADefaultDSfile must be supplied in theJBOSS_HOME/server/production/deploydirectory.Delete HSQLDB files
Delete the following files as they refer to the HSQLDB database:JBOSS_HOME/server/production/deploy/hsqldb-ds.xmlJBOSS_HOME/common/lib/hsqldb.jarJBOSS_HOME/common/lib/hsqldb-plugin.jarJBOSS_HOME/server/production/deploy/messaging/hsqldb-persistence-service.xml
Remove HSQLDB Security Domain
Comment out the security domain forHsqlDbRealmin theJBOSS_HOME/server/production/conf/login-config.xmlfile as shown.<!-- Security domains for testing new jca framework <application-policy name = "HsqlDbRealm"> <authentication> <login-module code = "org.jboss.resource.security.ConfiguredIdentityLoginModule" flag = "required"> <module-option name = "principal">sa</module-option> <module-option name = "userName">cctest</module-option> <module-option name = "password">cc1248</module-option> <module-option name = "managedConnectionFactoryName"> jboss.jca:service=LocalTxCM,name=DefaultDS </module-option> </login-module> </authentication> </application-policy> -->Copy persistence service configuration file
The[database]-persistence-service.xmlfile contains the persistence service definition for JBoss Messaging, for the database specified by the [database] in the filename.Copy the[database]-persistence-service.xmlfile that corresponds to the database you are using from theJBOSS_HOME/docs/examples/jmsdirectory toJBOSS_HOME/server/production/deploy.Note
The table definitions in any[database]-persistence-service.xmlare not optimized for performance.Relocate JDBC driver libraries
Place the supported JDBC driver libraries in the directoryJBOSS_HOME/server/production/lib/.Important
Ensure you follow the policy guidelines in Section 2.5.5, “Java Security Manager Policy File ” and choose a supported JDBC driver from Table 2.1, “Allowed 5.1.0 Database and JDBC Driver Versions” or Table 2.2, “Allowed 5.1.1 Database and JDBC Driver Versions”to maintain an evaluated configuration.Add JDBC Grant Statement
Add the following grant statement for the JDBC driver you are using to the Java Security Manager policy file. The policy file is located inJBOSS_HOME/bin/security_cc.policy. Substitute the directory name of the JDBC driver where [cc.jdbc.driver] is specified in the code sample.Important
Each JDBC driver can use different permissions. Check the JDBC driver documentation and replacejava.security.AllPermission;with a secure permission scheme supported by the driver.// granting permissions to JDBC driver grant codeBase "file:${jboss.server.home.dir}/lib/[cc.jdbc.driver]" { permission java.security.AllPermission; };Oracle Database Persistence Plugin Optimization
When using the Oracle Database, the database persistence plugin definition must be changed inJBOSS_HOME/server/production/deploy/ejb2-timer-service.xmlfrom being:<attribute name="DatabasePersistencePlugin"> org.jboss.ejb.txtimer.GeneralPurposeDatabasePersistencePlugin </attribute>
to being:<attribute name="DatabasePersistencePlugin"> org.jboss.ejb.txtimer.OracleDatabasePersistencePlugin </attribute>
Note
java:/DefaultDS. The database has to be separated from all application databases: user applications must not provide additional tables to the java:/DefaultDS database, but must use their own dedicated databases to store their objects.
java:/DefaultDS database, as such injections are always limited to the connected database.
Note
2.5.7. Guidance on Configuring Java Security Permissions
Warning
- file permissions, except to files that are dedicated to the application
- network permissions
- permissions to load native code.
Important
java.security.AllPermission (or equivalent for your JDBC driver) to any of the user applications interacting with the certified system.
grant codeBase "file:${jboss.server.home.dir}/deploy/jmx-console.war/-" {
  permission java.security.AllPermission;
};/deploy directory.
TestDeployment.ear in the deploy directory of the certified system, then an example entry would be the following:
grant codeBase "file:${jboss.server.home.dir}/deploy/jmx-console.war/-" {
 permission java.util.PropertyPermission "*", "read";
 permission javax.security.auth.AuthPermission "createLoginContext.a_login";
 permission javax.security.auth.AuthPermission "getLoginConfiguration";
};TestDeployment.ear to read Java properties as well as the ability to create JAAS login context and obtain JAAS login configuration.
javax.management.MBeanPermission as specified in the Java MbeanServer interface:
2.5.8. Technology Preview Components
- PicketLink
- A security and identity framework that provides support for Security Assertion Markup Language (SAML) v2.0 and WS-Trust.The PicketLink technology preview folder is included in the root folder, at the same level as the
jboss-asfolder. If you leave thepicketlinkfolder as originally shipped in the EAP binary, PicketLink is unable to be launched, and subsequently interact with the certified configuration.
Chapter 3. Downloading and Verifying the Packages
Important
3.1. Verify the Authenticity of the Download Site
Procedure 3.1. Checking Site Security with Firefox
- In the address bar, click the security area at the beginning of the URL.
- From the pop-up box, click .
- From the Page Info window, click .
- The certificate displays details such as who the owner of the page is, who issued the certificate, when it was issued and when it expires as well as fingerprint verification strings.

Figure 3.1. The RHN SSL Certificate
3.2. JBoss Native Components Support
Important
Important
3.3. Zip Installation
3.3.1. Download Zip
Procedure 3.2. Downloading Files
- Open http://access.redhat.com in a web browser.
- Click the option in the menu across the top of the page.
- In the Downloads menu, click on .
- Enter your login information.Result:
You are taken to the Software Downloads page.
- Select
Application Platformfrom either the drop-down box or the menu on the left.Result:You are presented with a list of file downloads.
- Select either 5.1.0 or 5.1.1 from the Version drop-down box.Result:
You are presented with all versions of the selected platform.
Select the correct software
For 5.1.0, click theApplication Platform 5.1.0 Binarylink (not the download link).For 5.1.1, click theApplication Platform 5.1.1 Binarylink (not the download link).Result:You are presented with the Software Details screen, with SHA-256 information.
- On the displayed Software Details page, click the located next to the File drop-down box.
Note
Record the SHA-256 sum from the Software Details screen. You use this checksum to verify the authenticity of the download in Section 3.3.2, “Verifying the Downloaded Files” - Continue to Procedure 3.3, “Installation using ZIP file”
3.3.2. Verifying the Downloaded Files
sha256sum utility to calculate the checksum values of the files to compare to the supplied values on the website. The checksum values are also documented in Table 3.1, “5.1.0 SHA-256 checksum values” and Table 3.2, “5.1.1 SHA-256 checksum values” for completeness.
Note
shasum -a 256.
Example 3.1. Using the sha256sum tool on Linux or Unix
Download directory. If you saved the file to another location, or are using JBoss Enterprise Application Platform 5.1.1.GA, navigate to the correct directory and execute the sha256sum command in that directory.
[Download]$ sha256sum jboss-eap-5.1.0.zip
74d1e2cd49739f3c66fb0139de33a667 jboss-eap-5.1.0.zip
sha256sum utility must match the values displayed on the Downloads page for the file, and those documented in Table 3.1, “5.1.0 SHA-256 checksum values” or Table 3.2, “5.1.1 SHA-256 checksum values”. If they are not the same, your download is either incomplete or corrupted. You will need to download it again. If after several attempts you are unable to download a copy of the file that produces a valid checksum values you should open a support case to report the problem.
Table 3.1. 5.1.0 SHA-256 checksum values
| File | SHA-256 Checksum |
|---|---|
| jbossws-cxf-3.1.2.SP7-src-dist.zip | 44f7dce413fb462fe983ab7716f27abe34 9e6570575a890334c1ce9fc477e0a5 |
| jboss-ep-ws-cxf-5.1.0-installer.zip | 8e8aab592d9d02d855819b47740a6573 7f2f9b7ab4d5ceffc324a1043423d9a8 |
| jboss-ep-native-5.1.0-RHEL6-x86_64.zip | eee724ccd622101e57abd7151578b852 5a29ee5e5f03202caaeace664b0e8a58 |
| jboss-ep-native-5.1.0-RHEL6-i386.zip | 66a4d3a6b101e28dcb328bb7b804cc4a 7914d54646219f818d32409da0850e52 |
| jboss-ep-native-5.1.0-RHEL5-x86_64.zip | 1a3b341f592cda120e3dd7df8bd704466 e62ca082f533799fa20acc021e59ae8 |
| jboss-ep-native-5.1.0-RHEL5-i386.zip | 5e3434354b2ed7ab5211e0e1bbe4160c1 c5e1714f2cca5d7ffafd4457e5c29af |
| jboss-ep-native-5.1.0-RHEL4-x86_64.zip | 946a7b27b30a2b5edaae3d92630743fb8 8a37fde3d14b4d7ec93be5a540065b7 |
| jboss-ep-native-5.1.0-RHEL4-i386.zip | 09c145fa1e9a2cbbe504a3543e46efd66e ce3dbbbd5a0ce7a531009d6085b385 |
| jboss-eap-installer-5.1.0.jar | cfb52030cbb4a7ed08ec1a06e13940630 3cc7a6116c5efbae3cac2ef205431ab |
| jboss-eap-5.1.0.zip | d1edcf783b1095ea61c08a70d5d646183 8023290359c2911972c43e4263664e4 |
| JBPAPP-5367.zip | b19d407b079350bd0ac30c42af94a8863 378c588eebcc0dfa50296166424368f |
| JBPAPP-5386.zip | c42ab845202389947b17036452b6260d a845a890f68c4086295e052339647f30 |
| RHEL5.5-JBEAP-5-20110106.0-i386-disc1-ftp.iso | e75bb1712854c815cf693cb2ad111d88d 4c97b2790d25a8330dbb21bec68d346 |
| RHEL5.5-JBEAP-5-20110106.0-x86_64-disc1-ftp.iso | 729dcdd4cf3520cef274b501bf05627f88 6fdf8f3eaedf23ccf0a97b36914161 |
| JBEAP5-re20110105.3-i386-disc1-ftp.iso | 632bfe680de1a8c41ad5c5dafcfb3e1e7a6 ac23efc30452ee97de9475c162e01 |
| JBEAP5-re20110105.3-variant-src-disc1.iso | efa3e5d6bf561dbcc1c0fee225be5c31d23 d50a130ec2c406daa3a968746e279 |
| JBEAP5-re20110105.3-x86_64-disc1-ftp.iso | 694b14dc0336a9ccd56cb5297f38a3e328 4e7c2b411b2238108709c4e13b10e3 |
Table 3.2. 5.1.1 SHA-256 checksum values
| File | SHA-256 Checksum |
|---|---|
| jboss-eap-5.1.1.zip | a36152d7790631142579da4a3f72a5d 25a8fc509266d6bc7bb65664ad9fe7e01 |
| jboss-eap-installer-5.1.1.jar | a48168fd52f19c40bfedb03eb7b9caca3 aaca56361d801ca4a83d832da0a859d |
| jboss-ep-native-5.1.1-RHEL4-i386.zip | 269dbd16118886493056083cfc2d288 5bbb69f051037b9cf15883115467e99c7 |
| jboss-ep-native-5.1.1-RHEL4-x86_64.zip | dc9b3b75abbdf566caab9d60a5edb923 cf993b033a2696e3bb8a0d80e7cb4549 |
| jboss-ep-native-5.1.1-RHEL5-i386.zip | 6353d73ece9ece8a4f6400d77fb86fb63 36a8e2c9898c76d61481df3a2ea99e5 |
| jboss-ep-native-5.1.1-RHEL5-x86_64.zip | 58757206257e54238db355064cf8d9a4 6e43ce7b0ce962368d051c6ee644c723 |
| jboss-ep-native-5.1.1-RHEL6-i386.zip | 2aac5e5c6ad7b0d42b0a578f936a7fda9 5360c0d36f7fa45c1ca070b01b496e7 |
| jboss-ep-native-5.1.1-RHEL6-x86_64.zip | b4cb563ef8bcd67189befd6447a08698 cbd920332ed736520107d41afc1a9ad0 |
| jboss-ep-ws-cxf-5.1.1-installer.zip | 60969ff6d02f9ad7a52a6dff8abc7db89 dfb99b38ecdf9329881a22392d06e37 |
| JBPAPP-5367.zip | b19d407b079350bd0ac30c42af94a8863 378c588eebcc0dfa50296166424368f |
| JBEAP5-re20120206.0-i386-disc1-ftp.iso | d73b1581d9f6bdf563c5efdd9bed5eab 61ed627e80a33b30d2617cb9d48cbfca |
| JBEAP5-re20120206.0-x86_64-disc1-ftp.iso | caaf5221a0e406c2ec4515c864889a00 995ffd619ce10ad3c14938b803fc9848 |
| RHEL-5-JBEAP-5-20120206.0-i386-disc1-ftp.iso | 5efb04bb525cf6ca0841db3d8a72bb6e 7383d2761e5bbee8ce342a56357ccac7 |
| RHEL-5-JBEAP-5-20120206.0-x86_64-disc1-ftp.iso | e177d3e3071741317c9cb916b569464 6d987145ea20e7348a2dfe9df27bb86a6 |
| JB-EAP-5-RHEL-6-20120206.0-Server-i386-disc1-ftp.iso | 9f41998258030c307e7c7ab1faedb4e3 d535ec4e13493e9eac1b8eac1f9a3460 |
| JB-EAP-5-RHEL-6-20120206.0-Server-x86_64-disc1-ftp.iso | 2532121c107341668e2c131f84526b1 3add669ab6e10bbdae1e20d0704e22525 |
3.3.3. Install Zip
Procedure 3.3. Installation using ZIP file
- Unzip file
jboss-eap-[version].zipto extract the archive contents into the location of your choice.Result:This creates the
jboss-eap-[version]directory, with an un-configured installation of JBoss Enterprise Application Platform. Optional: Download and Install Native Components
Native components are downloaded separate to the primary application binary.- Choose a Native Components binary that corresponds to one of the evaluated Operating Systems listed in Section 2.1.2, “Operating System”.
- Click the name of the Native Component binary to display the SHA-256 checksum.
- Repeat the process in Section 3.3.2, “Verifying the Downloaded Files” to verify the file's authenticity.
- Unzip the downloaded file to JBoss installation directory (such as
jboss-eap-5.1.0) as run.sh can locate the components automatically when starting the Enterprise Application Server. - Run the following
rmcommand to remove the https directory and retain the compatibility with Common Criteria:# rm -rf JBOSS_INSTALL_DIR/jboss-ep-[version]/native/JBOSS_NATIVE_LIB/httpd
Substitute JBOSS_INSTALL_DIR with JBoss installation directory, [version] with the product version you chose, and JBOSS_NATIVE_LIB with the library directory (liborlib64).Note
Only Red Hat Enterprise Linux 4, Red Hat Enterprise Linux 5 and Red Hat Enterprise Linux 6 JBoss Native Components are certified and supported in Common Criteria certified configurations.
Install Security Patches
Follow the procedures in Section 3.3.4, “Download Patches” to correctly download the required security patches for the evaluated configuration and follow the patch installation instructions inside individual ZIP files (README.txt).
3.3.4. Download Patches
Procedure 3.4. Install required security patches
Important
- Open http://access.redhat.com in a web browser.
- Hover over the option in the menu across the top of the page.
- In the Downloads menu, click
- Enter your login information.Result:
You are taken to the Software Downloads page.
- Select
Application Platformin the drop-down box or in the menu on the left.Result:You are presented with a list of file downloads.
- Select 5.1.0 or 5.1.1 from the Version drop-down box, depending on the platform version you want to install.
- For 5.1.1, download the JBoss Remoting 2.5.3SP1 security advisory:
- Click the Security Advisories tab label.Result:
You are presented with the list of available security advisories.
- Click the Apply jboss remoting 2.5.3SP1 fix link.
- On the displayed Software Details tab, click the link next to the File drop-down box and confirm the download of the
JBPAPP-5386.zipfile.Note
Record the SHA-256 checksum from the Software Details screen. You use this checksum to verify the authenticity of the download in Section 3.3.2, “Verifying the Downloaded Files”
- Download
security_cc.policyto EAP 5.1:- Click the Patches tab label.Result:
You are presented with the list of available security advisories.
- Click the Add security_cc.policy to EAP 5.1x link.
- On the displayed Software Details tab, click the link next to the File drop-down box and confirm the download of the
JBPAPP-5367.zipfile.Note
Record the SHA-256 sum from the Software Details screen. You use this checksum to verify the authenticity of the download in Section 3.3.2, “Verifying the Downloaded Files”
3.4. ISO Installation
3.4.1. Download ISO
Procedure 3.5. Download the JBoss Enterprise Application Platform ISO
- Open http://access.redhat.com in a web browser.
- Log in using your customer portal credentials.
- Hover the mouse over the Download menu in the top menu bar.
- Under the Red Hat Enterprise Linux group, click Downloads.Result:
The Download Software page opens, which lists all ISO images available for Red Hat products.
- In the list of available software, expand the node for the Red Hat Enterprise Linux system supported by the certification.
Note
If you are not sure which node to select, refer to Section 2.1.2, “Operating System” for the supported Red Hat operating systems, and Table 3.1, “5.1.0 SHA-256 checksum values” and Table 3.2, “5.1.1 SHA-256 checksum values” for the list of supported ISO images. - Click the JBoss Application Platform (v 5) group.Result:
You are redirected to the ISO image download page.
- Verify the ISO is correct for your system by visually comparing the SHA-256 checksum with the checksum declared in Table 3.1, “5.1.0 SHA-256 checksum values” or Table 3.2, “5.1.1 SHA-256 checksum values”
Note
The name of the ISO link is not the same as the actual ISO filename. Use the tables specified to verify you are selecting the correct ISO image. - Record the corresponding SHA-256 sum for the ISO download. You use this checksum to verify the authenticity of the ISO in the next procedure.
- Click the ISO link.Result:
The download will begin. When the download has finished, you have successfully downloaded the correct ISO for the evaluated configuration.
3.4.2. Verify ISO
3.4.3. Install ISO
- Red Hat Enterprise Linux 4 users must follow Procedure 3.6, “Install ISO on Red Hat Enterprise Linux 4”.
- Red Hat Enterprise Linux 5 users must follow Procedure 3.7, “Install ISO on Red Hat Enterprise Linux 5”.
- Red Hat Enterprise Linux 6 users must follow Procedure 3.8, “Install ISO on Red Hat Enterprise Linux 6”
Procedure 3.6. Install ISO on Red Hat Enterprise Linux 4
Important
Mount ISO Image
Mount the ISO image downloaded in Procedure 3.5, “Download the JBoss Enterprise Application Platform ISO” to/mnt/jboss.[root ~]# mkdir /mnt/jboss [root ~]# mount -o loop PATH_TO_ISO_IMAGE /mnt/jboss
Create Local up2date Repository
Create a local repository for the ISO to retrieve packages from during installation.Add the following line to/etc/sysconfig/rhn/sources.echo "dir jbosslocal /mnt/jboss/RedHat/RPMS/" >> /etc/sysconfig/rhn/sources
Install JBoss Enterprise Application Platform
Run the followingup2datecommand, replacing WS_CHOICE withjbossas-ws-nativeorjbossas-ws-cxf[root ~]# up2date -i jbossas-messaging WS_CHOICE jbossas jbossas-security-policy-cc
Optionally install Native Components
Run the followingup2datecommand to install certified and supported native components[root ~]# up2date jboss-eap5-native
Procedure 3.7. Install ISO on Red Hat Enterprise Linux 5
Important
Mount ISO Image
Mount the ISO image downloaded in Procedure 3.5, “Download the JBoss Enterprise Application Platform ISO” to/mnt/jboss.[root ~]# mkdir /mnt/jboss [root ~]# mount -o loop PATH_TO_ISO_IMAGE /mnt/jboss
Create Repository
Create a local repository for the ISO to retrieve packages from during installation.Create a file namedjbosslocal.repoin/etc/yum.repos.d/.[root ~]# cat << EOF > /etc/yum.repos.d/jbosslocal.repo [jbosslocal] name=jbosslocal baseurl=file:///mnt/jboss/JBEAP enabled=1 gpgcheck=0 EOF
Install JBoss Enterprise Application Platform
Run the followingyumcommand, replacing WS_CHOICE withjbossas-ws-nativeorjbossas-ws-cxf:[root ~]# yum install jbossas-messaging WS_CHOICE jbossas jbossas-security-policy-cc
Optionally install Native Components
Run the followingyum installcommand to install certified and supported native components:[root ~]# yum install jboss-eap5-native
Procedure 3.8. Install ISO on Red Hat Enterprise Linux 6
Important
Important
Mount ISO Image
Mount the ISO image downloaded in Procedure 3.5, “Download the JBoss Enterprise Application Platform ISO” to/mnt/jboss.[root ~]# mkdir /mnt/jboss [root ~]# mount -o loop PATH_TO_ISO_IMAGE /mnt/jboss
Create Repository
Create a local repository for the ISO to retrieve packages from during installation.Create a file namedjbosslocal.repoin/etc/yum.repos.d/.[root ~]# cat << EOF > /etc/yum.repos.d/jbosslocal.repo [jbosslocal] name=jbosslocal baseurl=file:///mnt/jboss enabled=1 gpgcheck=0 EOF
Install JBoss Enterprise Application Platform
Run the followingyumcommand, replacing WS_CHOICE withjbossas-ws-nativeorjbossas-ws-cxf[root ~]# yum install jbossas-messaging WS_CHOICE jbossas jbossas-security-policy-cc
Optionally install Native Components
Run the followingyum installcommand to install certified and supported native components[root ~]# yum install jboss-eap5-native
3.5. Confirming the Version of your JBoss Enterprise Application Platform Installation
-V with the startup script
You can retrieve information about the version of your JBoss Enterprise Application Platform installation by running the same script used to start the server with the -V switch. For Linux and Unix installations this script is run.sh and on Microsoft Windows installations it is run.bat. Regardless of platform the script is located in JBOSS_HOME/bin. Using these scripts to start your server is covered in Chapter 4, Launching the JBoss Enterprise Application Platform Server.
-V switch will not start the server, nor does it require the server to be running. It displays information about the JBoss Enterprise Application Platform version and its configured Java environment. Below is an example of using this on an installation of JBoss Enterprise Application Platform on Red Hat Linux. Note the version number (JBoss 5.1.0.GA or JBoss 5.1.1.GA) displayed as the last item before the license information.
[bin]$ ./run.sh -V
=========================================================================

  JBoss Bootstrap Environment

  JBOSS_HOME: /opt/JBoss/EnterprisePlatform-5.1.0/jboss-eap-5.1/jboss-as

  JAVA: /usr/lib/jvm/jre-1.6.0-openjdk//bin/java

  JAVA_OPTS: -Dprogram.name=run.sh -server -Xms1303m -Xmx1303m -XX:MaxPermSize=256m
  -Dorg.jboss.resolver.warning=true -Dsun.rmi.dgc.client.gcInterval=3600000
  -Dsun.rmi.dgc.server.gcInterval=3600000
  -Dsun.lang.ClassLoader.allowArraySyntax=true -Djava.net.preferIPv4Stack=true

  CLASSPATH: /opt/JBoss/EnterprisePlatform-5.1.0/jboss-eap-5.1/jboss-as/bin/run.jar

=========================================================================

JBoss 5.1.0 (build: SVNTag=JBPAPP_5_1_0 date=201009150028)

Distributable under LGPL license.
See terms of license at gnu.org.

[bin]$
When the JBoss Enterprise Application Platform server is running you can retrieve its version information from the first page of the Web Console. This is located at http://localhost:8080/web-console/.
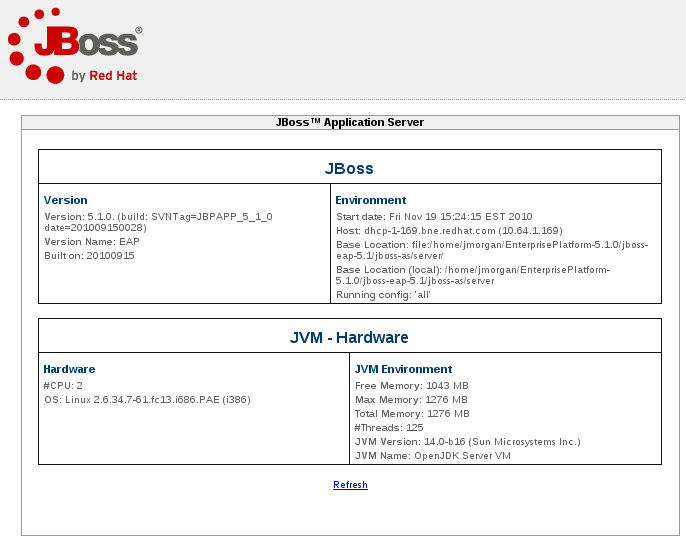
Figure 3.2. Version details displayed in Web Console
When the server is started, the version is echoed to the console, and written to JBOSS_HOME/server/production/log/boot.log:
15:36:39,026 INFO  [ServerImpl] Starting JBoss (Microcontainer)...
15:36:39,027 INFO  [ServerImpl] Release ID: JBoss [EAP] 5.1.0
(build: SVNTag=JBPAPP_5_1_0 date=201009150028)
Chapter 4. Launching the JBoss Enterprise Application Platform Server
run.conf, which determines the startup environment of the server. For Linux and Unix installations the startup script is run.sh and on Microsoft Windows installations it is run.bat. Regardless of platform the script is located in JBOSS_HOME/bin.
JBOSS_HOME/bin/security_cc.policy.
Important
4.1. Starting the JBoss Enterprise Application Platform Server
-c command parameter to specify the production server configuration.
Example 4.1. Starting the server on Unix or Linux
[home]$ cd JBOSS_HOME/bin
[bin]$ ./run.sh -c production
Example 4.2. Starting the server on Windows
cd JBOSS_HOME/bin
$ run.bat -c production
4.2. Enabling the Java Security Manager
Warning
run.conf (Linux) or run.conf.bat (Windows) file, located in the JBOSS_HOME/bin/ directory.
Note
To enable JSM for JBoss EAP add following lines to run.conf:
- Add this line to enable JSM and set its policy:
JAVA_OPTS="$JAVA_OPTS -Djava.security.manager -Djava.security.policy==$JBOSS_HOME/bin/security_cc.policy"
- Add this line to set Java system properties which are referred by the added security policy:
JAVA_OPTS="$JAVA_OPTS -Djboss.home.dir=$JBOSS_HOME -Djboss.server.home.dir=$JBOSS_HOME/server/production -Djava.protocol.handler.pkgs=org.jboss.handlers.stub"
Important
Make sure to add the lines exactly as shown including the double equal sign (this orders JSM to use only this policy without combining it with the system policy). - Add this line to ensure the security policy persists when an RPM installation is stopped and restarted :
export JBOSS_HOME=/var/lib/jbossas
4.2.1. Keystore Setup
4.2.1.1. Creating New Keystore with the JBoss Public Key
- Run the following command to create keystore that contains the JBoss public key:
keytool -importcert -alias jboss -keystore JBOSS_HOME/server/production/cc.keystore \
-storepass jbosseap -file JBOSS_HOME/bin/JBossPublicKey.RSA -noprompt \
-trustcacerts
Note
The jboss alias must end up in trustedCertEntry. You can check the result with the followingkeytoolcommand:keytool -list -keystore JBOSS_HOME/server/production/cc.keystore -storepass jbosseap
- Run this command to create the password file:
echo jbosseap > JBOSS_HOME/server/production/cc.password
Password file is a plain file with the password for key store opening (cc.keystore). - Uncomment lines number 6 and 7 of the
JBOSS_HOME/bin/security_cc.policyfile to enable the keystore:keystore "file:${jboss.server.home.dir}/cc.keystore"; keystorePasswordURL "file:${jboss.server.home.dir}/cc.password";Note
The passwordjbosseapused in Step 1 during key store creation must be the same as the password in thecc.passwordfile. We highly recommend you use a password different than the example password in this guide.
4.2.1.2. Using the Java System Keystore
keytool -importcert -alias jboss -keystore JAVA_HOME/jre/lib/security/cacerts \
-storepass changeit -file JBOSS_HOME/bin/JBossPublicKey.RSA -noprompt \
-trustcacerts
Make sure you are running the command as a user with write permission for the $JAVA_HOME directory. The default password for the cacerts keystore is
changeit.
Important
4.2.1.3. IBM JRE 1.6 and the Java Security Manager
JAVA_HOME/jre/lib/security/java.security and setting the value of policy.provider to sun.security.provider.PolicyFile instead of org.apache.harmony.security.fortress.DefaultPolicy:
policy.provider=sun.security.provider.PolicyFile
4.3. Additional Policy File Configuration
Chapter 5. Development Guide for the Common Criteria Certified System
5.1. Enterprise Application
- Web Applications based on Servlets and Java Server Pages (JSP)
- Enterprise Java Beans (EJB)
- JavaEE 1.4 Web Service Applications which can be based on Stateless EJBs or Plain Old Java Objects (POJOs) deployed as Java Servlets.
5.2. General Restrictions
- Application Programming Interfaces (APIs) that are not documented in the applicable product documentation must not be used. For more information about providing security permissions to user applications, refer to <the guidance section for System administrators to configure the certified system>
- The programming restrictions mandated by the Enterprise JavaBeans Specification v2.1 must be strictly followed. For more information, refer to JSR-000153 Enterprise JavaBeans 2.1 specification. (Section 25.2, pages 562-564).
The restrictions are:
- An enterprise bean must not use read/write static fields. Using read-only static fields is allowed. Therefore, it is recommended that all static fields in the enterprise bean class be declared as final.
- An enterprise bean must not use thread synchronization primitives to synchronize execution of multiple instances.
- An enterprise bean must not use the AWT functionality to attempt to output information to a display or to input information from a keyboard.
- An enterprise bean must not use the
java.iopackage to attempt to access files and directories in the file system. - An enterprise bean must not attempt to listen on a socket, accept connections on a socket, or use a socket for multicast.
- The enterprise bean must not attempt to query a class to obtain information about the declared members that are not otherwise accessible to the enterprise bean because of the security rules of the Java language. The enterprise bean must not attempt to use the Reflection API to access information that the security rules of the Java programming language make unavailable.
- The enterprise bean must not attempt to
- create a class loader
- obtain the current class loader
- set the context class loader
- set security manager
- create a new security manager
- stop the JVM
- or change the input, output, and error streams
- The enterprise bean must not attempt to set the socket factory used by ServerSocket, Socket, or the stream handler factory used by URL.
- The enterprise bean must not attempt to manage threads. The enterprise bean must not attempt to start, stop, suspend, or resume a thread, or to change a thread's priority or name. The enterprise bean must not attempt to manage thread groups.
- The enterprise bean must not attempt to obtain the security policy information for a particular code source.
- The enterprise bean must not attempt to load a native library.
- The enterprise bean must not attempt to gain access to packages and classes that the usual rules of the Java programming language make unavailable to the enterprise bean.
- The enterprise bean must not attempt to define a class in a package.
- The enterprise bean must not attempt to access or modify the security configuration objects (Policy, Security, Provider, Signer, and Identity).
- The enterprise bean must not attempt to use the subclass and object substitution features of the Java Serialization Protocol.
- The enterprise bean must not attempt to pass this as an argument or method result. The enterprise bean must pass the result of
SessionContext.getEJBObject,SessionContext.getEJBLocalObject,EntityContext.getEJBObject, orEntityContext.getEJBLocalObjectinstead.
5.3. Developer Advice for User Credentials in Remote Method Invocation
setPrincipal and setCredential methods.
Example 5.1. Setting Principal and Credential
MethodInvocation mi = new MethodInvocation();
mi.setPrincipal(new SimplePrincipal("myusername"));
mi.setCredential("mypassword");Example 5.2. Retrieving Principal and Credential
Principal p = mi.getPrincipal();
Object cred = mi.getCredential();
// Now do authentication (and then authorization)
Chapter 6. Overview of the Security Functions
6.1. Access Control
- HTTP
- URLs and paths provided with URLs can be protected from access by subjects.
- EJB
- EJBs and associated method names can be protected from invocation by subjects.
- JMS
- Message queue destinations and topic destinations can be protected from access by subjects.
- Web Services
- Plain Old Java Objects (POJOs) deployed as Servlets and Session Beans can be protected from access by subjects.
- JMX
- The JMX invokers can be protected by validating the role of the authenticated user.
6.2. Audit
Example 6.1. Start up log events
15:36:39,026 INFO  [ServerImpl] Starting JBoss (Microcontainer)...
15:36:39,027 INFO  [ServerImpl] Release ID: JBoss [EAP] 5.1.0 (build: SVNTag=JBPAPP_5_1_0 date=201009150028)
15:36:39,027 INFO  [ServerImpl] Bootstrap URL: null
15:36:39,027 INFO  [ServerImpl] Home Dir: /opt/JBoss/EnterprisePlatform-5.1.0/jboss-eap-5.1/jboss-as
15:36:39,027 INFO  [ServerImpl] Home URL: file:/opt/JBoss/EnterprisePlatform-5.1.0/jboss-eap-5.1/jboss-as/
15:36:39,027 INFO  [ServerImpl] Library URL: file:/opt/JBoss/EnterprisePlatform-5.1.0/jboss-eap-5.1/jboss-as/lib/
15:36:39,028 INFO  [ServerImpl] Patch URL: null
15:36:39,028 INFO  [ServerImpl] Common Base URL: file:/opt/JBoss/EnterprisePlatform-5.1.0/jboss-eap-5.1/jboss-as/common/
15:36:39,028 INFO  [ServerImpl] Common Library URL: file:/opt/JBoss/EnterprisePlatform-5.1.0/
jboss-eap-5.1/jboss-as/common/lib/
15:36:39,028 INFO  [ServerImpl] Server Name: production
15:36:39,028 INFO  [ServerImpl] Server Base Dir: /opt/JBoss/EnterprisePlatform-5.1.0/
jboss-eap-5.1/jboss-as/server
15:36:39,028 INFO  [ServerImpl] Server Base URL: file:/opt/JBoss/EnterprisePlatform-5.1.0/jboss-eap-5.1/jboss-as/server/
15:36:39,028 INFO  [ServerImpl] Server Config URL: file:/opt/JBoss/EnterprisePlatform-5.1.0/jboss-eap-5.1/jboss-as/server/production/conf/
15:36:39,028 INFO  [ServerImpl] Server Home Dir: /opt/JBoss/EnterprisePlatform-5.1.0/jboss-eap-5.1/jboss-as/server/production
15:36:39,029 INFO  [ServerImpl] Server Home URL: file:/opt/JBoss/EnterprisePlatform-5.1.0/jboss-eap-5.1/jboss-as/server/production/
15:36:39,029 INFO  [ServerImpl] Server Data Dir: /opt/JBoss/EnterprisePlatform-5.1.0/jboss-eap-5.1/jboss-as/server/production/data
15:36:39,029 INFO  [ServerImpl] Server Library URL: file:/opt/JBoss/EnterprisePlatform-5.1.0/jboss-eap-5.1/jboss-as/server/production/lib/
15:36:39,029 INFO  [ServerImpl] Server Log Dir: /opt/JBoss/EnterprisePlatform-5.1.0/jboss-eap-5.1/jboss-as/server/production/log
15:36:39,029 INFO  [ServerImpl] Server Native Dir: /opt/JBoss/EnterprisePlatform-5.1.0/jboss-eap-5.1/jboss-as/server/production/tmp/native
15:36:39,029 INFO  [ServerImpl] Server Temp Dir: /opt/JBoss/EnterprisePlatform-5.1.0/jboss-eap-5.1/jboss-as/server/production/tmp
15:36:39,029 INFO  [ServerImpl] Server Temp Deploy Dir: /opt/JBoss/EnterprisePlatform-5.1.0/jboss-eap-5.1/jboss-as/server/production/tmp/deploy
15:36:39,587 INFO  [ServerImpl] Starting Microcontainer, bootstrapURL=file:/opt/JBoss/EnterprisePlatform-5.1.0/jboss-eap-5.1/jboss-as/server/production/conf/bootstrap.xml
15:36:40,024 INFO  [VFSCacheFactory] Initializing VFSCache [org.jboss.virtual.plugins.cache.CombinedVFSCache]
15:36:40,026 INFO  [VFSCacheFactory] Using VFSCache [CombinedVFSCache[real-cache: null]]
15:36:40,259 INFO  [CopyMechanism] VFS temp dir: /opt/JBoss/EnterprisePlatform-5.1.0/jboss-eap-5.1/jboss-as/server/production/tmp
15:36:40,260 INFO  [ZipEntryContext] VFS force nested jars copy-mode is enabled.
15:36:41,278 INFO  [ServerInfo] Java version: 1.6.0_18,Sun Microsystems Inc.
15:36:41,278 INFO  [ServerInfo] Java Runtime: OpenJDK Runtime Environment (build 1.6.0_18-b18)
15:36:41,278 INFO  [ServerInfo] Java VM: OpenJDK Server VM 14.0-b16,Sun Microsystems Inc.
15:36:41,278 INFO  [ServerInfo] OS-System: Linux 2.6.34.7-61.fc13.i686.PAE,i386
15:36:41,279 INFO  [ServerInfo] VM arguments: -Dprogram.name=run.sh -Xms1303m -Xmx1303m -XX:MaxPermSize=256m -Dorg.jboss.resolver.warning=true -Dsun.rmi.dgc.client.gcInterval=3600000 -Dsun.rmi.dgc.server.gcInterval=3600000 -Dsun.lang.ClassLoader.allowArraySyntax=true -Djava.net.preferIPv4Stack=true -Djava.endorsed.dirs=/opt/JBoss/EnterprisePlatform-5.1.0/jboss-eap-5.1/jboss-as/lib/endorsed
15:36:41,302 INFO  [JMXKernel] Legacy JMX core initialized
Example 6.2. Shutdown log events
2010-11-19 15:59:54,304 INFO  [org.jboss.bootstrap.microcontainer.ServerImpl] (JBoss Shutdown Hook) Runtime shutdown hook called, forceHalt: true
2010-11-19 15:59:54,305 INFO  [org.apache.coyote.http11.Http11Protocol] (JBoss Shutdown Hook) Pausing Coyote HTTP/1.1 on http-127.0.0.1-8080
2010-11-19 15:59:54,322 INFO  [org.apache.coyote.http11.Http11Protocol] (JBoss Shutdown Hook) Stopping Coyote HTTP/1.1 on http-127.0.0.1-8080
2010-11-19 15:59:54,326 INFO  [org.apache.coyote.ajp.AjpProtocol] (JBoss Shutdown Hook) Pausing Coyote AJP/1.3 on ajp-127.0.0.1-8009
2010-11-19 15:59:54,332 INFO  [org.apache.coyote.ajp.AjpProtocol] (JBoss Shutdown Hook) Stopping Coyote AJP/1.3 on ajp-127.0.0.1-8009
2010-11-19 15:59:54,396 INFO  [org.jboss.web.tomcat.service.deployers.TomcatDeployment] (JBoss Shutdown Hook) undeploy, ctxPath=/jmx-console
2010-11-19 15:59:54,417 INFO  [org.jboss.web.tomcat.service.deployers.TomcatDeployment] (JBoss Shutdown Hook) undeploy, ctxPath=/
2010-11-19 15:59:54,424 INFO  [org.jboss.web.tomcat.service.deployers.TomcatDeployment] (JBoss Shutdown Hook) undeploy, ctxPath=/admin-console
2010-11-19 15:59:54,462 INFO  [org.jboss.resource.connectionmanager.ConnectionFactoryBindingService] (JBoss Shutdown Hook) Unbound ConnectionManager 'jboss.jca:service=ConnectionFactoryBinding,name=JmsXA' from JNDI name 'java:JmsXA'
2010-11-19 15:59:54,512 INFO  [org.jboss.jms.server.connectionfactory.ConnectionFactory] (JBoss Shutdown Hook) org.jboss.jms.server.connectionfactory.ConnectionFactory@8301 undeployed
2010-11-19 15:59:54,513 INFO  [org.jboss.jms.server.connectionfactory.ConnectionFactory] (JBoss Shutdown Hook) org.jboss.jms.server.connectionfactory.ConnectionFactory@b24e3f undeployed
2010-11-19 15:59:54,514 INFO  [org.jboss.jms.server.connectionfactory.ConnectionFactory] (JBoss Shutdown Hook) org.jboss.jms.server.connectionfactory.ConnectionFactory@355f75 undeployed
2010-11-19 15:59:54,514 INFO  [org.jboss.jms.server.destination.QueueService] (JBoss Shutdown Hook) Queue[/queue/DLQ] stopped
2010-11-19 15:59:54,515 INFO  [org.jboss.jms.server.destination.QueueService] (JBoss Shutdown Hook) Queue[/queue/ExpiryQueue] stopped

...

2010-11-19 15:59:59,358 INFO  [org.jboss.bootstrap.microcontainer.ServerImpl] (JBoss Shutdown Hook) Shutdown complete
Example 6.3. Log output
2008-12-12 16:04:33,753 826541 TRACE [org.jboss.ejb.plugins.SecurityInterceptor] (WorkerThread#0[127.0.0.1:33182]:) Authenticated  principal=scott
2008-12-12 16:04:33,753 826541 TRACE [org.jboss.ejb.plugins.SecurityInterceptor] (WorkerThread#0[127.0.0.1:33182]:) method=public abstract org.jboss.test.jca.securedejb.CallerIdentity org.jboss.test.jca.securedejb.CallerIdentityHome.create() throws javax.ejb.CreateException,java.rmi.RemoteException, interface=HOME, requiredRoles=[CallerIdentityUser]
6.2.1. Enabling Additional Logging
6.3. Clustering
- Applications - an application deployed on one node is replicated to the other nodes of the cluster (farming deployment)
- State of HTTP sessions, EJB 3.0 session beans, EJB 3.0 entity beans, as well as Hibernate persistence objects (distributed state replication service using JBoss Cache)
- State of HTTP sessions and EJB 2.x session beans (distributed state replication service using HASessionState MBean)
- JMS queues.
6.4. Identification and Authentication
- HTTP and Web Services
- HTTP-basic authentication, HTTP-digest authentication, form-based authentication, client certificate based authentication.
- EJB
- Username and password-based authentication, and client certificate based authentication.
- JMS
- Username and password-based authentication.
- JNDI
- Username and password-based authentication.
- JMX Invokers
- Username and password-based authentication.
- File-based storage
- BaseCertLoginModule
- LDAP
- Databases accessible through JDBC
6.5. Transaction Rollback
- Atomicity
- A transaction must be atomic. This means that either all the work done in the transaction must be performed, or none of it must be performed. Doing only part of a transaction is not allowed.
- Consistency
- When a transaction is completed, the system must be in a stable and consistent condition.
- Isolation
- Different transactions must be isolated from each other. This means that the partial work done in one transaction is not visible to other transactions until the transaction is committed, and that each process in a multi-user system can be programmed as if it was the only process accessing the system.
- Durability
- The changes made during a transaction are made persistent when it is committed. When a transaction is committed, its changes will not be lost, even if the server crashes afterward.
- transactions are short lived
- resources (such as databases) are locked for the duration of the transaction
- participants have a high degree of trust with each other.
Appendix A. Port Configuration in JBoss Enterprise Application Platform
A.1. TCP Settings
bindings-jboss-beans.xml. The file is located in JBOSS_HOME/server/production/conf/bindingservice.beans/META-INF/bindings-jboss-beans.xml
Table A.1. bindings-jboss-beans.xml Port Configuration
|
Port
|
Status
|
Purpose
|
|---|---|---|
|
1098
|
Enabled
|
RMI naming service
|
|
3528
|
Disabled
|
IIOP port assigned by IANA
|
|
4444
|
Enabled
|
RMI JRMP invoker
|
|
4445
|
Enabled
|
RMI pooled invoker
|
|
4446
|
Enabled
|
Remoting server connector
|
|
4447
|
Enabled
|
Remoting server connector
|
|
4457
|
Enabled
|
Remoting server connector
|
|
4712
|
Enabled
|
JBossTS recovery manager
|
|
4713
|
Enabled
|
JBossTS transaction status manager
|
|
4714
|
Enabled
|
Process ID for JBossTS
|
|
8080
|
Enabled
|
HTTP Connector
|
|
8083
|
Enabled
|
RMI Classloading mini web server
|
|
8443
|
Enabled
|
JBossWS HTTPS connector socket
|
cluster-service.xml. The file is located in JBOSS_HOME/server/production/deploy/cluster-service.xml
Table A.2. cluster-service.xml Port Configuration
|
Port
|
Status
|
Purpose
|
|---|---|---|
|
1100
|
Disabled
|
Clustering
|
|
1101
|
Disabled
|
Clustering
|
|
4448
|
Disabled
|
PooledInvokerHA
|
clustered-hsql-persistence-service.xml. The file is located in JBOSS_HOME/server/production/deploy/messaging/clustered-hsql-persistence-service.xml
Table A.3. clustered-hsqldb-persistence-service.xml Port Configuration
|
Port
|
Status
|
Purpose
|
|---|---|---|
|
7900
|
Disabled
| |
ejb3-connectors-jboss-beans.xml. The file is located in JBOSS_HOME/server/production/deploy/ejb3-connectors-jboss-beans.xml
Table A.4. ejb3-connectors-jboss-beans.xml Port Configuration
|
Port
|
Status
|
Purpose
|
|---|---|---|
|
3873
|
Enabled
|
EJB3 Remoting Connector
|
jboss-service.xml. The file is located in JBOSS_HOME/server/production/conf/jboss-service.xml
Table A.5. jboss-service.xml Port Configuration
|
Port
|
Status
|
Purpose
|
|---|---|---|
|
1099
|
Enabled
|
RMI bootstrap naming service
|
jgroups-channelfactory-stacks.xml. The file is located in JBOSS_HOME/server/production/deploy/cluster/jgroups-channelfactory.sar/META-INF/jgroups-channelfactory-stacks.xml
Table A.6. jgroups-channelfactory-stacks.xml Port Configuration
|
Port
|
Status
|
Purpose
|
|---|---|---|
|
7500
|
Enabled
| UDP and TCP stack diagnostics port |
|
7600
|
Enabled
|
TCP stack with flow control/message bundling
|
|
7650
|
Enabled
|
TCP stack without flow control/message bundling
|
|
7900
|
Enabled
| |
|
45700
|
Enabled
|
TCP stack diagnostics port
|
|
45701
|
Enabled
|
Multicast port for multicast-based automatic discovery
|
|
45710
|
Enabled
|
Multicast port for TCP based stack optimized for the JBoss Messaging Data Channel
|
server.xml. The file is located in JBOSS_HOME/server/production/deploy/jbossweb.sar/server.xml
Table A.7. server.xml Port Configuration
|
Port
|
Status
|
Purpose
|
|---|---|---|
|
8009
|
Disabled
|
AJP Connector
|
A.2. UDP Settings
bindings-jboss-beans.xml. The file is located in JBOSS_HOME/server/production/conf/bindingservice.beans/META-INF/bindings-jboss-beans.xml
Table A.8. bindings-jboss-beans.xml Port Configuration
|
Port
|
Status
|
Purpose
|
|---|---|---|
|
1102
|
Disabled
| |
|
1161
|
Disabled
|
snmp
|
|
1162
|
Disabled
|
snmp
|
|
53200
|
Enabled
|
Multicast port for IP multicast based stack, with flow control, message bundling enabled. For JBoss Messaging Control Channel clustered services.
|
|
54200
|
Enabled
|
JBoss Messaging port stack with flow control, message bundling disabled, and stack optimized
|
|
54225
|
Enabled
|
Multicast port for IP multicast based stack, with flow control, message bundling enabled. For services that make high-volume asynchronous RPCs, such as JBoss Cache.
|
|
54250
|
Enabled
|
Multicast port for IP multicast based stack, with flow control and message bundling disabled. Used for synchronous calls, and low message volume rates and sizes. Not suitable for high volume; you may run out of memory.
|
jgroups-channelfactory-stacks.xml. The file is located in JBOSS_HOME/server/production/deploy/cluster/jgroups-channelfactory.sar/META-INF/jgroups-channelfactory-stacks.xml
Table A.9. jgroups-channelfactory-stacks.xml Port Configuration
|
Port
|
Status
|
Purpose
|
|---|---|---|
|
7500
|
Enabled
|
Diagnostics port for UDP and TCP stacks
|
|
45688
|
Enabled
|
Multicast port for IP multicast based stack, with flow control, message bundling disabled, and stack optimized
|
|
45689
|
Enabled
|
Multicast port for IP multicast based stack, with flow control, message bundling disabled, and stack optimized
|
|
45699
|
Enabled
|
Multicast port for IP multicast based stack, with flow control, message bundling disabled, and stack optimized
|
Appendix B. Revision History
| Revision History | |||
|---|---|---|---|
| Revision 5.1.1-121.400 | 2013-10-31 | ||
| |||
| Revision 5.1.1-121 | 2012-07-18 | ||
| |||
| Revision 5.1.0-120 | Tue Feb 14 2012 | ||
| |||