
Red Hat Training
A Red Hat training course is available for Red Hat Enterprise Linux
12.3. Directory-based Storage Pools
This section covers storing guest virtual machines in a directory on the host physical machine.
Directory-based storage pools can be created with
virt-manager or the virsh command line tools.
12.3.1. Creating a Directory-based Storage Pool with virt-manager
Create the local directory
Optional: Create a new directory for the storage pool
Create the directory on the host physical machine for the storage pool. This example uses a directory named /guest virtual machine_images.# mkdir /guest_images
Set directory ownership
Change the user and group ownership of the directory. The directory must be owned by the root user.# chown root:root /guest_images
Set directory permissions
Change the file permissions of the directory.# chmod 700 /guest_images
Verify the changes
Verify the permissions were modified. The output shows a correctly configured empty directory.# ls -la /guest_images total 8 drwx------. 2 root root 4096 May 28 13:57 . dr-xr-xr-x. 26 root root 4096 May 28 13:57 ..
Configure SELinux file contexts
Configure the correct SELinux context for the new directory. Note that the name of the pool and the directory do not have to match. However, when you shutdown the guest virtual machine, libvirt has to set the context back to a default value. The context of the directory determines what this default value is. It is worth explicitly labeling the directory virt_image_t, so that when the guest virtual machine is shutdown, the images get labeled 'virt_image_t' and are thus isolated from other processes running on the host physical machine.# semanage fcontext -a -t virt_image_t '/guest_images(/.*)?' # restorecon -R /guest_images
Open the storage pool settings
- In the
virt-managergraphical interface, select the host physical machine from the main window.Open the Edit menu and select Connection Details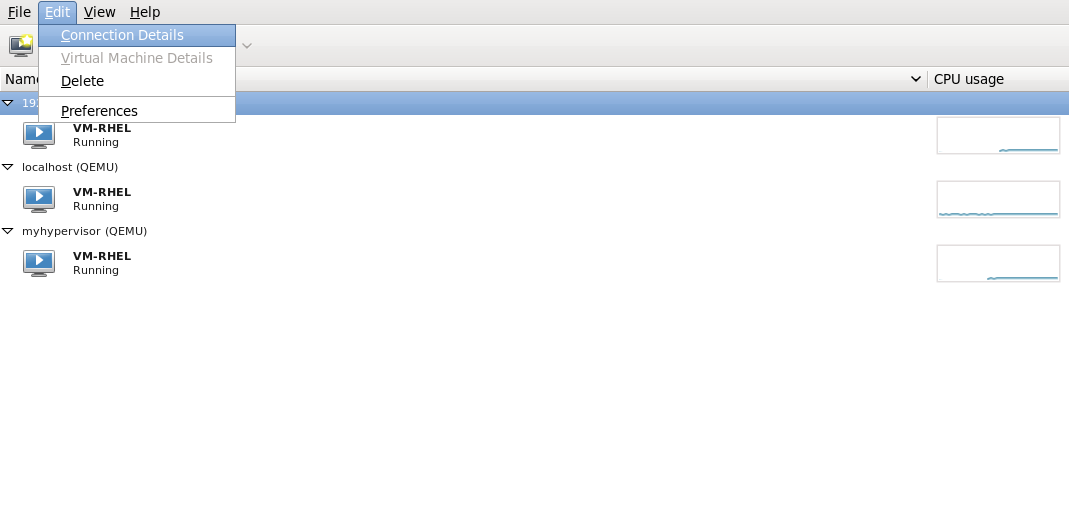
Figure 12.7. Connection details window
- Click on the Storage tab of the Connection Details window.
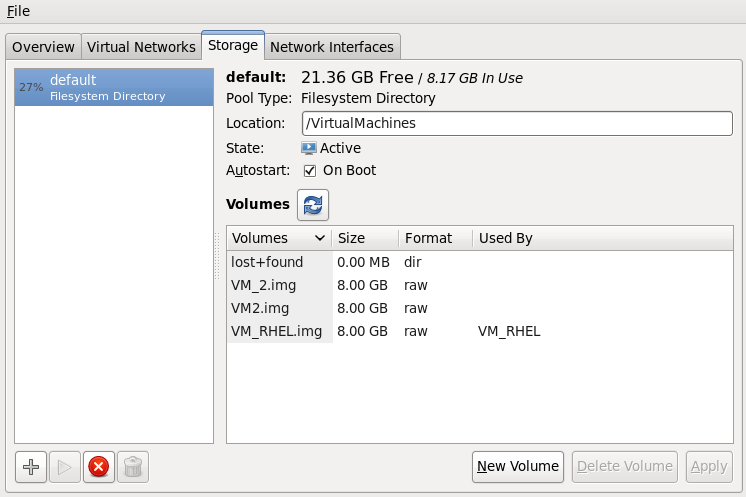
Figure 12.8. Storage tab
Create the new storage pool
Add a new pool (part 1)
Press the + button (the add pool button). The Add a New Storage Pool wizard appears.Choose a for the storage pool. This example uses the name guest_images. Change the todir: Filesystem Directory.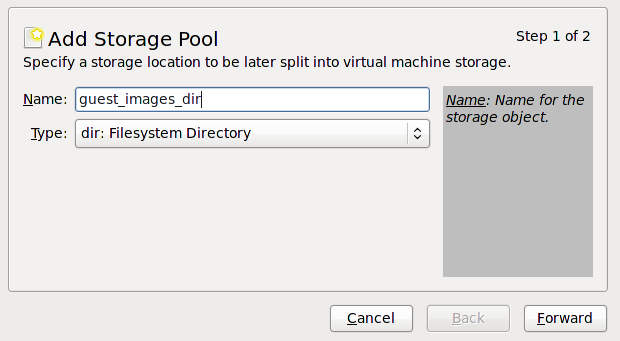
Figure 12.9. Name the storage pool
Press the button to continue.Add a new pool (part 2)
Change the field. For example, /guest_images.Verify the details and press the button to create the storage pool.
Verify the new storage pool
The new storage pool appears in the storage list on the left after a few seconds. Verify the size is reported as expected, 36.41 GB Free in this example. Verify the field reports the new storage pool as Active.Select the storage pool. In the field, confirm that the check box is checked. This will make sure the storage pool starts whenever thelibvirtdservice starts.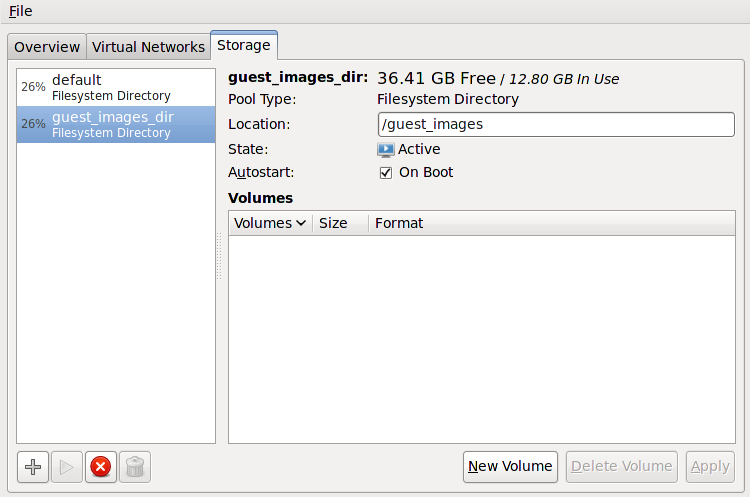
Figure 12.10. Verify the storage pool information
The storage pool is now created, close the Connection Details window.