
BRMS Business Process Management Guide
For JBoss Developers and Rules Authors
Edition 5.3.1
Abstract
Preface
Chapter 1. Introduction
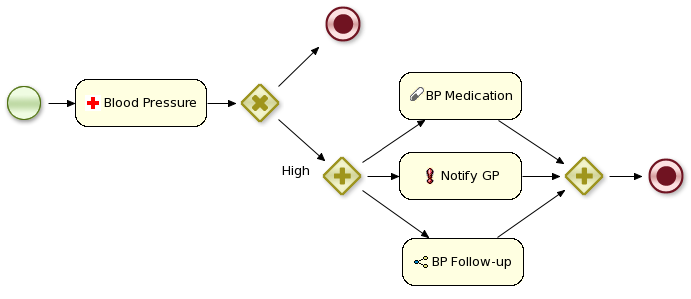
1.1. Introduction

Figure 1.1. Example Process
- A graphical editor embedded in the JBoss BRMS user interface to create and edit business processes
- A graphical editor plug-in for JBoss Developer studio to create and edit business processes
- A management console that provides process monitoring, Human Task management, and the ability to add reporting
- Integration with the JBoss BRMS repository for storing, versioning, and managing processes
- Integration with an external Human Tasks service
Chapter 2. Business Process Management API
2.1. The API

Figure 2.1. Knowledge Base and Knowledge Session
- Creating a knowledge base that contains the process definitions
- Creating a session to start new process instances, signal existing process instances, and register listeners
2.2. Create the Knowledge Base
KnowledgeBuilder kbuilder = KnowledgeBuilderFactory.newKnowledgeBuilder();
kbuilder.add(ResourceFactory.newClassPathResource("MyProcess.bpmn"), ResourceType.BPMN2);
KnowledgeBase kbase = kbuilder.newKnowledgeBase();
ResourceFactory has similar methods to load files from file system, URL, InputStream, and Reader.
2.3. Create a Session
StatefulKnowledgeSession ksession = kbase.newStatefulKnowledgeSession();
ProcessInstance processInstance = ksession.startProcess("com.sample.MyProcess");
ProcessRuntime interface defines all the session methods for interacting with processes, as shown in Example 2.1, “ProcessRuntime Interface”.
Example 2.1. ProcessRuntime Interface
/** * Start a new process instance. The process (definition) that should * be used is referenced by the given process id. * * @param processId The id of the process that should be started * @return theProcessInstancethat represents the instance of the process that was started */ ProcessInstance startProcess(String processId); /** * Start a new process instance. The process (definition) that should * be used is referenced by the given process id. Parameters can be passed * to the process instance (as name-value pairs), and these will be set * as variables of the process instance. * * @param processId the id of the process that should be started * @param parameters the process variables that should be set when starting the process instance * @return theProcessInstancethat represents the instance of the process that was started */ ProcessInstance startProcess(String processId, Map<String, Object> parameters); /** * Signals the engine that an event has occurred. The type parameter defines * which type of event and the event parameter can contain additional information * related to the event. All process instances that are listening to this type * of (external) event will be notified. For performance reasons, this type of event * signaling should only be used if one process instance should be able to notify * other process instances. For internal event within one process instance, use the * signalEvent method that also include the processInstanceId of the process instance * in question. * * @param type the type of event * @param event the data associated with this event */ void signalEvent(String type, Object event); /** * Signals the process instance that an event has occurred. The type parameter defines * which type of event and the event parameter can contain additional information * related to the event. All node instances inside the given process instance that * are listening to this type of (internal) event will be notified. Note that the event * will only be processed inside the given process instance. All other process instances * waiting for this type of event will not be notified. * * @param type the type of event * @param event the data associated with this event * @param processInstanceId the id of the process instance that should be signaled */ void signalEvent(String type, Object event, long processInstanceId); /** * Returns a collection of currently active process instances. Note that only process * instances that are currently loaded and active inside the engine will be returned. * When using persistence, it is likely not all running process instances will be loaded * as their state will be stored persistently. It is recommended not to use this * method to collect information about the state of your process instances but to use * a history log for that purpose. * * @return a collection of process instances currently active in the session */ Collection<ProcessInstance> getProcessInstances(); /** * Returns the process instance with the given id. Note that only active process instances * will be returned. If a process instance has been completed already, this method will return * null. * * @param id the id of the process instance * @return the process instance with the given id or null if it cannot be found */ ProcessInstance getProcessInstance(long processInstanceId); /** * Aborts the process instance with the given id. If the process instance has been completed * (or aborted), or the process instance cannot be found, this method will throw an * IllegalArgumentException. * * @param id the id of the process instance */ void abortProcessInstance(long processInstanceId); /** * Returns the WorkItemManager related to this session. This can be used to * register new WorkItemHandlers or to complete (or abort) WorkItems. * * @return the WorkItemManager related to this session */ WorkItemManager getWorkItemManager();
2.4. Events Listeners
ProcessEventListener can be used to listen to process-related events, such as starting or completing a process, entering or leaving a node, etc. The different methods of the ProcessEventListener class are shown in the following example. An event object provides access to related information, such as the process instance and node instance linked to the event. This API can be used to register event listeners.
Example 2.2. ProcessEventListener Class
public interface ProcessEventListener {

  void beforeProcessStarted( ProcessStartedEvent event );
  void afterProcessStarted( ProcessStartedEvent event );
  void beforeProcessCompleted( ProcessCompletedEvent event );
  void afterProcessCompleted( ProcessCompletedEvent event );
  void beforeNodeTriggered( ProcessNodeTriggeredEvent event );
  void afterNodeTriggered( ProcessNodeTriggeredEvent event );
  void beforeNodeLeft( ProcessNodeLeftEvent event );
  void afterNodeLeft( ProcessNodeLeftEvent event );
  void beforeVariableChanged(ProcessVariableChangedEvent event);
  void afterVariableChanged(ProcessVariableChangedEvent event);

}
Table 2.1. Supported Loggers
| Type | Description | Required Arguments |
|---|---|---|
| Console | Output is written to the console when the logger is closed or the number of events reaches a predefined level. | The knowledge session to be logged |
| File | Output is written to a file in XML. |
The knowledge session to be logged
The name of the log file to be created
|
| Threaded File | Output is written to a file after a specified interval; this is useful to visualize the progress in realtime during debugging. |
The knowledge session to be logged
The name of the log file to be created
The interval (in milliseconds) to save the events.
|
KnowledgeRuntimeLoggerFactory lets you add a logger to your session, as shown in the following example. You should always close the logger at the end of your application.
Example 2.3. KnowledgeRuntimeLogger
KnowledgeRuntimeLogger logger =
    KnowledgeRuntimeLoggerFactory.newFileLogger( ksession, "test" );
// add invocations to the process engine here,
// e.g. ksession.startProcess(processId);
...
logger.close();

Chapter 3. Process Overview
3.1. Process Overview

Figure 3.1. A Business Process
- As an XML file that follows the XML schema defined in the BPMN 2.0 specification.
- With the graphical web-based designer included in the BRMS user interface.For details see Section 5.1, “Process Designer”
- With the graphical process editor in the JBoss Developer Studio plug-in.For details see Section 6.1, “JBoss Developer Studio”
3.2. Process Nodes
The start of a process and the end of a process are both types of events. Intermediate events indicate events that could occur during the execution of the process.
Activities are actions that need to be performed during the execution of the process.
Gateways are used to define paths of execution through a process.
3.3. Process Properties
- ID: The unique ID of the process
- Name: The display name of the process
- Version: The version number of the process
- Package: The package (namespace) the process is defined in
- Variables (optional): Variables to store data during the execution of your process
- Swimlanes: Swimlanes used in the process for assigning human tasks
3.4. Events
Table 3.1. Events
| Event Type | Additional Properties | Usage |
|---|---|---|
|
Start Event
 | Processes have one start node with one outgoing connection. Execution of a process always starts at the start node. | |
|
End Event
 |
|
Processes have one or more end events. Each end event has one incoming connection and no outgoing connections.
If the process is terminated, all active nodes (on parallel paths of execution) are cancelled. Non-terminating end events end the current path of execution but allow other paths to continue. Terminating end events are visualized with a full circle inside the event node; non-terminating event nodes are empty. Note that if you use a terminating event node inside a sub-process, you are terminating the top-level process instance, not just that sub-process.
|
|
Throwing Error Event
 |
|
Error events are used to signal an exceptional condition in the process. It should have one incoming connection and no outgoing connections. When an Error Event is reached in the process, it will throw an error with the given name. The process will search for an appropriate error handler that is capable of handling this kind of fault. If no error handler is found, the process instance will be aborted.
Error handlers can be specified using boundary events when working with XML.
|
|
Catching Timer Event
 |
|
Catching timer events represent a timer that can trigger one or multiple times after a given period of time. A Timer Event should have one incoming connection and one outgoing connection. When a Timer Event is reached in the process, it will start the associated timer.
See Section 3.9, “Timers” for expression syntax and further details.
|
|
Catching Signal Event
 |
|
A Signal Event can be used to respond to internal or external events during the execution of the process. A Signal Event should have no incoming connections and one outgoing connection. It specifies the type of event that is expected. Whenever that type of event is detected, the node connected to this event node will be triggered.
A process instance can be signaled that a specific event occurred using:
ksession.signalEvent(eventType, data, processInstanceId)
This triggers all (active) signal event nodes in the process instance that are waiting for that event type. Data related to the event can be passed using the data parameter. If the event node specifies a variable name, this data will be copied to that variable when the event occurs.
Events can be used inside sub-processes; however, these event nodes will only be active when the sub-process is active.
A signal can be generated from inside a process instance with a script, for instance:
kcontext.getKnowledgeRuntime().signalEvent(eventType, data, kcontext.getProcessInstance().getId()); |
- Internal event: Any action inside a process (e.g., the action of an action node or an on-entry or on-exit action of some node) can signal the occurrence of an internal event to the surrounding process instance. Example code of an internal event is demonstrated below.
kcontext.getProcessInstance().signalEvent(type, eventData);
- External event: A process instance can be notified of an event from outside using code such as the following:
processInstance.signalEvent(type, eventData);
- External event using event correlation: Instead of notifying a process instance directly, it is possible to have the engine automatically determine which process instances might be interested in an event using event correlation, which is based on the event type. A process instance that contains an event node listening to external events of some type is notified whenever such an event occurs. To signal such an event to the process engine, use the following code:
ksession.signalEvent(type, eventData);
3.5. Activities
Table 3.2. Activities
| Activity Type | Additional Properties | Usage |
|---|---|---|
|
Script Tasks
 |
| The Script Task represents a script that should be executed in this process. The associated action specifies what should be executed, the dialect used for coding the action (i.e., Java or MVEL), and the actual action code. This code can access any variables and globals. There is also a predefined variable 'kcontext' that references the 'ProcessContext' object (which can be used to access the current ProcessInstance or NodeInstance; this object can also be used to get and set variables, or for it to get access to the ksession using:
kcontext.getKnowledgeRuntime())When a Script Task is reached in the process, it will execute the action and then continue with the next node. |
|
User Task
 |
|
Processes can involve tasks that need to be executed by human actors. A user task represents an atomic task to be completed by a human actor. User tasks can be used in combination with swim lanes to assign multiple human tasks to similar actors. For more information about swim lanes and human tasks, see Human Tasks chapter.
|
|
Service Tasks
 |
| Service Tasks represent an abstract unit of work that should be executed in this process. All work that is executed outside the process engine should be represented (in a declarative way) using a Service Task. Different types of services are predefined, e.g., sending an email, logging a message, etc. however, users can define domain-specific services or work items. For further details, see Domain-Specific Processes chapter. |
|
Business Rule Task
 |
|
Business Rule Task represents a set of rules that need to be evaluated. Rules are defined in separate files using the Drools rule format. Rules can become part of a specific ruleflow group using the ruleflow-group attribute in the header of the rule. When a Rule Task is reached in the process, the engine will start executing rules that are part of the corresponding ruleflow-group (if any). Execution will automatically continue to the next node if there are no more active rules in this ruleflow group. This means that during the execution of a ruleflow group, it is possible that new activations belonging to the currently active ruleflow group are added to the Agenda; this occurs because of changes made to the facts by the other rules. If the ruleflow group was already active, the ruleflow group will remain active and execution will only continue if all active rules of the ruleflow group have been completed.
|
|
Embedded Sub-Process
 |
|
A sub-process is a node that can contain other nodes so that it acts as a node container. This allows not only the embedding of a part of the process within such a sub-process node, but also the definition of additional variables that are accessible for all nodes inside this container. A sub-process needs a start event and one or more end events.
|
|
Reusable Sub-process
 |
|
Reusable sub-processes represent the invocation of another process from within a process. When a reusable sub-process node is reached in the process, the engine will start the process with the given ID.
|
|
Multi-Instance Sub-Process
 |
|
A Multiple Instance sub-process is a special kind of sub-process that allows you to execute the contained process segment multiple times, once for each element in a collection. It waits until the embedded process fragment is completed for each of the elements in the given collection before continuing. If the collection expression evaluates to null or an empty collection, the multiple instances sub-process will be completed immediately and follow its outgoing connection.
|
- Avoid low level implementation details inside the process when defining high-level business processes that need to be understood by business users. A Script Task could be used to manipulate variables, but other concepts like a service task could be used to model more complex behavior in a higher-level manner.
- Scripts should be immediate as they use the engine thread to execute the script. Scripts that take some time to execute should be modeled as an asynchronous Service Task.
- Avoid contacting external services through a script node; instead, model communication with an external service using a service task.
- Scripts should not throw exceptions. Runtime exceptions should be caught and managed inside the script or transformed into signals or errors that can then be handled inside the process.
This variable is of type org.drools.runtime.process.ProcessContext and can be used for several tasks:
- Getting the current node instance (if applicable). The node instance could be queried for data, such as its name and type. You can also cancel the current node instance.
NodeInstance node = kcontext.getNodeInstance();

String name = node.getNodeName();
- Getting the current process instance. A process instance can be queried for data (name, id, processId, etc.), aborted or signaled an internal event.
ksession.signalEvent(eventType, data, processInstanceId)
- Getting or setting the value of variables.
- Accessing the Knowledge Runtime allows you do things like starting a process, signaling (external) events, inserting data, etc.
Both Java and MVEL can be used. Java actions should be valid Java code. MVEL actions can use the business scripting language MVEL to express the action. MVEL accepts any valid Java code but additionally provides support for nested accesses of parameters (e.g., person.name instead of person.getName()), and it provides many other scripting improvements. Thus, MVEL expressions are more convenient for the business user. For example, an action that prints out the name of the person in the "requester" variable of the process would look like this:
// Java dialect
System.out.println( person.getName() );

//  MVEL dialect
System.out.println( person.name );
3.6. Gateways
- AND (Parallel)The flow of control continues along all outgoing connections (branches) simultaneously.
- XOR (Exclusive)The flow of control continues along only one of the outgoing connections. The connection with the constraint with the lowest priority number that evaluates to true is selected. For information about defining constraints see Section 3.8, “Constraints”. At least one of the outgoing connections must evaluate to true at runtime, or the process will throw an exception at runtime.
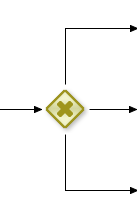
Figure 3.2. Diverging Gateway
- ID: The ID of the node (which is unique within one node container).
- Name: The display name of the node.
- Type: AND or XOR.
- Constraints: The constraints linked to each of the outgoing connections (exclusive and inclusive gateways).

Figure 3.3. Converging Gateway
- ID: The ID of the node (which is unique within one node container).
- Name: The display name of the node.
- Type: AND or XOR.
- When a parallel (AND) split was used, the converging gateway will wait for all incoming branches to be completed before continuing.
- When an exclusive (XOR) split was used, the converging gateway will continue as soon as the one incoming branch has completed.
Note
3.7. Data
- Process-level variables can be set when starting a process by providing a map of parameters to the invocation of the startProcess method. These parameters will be set as variables on the process scope.
- Script actions can access variables directly simply by using the name of the variable as a local parameter in their script. For example, if the process defines a variable of type "org.jbpm.Person" in the process, a script in the process could access this directly:
// call method on the process variable "person"

person.setAge(10);
Changing the value of a variable in a script can be done through the knowledge context:kcontext.setVariable(variableName, value);
- Service tasks (and reusable sub-processes) can pass the value of process variables to the outside world (or another process instance) by mapping the variable to an outgoing parameter. For example, the parameter mapping of a service task could define that the value of the process variable x should be mapped to a task parameter y just before the service is invoked. You can also inject the value of the process variable into a hard-coded parameter String using #{expression}. For example, the description of a human task could be defined as the following:
You need to contact person #{person.getName()}Where person is a process variable. This will replace this expression with the actual name of the person when the service needs to be invoked. Similarl results of a service (or reusable sub-process) can also be copied back to a variable using result mapping. - Various other nodes can also access data. Event nodes, for example, can store the data associated to the event in a variable. Check the properties of the different node types for more information.
ksession.setGlobal(name, value)
kcontext.getKnowledgeRuntime().setGlobal(name,value);.
3.8. Constraints
- Code constraints are boolean expressions evaluated directly whenever they are reached; these constraints are written in either Java or MVEL. Both Java and MVEL code constraints have direct access to the globals and variables defined in the process.Here is an example of a valid Java code constraint, person being a variable in the process:
return person.getAge() > 20;
Here is an example of a valid MVEL code constraint, person being a variable in the process:return person.age > 20;
- Rule constraints are equal to normal Drools rule conditions. They use the Drools Rule Language syntax to express complex constraints. These rules can, like any other rule, refer to data in the working memory. They can also refer to globals directly. Here is an example of a valid rule constraint:
Person( age > 20 )
This tests for a person older than 20 in the working memory.
name of the process:
processInstance : WorkflowProcessInstance()
Person( name == ( processInstance.getVariable("name") ) )
# add more constraints here ...3.9. Timers
[#d][#h][#m][#s][#[ms]]
3.10. Updating Processes
- Proceed: The running process instance proceeds as normal, following the process definition as it was defined when the process instance was started. As a result, the already running instance will proceed as if the process was never updated. New instances can be started using the updated process.
- Abort (and restart): The already running instance is aborted. If necessary, the process instance can be restarted using the new process definition.
- Transfer: The process instance is migrated to the new process definition; that is, once it has been migrated successfully, it will continue executing based on the updated process logic. For further details see Section 3.11, “Process Instance Migration”.
processInstance.getProcess().getVersion()
3.11. Process Instance Migration
// create the session and start the process "com.sample.process"
KnowledgeBuilder kbuilder = ...
StatefulKnowledgeSession ksession = ...
ProcessInstance processInstance = ksession.startProcess("com.sample.process");

// add a new version of the process "com.sample.process2"
kbuilder = KnowledgeBuilderFactory.newKnowledgeBuilder();
kbuilder.add(..., ResourceType.BPMN2);
kbase.addKnowledgePackages(kbuilder.getKnowledgePackages());

// migrate process instance to new version
Map<String, Long> mapping = new HashMap<String, Long>();
// top level node 2 is mapped to a new node with id 3
mapping.put("2", 3L);
// node 2, which is part of composite node 5, is mapped to a new node with id 4
mapping.put("5.2", 4L);
WorkflowProcessInstanceUpgrader.upgradeProcessInstance(
   ksession, processInstance.getId(),
   "com.sample.process2", mapping);
3.12. Multi-threading
3.12.1. Multi-threading
3.12.2. Engine Execution
Thread.sleep(...) as part of a script will not make the engine continue execution elsewhere but will block the engine thread during that period.
completeWorkItem(...) method to return before continuing execution. It is important that your service handler executes your service asynchronously if its execution is not instantaneous.
3.13. Asynchronous Handlers
public class MyServiceTaskHandler implements WorkItemHandler {

  public void executeWorkItem(WorkItem workItem, WorkItemManager manager) {
    new Thread(new Runnable() {
      public void run() {
        // Do the heavy lifting here ...
      }
    }).start();
  }

  public void abortWorkItem(WorkItem workItem, WorkItemManager manager) {
  }

}
Chapter 4. BPMN 2.0 Notation
4.1. Business Process Model and Notation (BPMN) 2.0 Specification
Table 4.1. BPMN 2.0 Supported Elements and Attributes
| Element | Supported attributes | Supported elements | Extension attributes | Extension elements |
|---|---|---|---|---|
| definitions | rootElement BPMNDiagram | |||
| process | processType isExecutable name id | property laneSet flowElement | packageName adHoc version | import global |
| sequenceFlow | sourceRef targetRef isImmediate name id | conditionExpression | priority | |
| interface | name id | operation | ||
| operation | name id | inMessageRef | ||
| laneSet | lane | |||
| lane | name id | flowNodeRef | ||
| import* | name | |||
| global* | identifier type | |||
| Events | ||||
| startEvent | name id | dataOutput dataOutputAssociation outputSet eventDefinition | x y width height | |
| endEvent | name id | dataInput dataInputAssociation inputSet eventDefinition | x y width height | |
| intermediateCatchEvent | name id | dataOutput dataOutputAssociation outputSet eventDefinition | x y width height | |
| intermediateThrowEvent | name id | dataInput dataInputAssociation inputSet eventDefinition | x y width height | |
| boundaryEvent | cancelActivity attachedToRef name id | eventDefinition | x y width height | |
| terminateEventDefinition | ||||
| compensateEventDefinition | activityRef | documentation extensionElements | ||
| conditionalEventDefinition | condition | |||
| errorEventDefinition | errorRef | |||
| error | errorCode id | |||
| escalationEventDefinition | escalationRef | |||
| escalation | escalationCode id | |||
| messageEventDefinition | messageRef | |||
| message | itemRef id | |||
| signalEventDefinition | signalRef | |||
| timerEventDefinition | timeCycle timeDuration | |||
| Activities | ||||
| task | name id | ioSpecification dataInputAssociation dataOutputAssociation | taskName x y width height | |
| scriptTask | scriptFormat name id | script | x y width height | |
| script | text[mixed content] | |||
| userTask | name id | ioSpecification dataInputAssociation dataOutputAssociation resourceRole | x y width height | onEntry-script onExit-script |
| potentialOwner | resourceAssignmentExpression | |||
| resourceAssignmentExpression | expression | |||
| businessRuleTask | name id | x y width height ruleFlowGroup | onEntry-script onExit-script | |
| manualTask | name id | x y width height | onEntry-script onExit-script | |
| sendTask | messageRef name id | ioSpecification dataInputAssociation | x y width height | onEntry-script onExit-script |
| receiveTask | messageRef name id | ioSpecification dataOutputAssociation | x y width height | onEntry-script onExit-script |
| serviceTask | operationRef name id | ioSpecification dataInputAssociation dataOutputAssociation | x y width height | onEntry-script onExit-script |
| subProcess | name id | flowElement property loopCharacteristics | x y width height | |
| adHocSubProcess | cancelRemainingInstances name id | completionCondition flowElement property | x y width height | |
| callActivity | calledElement name id | ioSpecification dataInputAssociation dataOutputAssociation | x y width height waitForCompletion independent | onEntry-script onExit-script |
| multiInstanceLoopCharacteristics | loopDataInputRef inputDataItem | |||
| onEntry-script* | scriptFormat | script | ||
| onExit-script* | scriptFormat | script | ||
| Gateways | ||||
| parallelGateway | gatewayDirection name id | x y width height | ||
| eventBasedGateway | gatewayDirection name id | x y width height | ||
| exclusiveGateway | default gatewayDirection name id | x y width height | ||
| inclusiveGateway | default gatewayDirection name id | x y width height | ||
| Data | ||||
| property | itemSubjectRef id | |||
| dataObject | itemSubjectRef id | |||
| itemDefinition | structureRef id | |||
| ioSpecification | dataInput dataOutput inputSet outputSet | |||
| dataInput | name id | |||
| dataInputAssociation | sourceRef targetRef assignment | |||
| dataOutput | name id | |||
| dataOutputAssociation | sourceRef targetRef assignment | |||
| inputSet | dataInputRefs | |||
| outputSet | dataOutputRefs | |||
| assignment | from to | |||
| formalExpression | language | text[mixed content] | ||
| BPMNDI | ||||
| BPMNDiagram | BPMNPlane | |||
| BPMNPlane | bpmnElement | BPMNEdge BPMNShape | ||
| BPMNShape | bpmnElement | Bounds | ||
| BPMNEdge | bpmnElement | waypoint | ||
| Bounds | x y width height | |||
| waypoint | x y | |||
4.2. An Example BPMN 2.0 Process

Figure 4.1. Graphical Hello World Process
Example 4.1. BPMN 2.0 XML Hello World Process
<?xml version="1.0" encoding="UTF-8"?>
<definitions id="Definition"
             targetNamespace="http://www.example.org/MinimalExample"
             typeLanguage="http://www.java.com/javaTypes"
             expressionLanguage="http://www.mvel.org/2.0"
             xmlns="http://www.omg.org/spec/BPMN/20100524/MODEL"
             xmlns:xs="http://www.w3.org/2001/XMLSchema-instance"
             xs:schemaLocation="http://www.omg.org/spec/BPMN/20100524/MODEL BPMN20.xsd"
             xmlns:bpmndi="http://www.omg.org/spec/BPMN/20100524/DI"
             xmlns:dc="http://www.omg.org/spec/DD/20100524/DC"
             xmlns:di="http://www.omg.org/spec/DD/20100524/DI"
             xmlns:tns="http://www.jboss.org/drools">

  <process processType="Private" isExecutable="true" id="com.sample.HelloWorld" name="Hello World" >

    <!-- nodes -->
    <startEvent id="_1" name="StartProcess" />
    <scriptTask id="_2" name="Hello" >
      <script>System.out.println("Hello World");</script>
    </scriptTask>
    <endEvent id="_3" name="EndProcess" >
        <terminateEventDefinition/>
    </endEvent>

    <!-- connections -->
    <sequenceFlow id="_1-_2" sourceRef="_1" targetRef="_2" />
    <sequenceFlow id="_2-_3" sourceRef="_2" targetRef="_3" />

  </process>

  <bpmndi:BPMNDiagram>
    <bpmndi:BPMNPlane bpmnElement="Minimal" >
      <bpmndi:BPMNShape bpmnElement="_1" >
        <dc:Bounds x="15" y="91" width="48" height="48" />
      </bpmndi:BPMNShape>
      <bpmndi:BPMNShape bpmnElement="_2" >
        <dc:Bounds x="95" y="88" width="83" height="48" />
      </bpmndi:BPMNShape>
      <bpmndi:BPMNShape bpmnElement="_3" >
        <dc:Bounds x="258" y="86" width="48" height="48" />
      </bpmndi:BPMNShape>
      <bpmndi:BPMNEdge bpmnElement="_1-_2" >
        <di:waypoint x="39" y="115" />
        <di:waypoint x="75" y="46" />
        <di:waypoint x="136" y="112" />
      </bpmndi:BPMNEdge>
      <bpmndi:BPMNEdge bpmnElement="_2-_3" >
        <di:waypoint x="136" y="112" />
        <di:waypoint x="240" y="240" />
        <di:waypoint x="282" y="110" />
      </bpmndi:BPMNEdge>
    </bpmndi:BPMNPlane>
  </bpmndi:BPMNDiagram>

</definitions>Chapter 5. Process Designer
5.1. Process Designer

5.2. Configuring the Process Designer
jbpm.xml file, which is located in the jboss-as/server/production/deploy/designer.war/profiles/ directory.
- protocol: the protocol to use (http/https)
- host: localhost:8080
- subdomain: jboss-brms/org.drools.guvnor.Guvnor/oryxeditor
- usr: admin (default, must be a valid JBoss BRMS user)
- pwd: admin (default, must correspond to a valid JBoss BRMS user password)
Note
production/deploy/jboss-brms.war/WEB-INF/classes/preferences.properties.
5.3. Process Creation and Validation
Procedure 5.1. Create a Process
- From the navigation panel select → → .
- Enter a name for the process in the Name: dialogue box.
- Select which package to create the process in from the drop down menu and provide a description.
Note
At this stage, Red Hat advises against creating processes in the global area as not all of the processes attributes can be successfully imported into other packages. - Processes are created by dragging and dropping the process elements from the shape repository panel on the left of the screen onto the canvas in the center of the screen.Select the node to start the process with from the shape repository panel and drag it onto the canvas.Name the node by clicking the value column next to Name in the properties panel on the right side of the Process Designer.
- Add the next node in the process by selecting the required node type from the shape repository panel and dragging it onto the canvas.Edit the node's properties in the properties panel.
- Connect the nodes by clicking the first node; then by selecting and holding the arrow icon, drag it to the second node.
- Continue to add nodes and connections until the process is finished.
When creating new processes it is important not to include unicode characters in either the process name or the process ID, as this is not currently supported and will result in unexpected behavior from the process designer when saving and retrieving the process assets.
The Process Designer can be used to check that processes are complete. If validation errors are encountered, an error message is displayed; however, validation errors should not be relied upon to check for overall correctness of the process.
5.4. Importing Existing Processes
5.4.1. Importing Existing BPMN2 Processes
- Upload an existing file from the local filesystem.
- Copy and paste the BPMN2 XML directly into the import dialogue box.
5.4.2. Migrating jPDL 3.2 to BPMN2
Important
Procedure 5.2. Enabling the jPDL 3.2 Migration Tool
- Stop the server.
- Locate jbpm.xml in the
server/profile/deploy/designer.war/profiles/directory. - Remove the comment tags around the JPDL migration plugin tool entry:
<!-- plugin name="ORYX.Plugins.JPDLMigration"/ --> - Save the file with the comment tags removed:
<plugin name="ORYX.Plugins.JPDLMigration"/> - Restart the server.
- Log onto the JBoss BRMS user interface and navigate to the process designer. The jPDL migration tool button has now been added to the process designer user interface.
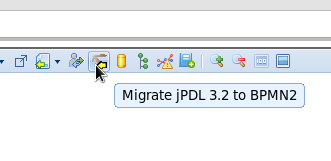
Figure 5.1. jPDL Migration Tool
5.6. Defining Domain-Specific Service Nodes
Procedure 5.3. Define a Service Node
- From the navigation panel, select → → .
- Enter a name for the definition in the Name: dialogue box.Select which package to assign the service node to, or select Create in Global Area, provide a description and click OK.
- Configure the service node as required.For example, an email service node could be named
Email, and parameters,To,From,Subject, andBody, all of type String. Edit the existing parameters and use the Parameter button to add new ones.Edit the display name to show the required name for the work task.Select → . - Upload an icon for the Service node.Select → .Enter a name into the Name dialogue box.Enter the file extension type.Select which package the file should be created in and click OK.
- Click Choose File to select an image file from the local filesystem and click Upload.
- Add the icon to the service node.Click the package name from the navigation panel; expand the WorkItemDefinition tab and select the work and click open for the service node. PNG and GIF formats are supported for icons.The icon is now available for the Select Icon to add drop down box. Select the icon to use.
- Click → .
- To add the new service node to a process, open a process.
- From the navigation panel select → and select the package.
- Expand the processes area under the assets tab and click open on the required process.
- From the Shape Repository, expand the Service Tasks tab and drag the new service node on to the process as required.
5.7. Connecting to a Service Repository
Procedure 5.4. Connection to the Service Repository
- Log onto the JBoss BRMS user interface.
- Access the process designer by either selecting an existing process to edit or by creating a new process.
- Select the service repository icon to enter the service repository URL.
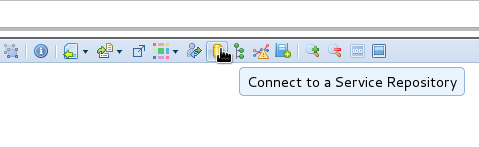
Figure 5.2. Service Repository Connection
- Enter the URL for the service repository and click Connect.
- Double click the required services to add them to the package and make them available in the Shape Repository of the process designer.
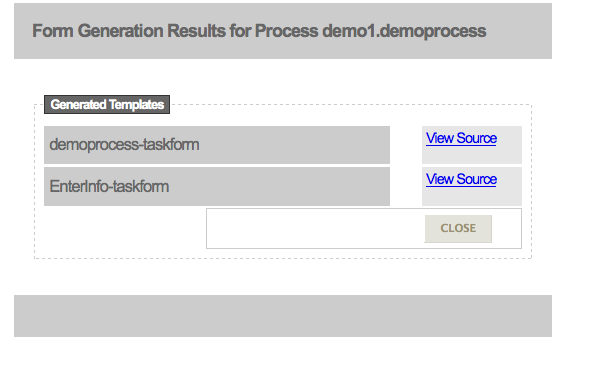
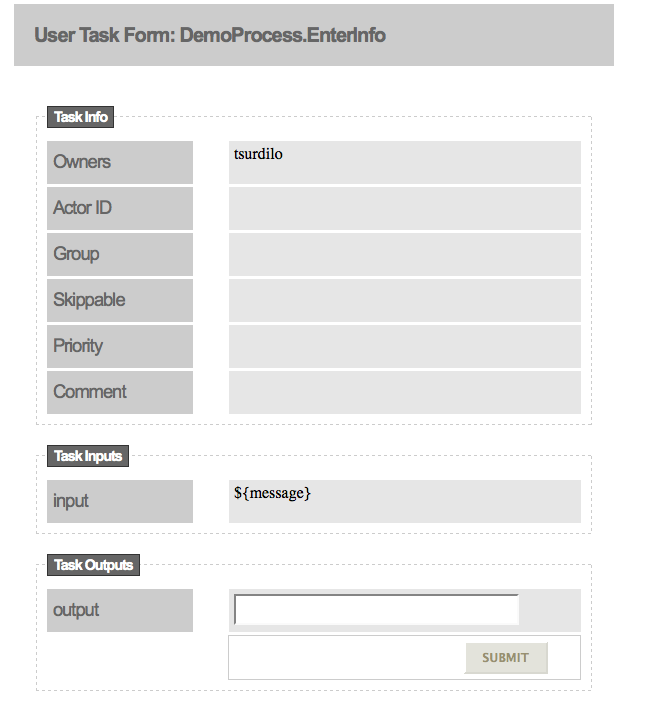
5.8. Generate Process and Task Forms

Chapter 6. JBoss Developer Studio
6.1. JBoss Developer Studio
Note
6.2. Project Creation
Procedure 6.1. Create a New Project
- Select → → .
- Select → .
- Enter a name for the project into the Project name: text box and click Next.
Note
JBDS provides the option to add a sample HelloWorld Process to the project. Accept this default to test the sample project in the next step. - To test the project, right click the Java file that contains the main method and select → → .The output will be displayed in the console tab.
6.3. Process Creation
Procedure 6.2. Create a New Process
- To create a new process, select → → and then select → .
- Select the parent folder for the process.
- Enter a name in the File name: dialogue box and click Finish.
- Open the graphical editor by right clicking the process .bpmn file, select Open With and then click the radio button next to BPMN2 Process Editor.
- Add nodes to the process by clicking on the required node in the palette and clicking on the canvas where the node should be placed.
- Connect the nodes with sequence flows. Select Sequence Flow from the palette, then click the nodes to connect them.
- To edit a node's properties, click the node, open the properties tab in the bottom panel of the JBDS workspace, and click the values to be edited.If the properties tab is not already open, right click the bpmn file in the package panel and select → .
- Click the save icon to save the process.
6.4. Validation and Debugging
To validate a process, right click the .bpmn file and select Validate.
To debug a process, right click the .bpmn file and select → ; make any required changes to the test configuration and click Debug.
Chapter 7. Persistence
7.1. Persistent
- Runtime
- Process Definitions
- Historical information (logs)
7.2. Runtime State
7.2.1. Runtime State
ksession.getProcessInstance(id)
7.2.2. Safe Points
7.2.3. Binary Persistence
- The process instance information is transformed into binary data. For performance reasons, a custom serialization mechanism is used and not normal Java serialization.
- The binary data is stored alongside other metadata about the process instance. This metadata includes the process instance ID, process ID, and the process start date.
ksession.getId().

Figure 7.1. Data Model
sessioninfo entity contains the state of the (knowledge) session in which the process instance is running.
Table 7.1. SessionInfo
| Field | Description | Nullable |
|---|---|---|
id | The primary key | NOT NULL |
lastmodificationdate | The last time that the entity was saved to the database | |
rulesbytearray | The binary dataset containing the state of the session | NOT NULL |
startdate | The start time of the session | |
optlock | The version field that serves as its optimistic lock value |
processinstanceinfo entity contains the state of the process instance.
Table 7.2. ProcessInstanceInfo
| Field | Description | Nullable |
|---|---|---|
instanceid | The primary key | NOT NULL |
lastmodificationdate | The last time that the entity was saved to the database | |
lastreaddate | The last time that the entity was retrieved (read) from the database | |
processid | The name (ID) of the process | |
processinstancebytearray | This is the binary dataset containing the state of the process instance | NOT NULL |
startdate | The start time of the process | |
state | An integer representing the state of the process instance | NOT NULL |
optlock | The version field that serves as its optimistic lock value |
eventtypes entity contains information about events that a process instance will undergo or has undergone.
Table 7.3. EventTypes
| Field | Description | Nullable |
|---|---|---|
instanceid | This references the processinstanceinfo primary key and there is a foreign key constraint on this column | NOT NULL |
element | A text field related to an event that the process has undergone |
workiteminfo entity contains the state of a work item.
Table 7.4. WorkItemInfo
| Field | Description | Nullable |
|---|---|---|
workitemid | The primary key | NOT NULL |
name | The name of the work item | |
processinstanceid | The (primary key) ID of the process: there is no foreign key constraint on this field | NOT NULL |
state | An integer representing the state of the work item | NOT NULL |
optlock | The version field that serves as its optimistic lock value | |
workitembytearay | This is the binary dataset containing the state of the work item | NOT NULL |
7.3. Configuring Persistence
7.3.1. Configuring Persistence
7.3.2. Adding Dependencies
- JBoss BRMS 5.3 Deployable Package.
- The database vendor's JDBC driver.
- A transaction manager.
Note
- jbpm-test
- jbpm-persistence-jpa
- drools-persistence-jpa
- persistence-api
- hibernate-entitymanager
- hibernate-annotations
- hibernate-commons-annotations
- hibernate-core
- commons-collections
- dom4j
- jta
- btm
- javassist
- slf4j-api
- slf4j-jdk14
- h2
7.3.3. Configure the Engine to use Persistence
JBPMHelper class of the jbpm-test module has a method to create a session and uses a configuration file to configure the session. The information below shows an example jBPM.properties file that uses an H2 in-memory database with persistence enabled.
Example 7.1. Example jBPM.properties File
# for creating a datasource
persistence.datasource.name=jdbc/jbpm-ds
persistence.datasource.user=sa
persistence.datasource.password=
persistence.datasource.url=jdbc:h2:tcp://localhost/~/jbpm-db
persistence.datasource.driverClassName=org.h2.Driver

# for configuring persistence of the session
persistence.enabled=true
persistence.persistenceunit.name=org.jbpm.persistence.jpa
persistence.persistenceunit.dialect=org.hibernate.dialect.H2Dialect

# for configuring the human task service
taskservice.enabled=true
taskservice.datasource.name=org.jbpm.task
taskservice.transport=mina
taskservice.usergroupcallback=org.jbpm.task.service.DefaultUserGroupCallbackImpl
JBPMHelper class can be used to register the datasource:
JBPMHelper.setupDataSource();
JBPMHelper class can be used to create sessions (after the knowledge base has been created):
StatefulKnowledgeSession ksession = JBPMHelper.newStatefulKnowledgeSession(kbase);
startProcess) and the engine will persist all runtime state in the created datasource.
JBPMHelper class can be used to recreate sessions by restoring their state from the database by passing in the session ID. The session ID is retrieved using ksession.getId().
StatefulKnowledgeSession ksession =
    JBPMHelper.loadStatefulKnowledgeSession(kbase, sessionId);
7.3.4. Session ID
7.3.4.1. Session ID
jbpmSessionId.ser file. If the jbpmSessionId.ser file does not exist, it will be created and the session ID stored in the file. If the file exists, the session ID is read from the file and the session is loaded from the database, enabling the session to be reloaded after the server has been restarted.
jbpmSessionId.ser file is located in jboss-as/server/profile/tmp/ directory; however, this can be changed by modifying the jbpm.console.tmp.dir property in jbpm.console.properties located in the jboss-as/server/profile/deploy/business-central-server.war/WEB-INF/classes/ directory.
7.3.5. Transactions
// create the entity manager factory and register it in the environment
EntityManagerFactory emf =
    Persistence.createEntityManagerFactory( "org.jbpm.persistence.jpa" );
Environment env = KnowledgeBaseFactory.newEnvironment();
env.set( EnvironmentName.ENTITY_MANAGER_FACTORY, emf );
env.set( EnvironmentName.TRANSACTION_MANAGER,
         TransactionManagerServices.getTransactionManager() );

// create a new knowledge session that uses JPA to store the runtime state
StatefulKnowledgeSession ksession =
    JPAKnowledgeService.newStatefulKnowledgeSession( kbase, null, env );

// start the transaction
UserTransaction ut =
  (UserTransaction) new InitialContext().lookup( "java:comp/UserTransaction" );
ut.begin();

// perform multiple commands inside one transaction
ksession.insert( new Person( "John Doe" ) );
ksession.startProcess( "MyProcess" );

// commit the transaction
ut.commit();7.4. History Log
7.4.1. History Log
7.4.2. The Business Activity Monitoring Data Model

Figure 7.2. Business Activity Monitoring data model
ProcessInstanceLog table contains the basic log information about a process instance.
Table 7.5. ProcessInstanceLog
| Field | Description | Nullable |
|---|---|---|
id | The primary key and ID of the log entity | NOT NULL |
end_date | When applicable, the end date of the process instance | |
processid | The name (ID) of the process | |
processinstanceid | The process instance ID | NOT NULL |
start_date | The start date of the process instance |
NodeInstanceLog table contains more information about which nodes were executed inside each process instance. Whenever a node instance is entered from one of its incoming connections or is exited through one of its outgoing connections, that information is stored in this table.
Table 7.6. NodeInstanceLog
| Field | Description | Nullable |
|---|---|---|
id | The primary key and ID of the log entity | NOT NULL |
log_date | The date of the event | |
nodeid | The node ID of the corresponding node in the process definition | |
nodeinstanceid | The node instance ID | |
nodename | The name of the node | |
processid | The ID of the process that the process instance is executing | |
processinstanceid | The process instance ID | NOT NULL |
type | The type of the event (0 = enter, 1 = exit) | NOT NULL |
VariableInstanceLog table contains information about changes in variable instances. The default is to only generate log entries after a variable changes. It is also possible to log entries before the variable's value changes.
Table 7.7. VariableInstanceLog
| Field | Description | Nullable |
|---|---|---|
id | The primary key and ID of the log entity | NOT NULL |
log_date | The date of the event | |
processid | The ID of the process that the process instance is executing | |
processinstanceid | The process instance ID | NOT NULL |
value | The value of the variable at the time that the log is made | |
variableid | The variable ID in the process definition | |
variableinstanceid | The ID of the variable instance |
7.4.3. Storing Process Events in a Database
StatefulKnowledgeSession ksession = ...;
JPAWorkingMemoryDbLogger logger = new JPAWorkingMemoryDbLogger(ksession);

// invoke methods one your session here

logger.dispose();
addFilter to ensure that only relevant information is stored in the database.
persistence.xml file, which is located business-central-server.war/WEB-INF/classes/META-INF/ directory of the JBoss BRMS 5.3 deployable installation.
       <?xml version="1.0" encoding="UTF-8" standalone="yes"?>
       <persistence
           version="1.0"
           xsi:schemaLocation=
           	"http://java.sun.com/xml/ns/persistence
           	 http://java.sun.com/xml/ns/persistence/persistence_1_0.xsd
       		 http://java.sun.com/xml/ns/persistence/orm
       		 http://java.sun.com/xml/ns/persistence/orm_1_0.xsd"
           xmlns:orm="http://java.sun.com/xml/ns/persistence/orm"
           xmlns:xsi="http://www.w3.org/2001/XMLSchema-instance"
           xmlns="http://java.sun.com/xml/ns/persistence">

        <!--persistence-unit name="ProcessService">
         <jta-data-source>java:/DefaultDS</jta-data-source>
         <properties>
          <property name="hibernate.hbm2ddl.auto" value="create-drop"/>
         </properties>
        </persistence-unit-->

         <persistence-unit name="org.jbpm.persistence.jpa" transaction-type="JTA">
           <provider>org.hibernate.ejb.HibernatePersistence</provider>
           <jta-data-source>java:/DefaultDS</jta-data-source>
           <mapping-file>META-INF/JBPMorm.xml</mapping-file>
           <class>org.jbpm.persistence.processinstance.ProcessInstanceInfo</class>
           <class>org.drools.persistence.info.SessionInfo</class>
           <class>org.drools.persistence.info.WorkItemInfo</class>
           <class>org.jbpm.process.audit.ProcessInstanceLog</class>
           <class>org.jbpm.process.audit.NodeInstanceLog</class>
           <class>org.jbpm.process.audit.VariableInstanceLog</class>
           <properties>
             <property name="hibernate.dialect" value="org.hibernate.dialect.HSQLDialect"/>
             <property name="hibernate.max_fetch_depth" value="3"/>
             <property name="hibernate.hbm2ddl.auto" value="update" />
             <property name="hibernate.show_sql" value="false" />
             <property name="hibernate.transaction.manager_lookup_class" value="org.hibernate.transaction.JBossTransactionManagerLookup" />
           </properties>
         </persistence-unit>

       </persistence>
Chapter 8. Business Central Console
8.1. Business Central Console
8.2. Business Central Console and BRMS Integration
8.2.1. Business Central Console and BRMS Integration
8.2.2. Configuring the Business Central Console
jbpm.console.properties file, which is located in the jboss-as/server/profile/deploy/business-central-server.war/WEB-INF/classes/ directory. This file configures the following properties:
Note
jbpm.console.properties file by default.
- jbpm.console.server.host (default localhost)
- jbpm.console.server.port (default 8080)
- jbpm.console.task.service.host (default localhost) host where Task Server is deployed applies to all transports
- jbpm.console.tmp.dir: An optional property that is used to set the location of the
jbpmSessionId.serfile, which stores the session ID of the most recently used persisted session. - jbpm.console.task.service.port: The port where the task server is deployed (5446 when using HornetQ)
- jbpm.console.task.service.strategy (default HornetQ)
- JMSTaskClient.connectionFactory (no default) JNDI name of connection factory only for JMS
- JMSTaskClient.acknowledgeMode (no default) acknowledgment mode only for JMS
- JMSTaskClient.transactedQueue (no default) transacted queue name only for JMS
- JMSTaskClient.queueName (no default) queue name only for JMS
- JMSTaskClient.responseQueueName (no default) response queue name only for JMS
- guvnor.protocol (default http)
- guvnor.host (default localhost:8080)
- guvnor.subdomain (default drools-guvnor)
- guvnor.usr (default admin)
- guvnor.pwd (default admin)
- guvnor.packages (comma separated list of packages to load from Guvnor. When no packages have been specified, all packages will be visible. When specifying packages that should be visible, it is important to remember only the specified packages be visible.)
- guvnor.connect.timeout (default 10000)
- guvnor.read.timeout (default 10000)
- guvnor.snapshot.name (default LATEST) This is an optional property that specifies the name of the snapshot to use.
Note
jboss-as/server/production/deploy/jboss-brms.war/WEB-INF/components.xml. If the credentials are changed in one place, they must be changed in both locations.
8.2.3. User and Group Management
brms-roles.properties file in the server/profile/conf/props/ directory.
8.3. Log On to the Business Central Console
brms-roles.properties file in the server/profile/conf/props/ directory.
8.4. Managing Process Instances
Managing Process Instances
- Managing Process Instances
- The process instances table, found under the Processes menu, shows all running instances for a specific process definition. Select a process instance to show the details of that specific process instance.
- Starting new process instances
- New process instances are started by selecting the process definition from the process definition list and selecting Start. If a form is associated with the process (to ask for additional information before starting the process) the form will be displayed. After completing the form, the process is started with the provided information.
- Inspecting Process Instance State
- To inspect the state of a specific process instance, click on the Diagram button. The process flow chart is displayed with a red triangle overlaid on any currently active nodes.
- Inspecting Process Instance Variables
- Top level process instance variables can be inspected by clicking the Instance Data button.
- Terminate Process Instances
- To terminate a process instance, click the Terminate button.
- Delete Process Instances
- To delete a process instance, click the Delete button.
- Signal Process
- To signal processes that have catching intermediate signal events defined, click the signal button.
8.5. Human Task Lists
8.6. Registering Service Handlers
drools.session.conf file by using the drools.workItemHandlers property as a list of space delimited file names:
drools.workItemHandlers = CustomerWorkItemHandlers.conf
[
   "log" : new org.jbpm.process.instance.impl.demo.SystemOutWorkItemHandler(),
]
8.7. Adding New Process and Task Forms
<html>
<body>
<h2>Start Performance Evaluation</h2>
<hr>
<form action="complete" method="POST" enctype="multipart/form-data">
Please fill in your username: <input type="text" name="employee" /></BR>
<input type="submit" value="Complete">
</form>
</body>
</html>
<html>
<body>
<h2>Employee evaluation</h2>
<hr>
${task.descriptions[0].text}<br/>
<br/>
Please fill in the following evaluation form:
<form action="complete" method="POST" enctype="multipart/form-data">
Rate the overall performance: <select name="performance">
<option value="outstanding">Outstanding</option>
<option value="exceeding">Exceeding expectations</option>
<option value="acceptable">Acceptable</option>
<option value="below">Below average</option>
</select><br/>
<br/>
Check any that apply:<br/>
<input type="checkbox" name="initiative" value="initiative">Displaying initiative<br/>
<input type="checkbox" name="change" value="change">Thriving on change<br/>
<input type="checkbox" name="communication" value="communication">Good communication skills<br/>
<br/>
<input type="submit" value="Complete">
</form>
</body>
</html>
<html>
<body>
<h2>Request Review</h2>
<hr>
UserId: ${userId} <br/>
Description: ${description} <br/>
Date: ${date?date} ${date?time}
<form action="complete" method="POST" enctype="multipart/form-data">
Comment:<BR/>
<textarea cols="50" rows="5" name="comment"></textarea></BR>
<input type="submit" name="outcome" value="Accept">
<input type="submit" name="outcome" value="Reject">
</form>
</body>
</html>jbossas/server/profile/lib directory or added to the set of sample forms in the jbpm-gwt-form.jar in the jbpm console server war), or the forms can be stored in the JBoss BRMS process repository.
8.8. REST interface
/business-central-server/rs/task/{taskId}/close/business-central-server/rs/process/definition/{id}/new_instanceChapter 9. Domain-Specific Processes
9.1. Domain-Specific Service Nodes
- Declarative (they describe what, not how)
- high-level (no code)
- Adaptable to the context
Example 9.1. Ordering Nursing Tasks
9.2. Define a Work Item
  Name: "Notification"
  Parameters
  From [String]
  To [String]
  Message [String]
  Priority [String]
META-INF directory. The properties are provided as name-value pairs. Parameters and results are mapped and each parameter name is mapped to the expected data type. The configuration file also includes the display name and icon for the work item.
Example 9.2. Example Notification Work Item using MVEL
import org.drools.process.core.datatype.impl.type.StringDataType;
[
  // the Notification work item
  [
    "name" : "Notification",
    "parameters" : [
      "Message" : new StringDataType(),
      "From" : new StringDataType(),
      "To" : new StringDataType(),
      "Priority" : new StringDataType(),
    ],
    "displayName" : "Notification",
    "icon" : "icons/notification.gif"
  ]

]
resources directory:
project/src/main/resources/icons/notification.gif
- Parameter Mapping:Maps the value of a variable in the process to a parameter of the work item. The work item can be customized based on the current state of the actual process instance (for example, the priority of the notification could be dependent on process-specific information).
- Result Mapping:Maps a result to a process variable, which is returned after the work item has been executed, and it makes the variable available to the rest of the process.
- Wait for completion:By default, the process waits until the requested work item has been completed before continuing with the process. It is also possible to continue immediately after the work item has been requested (and not wait for the results) by setting wait for completion to false.
Example 9.3.
import org.drools.process.core.datatype.impl.type.StringDataType;
[
  // the Java Node work item located in:
  // project/src/main/resources/META-INF/JavaNodeDefinition.conf
  [
    "name" : "JavaNode",
    "parameters" : [
      "class" : new StringDataType(),
      "method" : new StringDataType(),
    ],
    "displayName" : "Java Node",
    "icon" : "icons/java.gif"
  ]

]
9.3. Register the Work Definition
drools.workDefinitions = MyWorkDefinitions.wid
drools.workDefinitions = MyWorkDefinitions.conf WorkDefinitions.conf
Note
.wid for your own definitions of domain specific nodes.
9.4. Executing Service Nodes
package com.sample;

import org.drools.runtime.process.WorkItem;
import org.drools.runtime.process.WorkItemHandler;
import org.drools.runtime.process.WorkItemManager;

public class NotificationWorkItemHandler implements WorkItemHandler {

  public void executeWorkItem(WorkItem workItem, WorkItemManager manager) {
    // extract parameters
    String from = (String) workItem.getParameter("From");
    String to = (String) workItem.getParameter("To");
    String message = (String) workItem.getParameter("Message");
    String priority = (String) workItem.getParameter("Priority");
    // send email
    EmailService service = ServiceRegistry.getInstance().getEmailService();
    service.sendEmail(from, to, "Notification", message);
    // notify manager that work item has been completed
    manager.completeWorkItem(workItem.getId(), null);
  }

  public void abortWorkItem(WorkItem workItem, WorkItemManager manager) {
    // Do nothing, notifications cannot be aborted
  }

}
ksession.getWorkItemManager().registerWorkItemHandler(
    "Notification", new NotificationWorkItemHandler());
- The process is more declarative, specifying what should be executed, not how.
- Changes to the environment can be implemented by adapting the work item handler. The process itself should not be changed.
- The same processes can be used in different environments, where the work item handler is responsible for integration with the right services.
- It is easy to share work item handlers across processes and projects (which would be more difficult if the code would be embedded in the process itself).
- Different work item handlers could be used depending on the context. For example, during testing or simulation, it might not be necessary to execute the work items. In this case, specialized dummy work item handlers could be used during testing.
9.5. Service Repository
Example 9.4. Service Repository Configuration File
     import org.drools.process.core.datatype.impl.type.StringDataType;
     [
       [
         "name" : "Twitter",
         "description" : "Send a twitter message",
         "parameters" : [
         	"Message" : new StringDataType()
         ],
         "displayName" : "Twitter",
         "eclipse:customEditor" : "org.drools.eclipse.flow.common.editor.editpart.work.SampleCustomEditor",
         "icon" : "twitter.gif",
         "category" : "Communication",
         "defaultHandler" : "org.jbpm.process.workitem.twitter.TwitterHandler",
         "documentation" : "index.html",
         "dependencies" : [
           "file:./lib/jbpm-twitter.jar",
           "file:./lib/twitter4j-core-2.2.2.jar"
         ]
       ]
     ]
- The icon property should refer to a file with the given file name in the same folder as the extended configuration file (so it can be downloaded by the import wizard and used in the process diagrams). Icons should be 16x16 GIF files.
- The category property defines the category this service should be placed under when browsing the repository.
- The defaultHandler property defines the default handler implementation (i.e. the Java class that implements the
WorkItemHandlerinterface and can be used to execute the service). This can automatically be registered as the handler for that service when importing the service from the repository. - The documentation property defines a documentation file that describes what the service does and how it works. This property should refer to a HTML file with the given name in the same folder as the extended configuration file (so it can be shown by the import wizard when browsing the repository).
- The dependencies property defines additional dependencies that are necessary to execute this service. This usually includes the handler implementation jar but could also include additional external dependencies. These dependencies should also be located on the repository on the given location (relative to the folder where the extended configuration file is located), so they can be downloaded by the import wizard when importing the service.
index.conf file that references all the folders that should be processed when searching for services in the repository. Each of those folders should then contain:
- An extended configuration file with the same name as the folder (e.g.
Twitter.conf) that defines the service task - The icon as references in the configuration file
- The documentation as references in the configuration file
- The dependencies as references in the configuration file (for example in a lib folder)
index.conf in each sub-directory of the repository that can be used to scan additional sub-folders. Note that the hierarchical structure of the repository is not shown when browsing the repository using the import wizard, as the category property in the configuration file is used for that.
Procedure 9.1. Import Resources From the Service Repository
- Right click the project and select Import....
- Select the source of the resources to import. i.e., → and click Next.
- Navigate to the resources. i.e., select the package where the resource is located in Guvnor and highlight the resources. Click Menu.
- Select the destination location for the resources and click Finish.
Chapter 10. Human Tasks
10.1. Human Tasks
- Human tasks nodes must be included inside the process model.
- A task management component must integrate with the BRMS BPM (BRMS 5.3 standalone comes with the WS-HumanTask implementation included).
- End users must interact with a human task client to request their tasks, claim and complete tasks.
10.2. Adding Human Tasks to Processes
10.2.1. User Task Node

Note
- ID: The ID of the node (which is unique within one node container).
- Name: The display name of the node.
- TaskName: The name of the human task.
- Priority: An integer indicating the priority of the human task.
- Comment: A comment associated with the human task.
- ActorId: The actor ID that is responsible for executing the human task. A list of actor ID's can be specified using a comma (',') as separator.
- GroupId: The group ID that is responsible for executing the human task. A list of group ID's can be specified using a comma (',') as separator.
- Skippable: Specifies whether the human task can be skipped, i.e., whether the actor may decide not to execute the task.
- Content: The data associated with this task.
- Swimlane: The swimlane this human task node is part of. Swimlanes make it easy to assign multiple human tasks to the same actor.
- On entry and on exit actions: Action scripts that are executed upon entry and exit of this node.
- Parameter mapping: Allows copying the value of process variables to parameters of the human task. Upon creation of the human tasks, the values will be copied.
- Result mapping: Allows copying the value of result parameters of the human task to a process variable. Upon completion of the human task, the values will be copied. A human task has a result variable "Result" that contains the data returned by the human actor. The variable "ActorId" contains the ID of the actor that actually executed the task.
10.2.2. Dynamic Human Task Properties
- #{expression}
- Task parameters of type String can use #{expression} to embed the value of the given expression in the String. For example, the comment related to a task might be "Please review this request from user #{user}", where user is a variable in the process. At runtime, #{user} will be replaced by the actual user name for that specific process instance. The value of #{expression} will be resolved when creating human task and the #{...} will be replaced by the toString() value of the value it resolves to. The expression could simply be the name of a variable (in which case it will be resolved to the value of the variable), but more advanced MVEL expressions are possible as well; for example, #{person.name.firstname} could be used as the expression. Note that this approach can only be used for String parameters. Other parameters should use parameter mapping to map a value to that parameter.
- Parameter mapping
- The value of a process variable (or a value derived from a variable) can be mapped to a task parameter. For example, if a task needs to be assigned to a user whose ID is a variable in the process, the task could be completed by mapping the ID variable to the parameter ActorId.
10.2.3. User and Group Assignment
10.2.4. Standard Human Roles
- Task Initiator - creates the task instance.
- Task Stakeholders - are responsible for the outcome of the task instance.
- Potential Owners - receive the task so they can complete it.
- Actual Owner - actually performs the task.
- Excluded Owners - may not reserve or start the task.
- Business Administrators - perform the Task Stakeholders role but at a task type level.
- Notification recipients - receive the notifications pertaining to the task.
Note
10.2.5. Task Escalation and Notification
- not started (READY or RESERVED)
- not completed (IN_PROGRESS)

- Users. This attribute is a comma separated list of user ids that should be assigned to the task on escalation. String values and expressions #{user-id} are acceptable for this attribute.
- Groups. This comma separated list of group ids should be assigned to the task on escalation. String values and expressions #{group-id} are acceptable for this attribute.
- Expires At. This attribute defines the time an escalation should take place. It should be defined as time definition (2m, 4h, 6d, etc.) in same way as for timers. String values and expressions #{expiresAt} are acceptable for this attribute.
- Type. This attribute identifies the type of task state the escalation should take place in (not-started | not-completed).
- not started (READY or RESERVED)
- not completed (IN_PROGRESS)

- Type. This attribute identifies the type of task state on which escalation should take place (not-started | not-completed).
- Expires At. This time definition property determines when escalation should take place. It should be defined as time definition (2m, 4h, 6d, etc.) in the same way as for timers. String values and expressions #{expiresAt} are acceptable properties.
- From. An optional user or group id that will be used in the 'From' field for email messages; it accepts Strings and expressions.
- To Users. A comma separated list of user ids that will become recipients of the notification.
- To Groups. A comma separated list of group ids that will become recipients of the notification.
- Reply To. An optional user or group id that should receive replies to the notification.
- Subject. The subject of the notification; it accepts Strings and expressions.
- Body. The body of the notification; it accepts Strings and expressions.
- taskId: An internal id of a task instance.
- processInstanceId: An internal id of a process instance that the task belongs to.
- workItemId: An internal id of a work item that created this task.
- processSessionId: A session internal id of a runtime engine.
- owners: A list of users/groups that are potential owners of the task.
- doc: A map that contains regular task variables.
<html>
	<body>
		<b>${owners[0].id} you have been assigned to a task (task-id ${taskId})</b><br>
		You can access it in your task
		<a href="http://localhost:8080/jbpm-console/app.html#errai_ToolSet_Tasks;Group_Tasks.3">inbox</a><br/>
		Important technical information that can be of use when working on it<br/>
		- process instance id - ${processInstanceId}<br/>
		- work item id - ${workItemId}<br/>

		<hr/>

		Here are some task variables available:
		<ul>
			<li>ActorId = ${doc['ActorId']}</li>
			<li>GroupId = ${doc['GroupId']}</li>
			<li>Comment = ${doc['Comment']}</li>
		</ul>
		<hr/>
		Here are all potential owners for this task:
		<ul>
		$foreach{orgEntity : owners}
			<li>Potential owner = ${orgEntity.id}</li>
		$end{}
		</ul>

		<i>Regards</i>
	</body>
</html>
10.2.6. Data Mapping
10.2.6.1. Data Mapping
10.2.6.2. Task Parameters
10.2.6.3. Task Results
10.2.7. Swimlanes
Swimlane parameter of the user task node.
10.2.8. Removing Tasks from the Database
Example 10.1. Attaching the Event Listener
TasksAdmin admin = new TaskService(...).createTaskAdmin();
StatefulKnowledgeSession ksession = ...
ksession.addEventListener(new TaskCleanUpProcessEventListener(admin));
10.3. Human Task Service
10.3.1. Human Task Service
10.3.2. Task Life Cycle
- The task is created and starts at the 'created' stage.
- The task is usually transferred to the 'Ready' stage automatically, and it is displayed on the task lists of users who can claim the task.
- A user claims the task and the status is set to 'Reserved'.
- The user starts the task (executes the task) and the status is set to 'InProgress'
- The user completes the task and specifies the result data of the task, and the status is set to 'Completed'. If the user was unable to complete the task, they indicate this with a fault response (including the associated fault data) and the status is set to 'Failed.
- Delegating or forwarding a task to be assigned to another user.
- Revoking a task. After claiming a task, a user can revoke the task and it will become available again to all the users who can claim it.
- Temporarily suspending and resuming a task.
- Stopping a task in progress.
- Skipping a task (if the task has been marked as skippable), in which case the task will not be executed.
10.3.3. Integrate a Human Task Service
StatefulKnowledgeSession ksession = ...;
ksession.getWorkItemManager().registerWorkItemHandler("Human Task", new CommandBasedHornetQWSHumanTaskHandler());10.3.4. Interacting with the Human Task Service
public void start( long taskId, String userId, TaskOperationResponseHandler responseHandler )
public void stop( long taskId, String userId, TaskOperationResponseHandler responseHandler )
public void release( long taskId, String userId, TaskOperationResponseHandler responseHandler )
public void suspend( long taskId, String userId, TaskOperationResponseHandler responseHandler )
public void resume( long taskId, String userId, TaskOperationResponseHandler responseHandler )
public void skip( long taskId, String userId, TaskOperationResponseHandler responseHandler )
public void delegate( long taskId, String userId, String targetUserId,
                      TaskOperationResponseHandler responseHandler )
public void complete( long taskId, String userId, ContentData outputData,
                      TaskOperationResponseHandler responseHandler )
...- taskId: The ID of the task. This is usually extracted from the currently selected task in the user task list in the user interface.
- userId: The ID of the user that is executing the action. This is usually the ID of the user that is logged in to the application.
- responseHandler: Communication with the task service is asynchronous, so you should use a response handler that will be notified when the results are available.
//Use UUID.randomUUID() to ensure the HornetQ Connector has a unique name
	TaskClient client = new TaskClient(new HornetQTaskClientConnector("HornetQConnector" + UUID.randomUUID(), new HornetQTaskClientHandler(SystemEventListenerFactory.getSystemEventListener())));
	client.connect("127.0.0.1", 5446);
	CommandBasedHornetQWSHumanTaskHandler handler = new CommandBasedHornetQWSHumanTaskHandler(ksession);
	handler.setClient(client);
	handler.connect();
	ksession.getWorkItemManager().registerWorkItemHandler("Human Task", handler);

// adding a task
BlockingAddTaskResponseHandler addTaskResponseHandler = new BlockingAddTaskResponseHandler();
Task task = ...;
client.addTask( task, null, addTaskResponseHandler );
long taskId = addTaskResponseHandler.getTaskId();

// getting tasks for user "bobba"
BlockingTaskSummaryResponseHandler taskSummaryResponseHandler =
    new BlockingTaskSummaryResponseHandler();
client.getTasksAssignedAsPotentialOwner("bobba", "en-UK", taskSummaryResponseHandler);
List<TaskSummary> tasks = taskSummaryResponseHandler.getResults();

// starting a task
BlockingTaskOperationResponseHandler responseHandler =
    new BlockingTaskOperationResponseHandler();
client.start( taskId, "bobba", responseHandler );
responseHandler.waitTillDone(1000);

// completing a task
responseHandler = new BlockingTaskOperationResponseHandler();
client.complete( taskId, "bobba".getId(), null, responseHandler );
responseHandler.waitTillDone(1000);
10.3.5. User and Group Assignment
EntityManagerFactory emf = Persistence.createEntityManagerFactory("org.jbpm.task");
TaskService taskService = new TaskService(emf, SystemEventListenerFactory.getSystemEventListener());
TaskServiceSession taskSession = taskService.createSession();
// now register new users and groups
taskSession.addUser(new User("userA"));
taskSession.addGroup(new Group("groupA"));jbpm-human-task.war/WEB-INF/web.xml file. The default implementation, org.jbpm.task.service.DefaultUserGroupCallbackImpl, assigns all users to all groups and is provided for testing purposes only.
jbpm-human-task.war/WEB-INF/web.xml and add the class as in the following example:
<!-- use org.jbpm.task.service.DefaultUserGroupCallbackImpl to configure sample user group callback for demo purpose-->
<init-param>
	<param-name>user.group.callback.class</param-name>
	<param-value>org.jbpm.task.service.DefaultUserGroupCallbackImpl</param-value>
</init-param>
server/profile/deploy/jbpm-human-task.war/WEB-INF/classes/org/jbpm/task/servlet/ directory.
10.3.6. Starting the Human Task Service
org.jbpm.task.service.TaskService taskService = new org.jbpm.task.service.TaskService(
  emf, SystemEventListenerFactory.getSystemEventListener());

TaskServiceSession taskServiceSession = taskService.createSession();

//adding users to TaskServiceSession
taskServiceSession.addUser(new User("Administrator"));
taskServiceSession.addUser(new User("jsmith"));

LocalTaskService localTaskService = new LocalTaskService( taskService );
humanTaskHandler = new SyncWSHumanTaskHandler( localTaskService, ksession );
humanTaskHandler.setLocal( true );
humanTaskHandler.connect();
ksession.getWorkItemManager().registerWorkItemHandler( "Human Task", humanTaskHandler );

//using HT API ...
List<TaskSummary> tasks = localTaskService.getTasksAssignedAsPotentialOwner("jsmith", "en-US");
create as the value for the hibernate.hbm2ddl.auto property will result in the jBPM schemas being recreated every time the server is restarted. The indexes should only be created once and then this functionality should be disabled. This can be achieved by placing comment tags around the hibernate.hbm2ddl.auto property after the schema has been created:
<!-- <property name="hibernate.hbm2ddl.auto" value="create" /> -->
<?xml version="1.0" encoding="UTF-8" standalone="yes"?>
<persistence
    version="1.0"
    xsi:schemaLocation=
      "http://java.sun.com/xml/ns/persistence
       http://java.sun.com/xml/ns/persistence/persistence_1_0.xsd
       http://java.sun.com/xml/ns/persistence/orm
       http://java.sun.com/xml/ns/persistence/orm_1_0.xsd"
    xmlns:orm="http://java.sun.com/xml/ns/persistence/orm"
    xmlns:xsi="http://www.w3.org/2001/XMLSchema-instance"
    xmlns="http://java.sun.com/xml/ns/persistence">

  <persistence-unit name="org.jbpm.task">
    <provider>org.hibernate.ejb.HibernatePersistence</provider>
    <class>org.jbpm.task.Attachment</class>
    <class>org.jbpm.task.Content</class>
    <class>org.jbpm.task.BooleanExpression</class>
    <class>org.jbpm.task.Comment</class>
    <class>org.jbpm.task.Deadline</class>
    <class>org.jbpm.task.Comment</class>
    <class>org.jbpm.task.Deadline</class>
    <class>org.jbpm.task.Delegation</class>
    <class>org.jbpm.task.Escalation</class>
    <class>org.jbpm.task.Group</class>
    <class>org.jbpm.task.I18NText</class>
    <class>org.jbpm.task.Notification</class>
    <class>org.jbpm.task.EmailNotification</class>
    <class>org.jbpm.task.EmailNotificationHeader</class>
    <class>org.jbpm.task.PeopleAssignments</class>
    <class>org.jbpm.task.Reassignment</class>
    <class>org.jbpm.task.Status</class>
    <class>org.jbpm.task.Task</class>
    <class>org.jbpm.task.TaskData</class>
    <class>org.jbpm.task.SubTasksStrategy</class>
    <class>org.jbpm.task.OnParentAbortAllSubTasksEndStrategy</class>
    <class>org.jbpm.task.OnAllSubTasksEndParentEndStrategy</class>
    <class>org.jbpm.task.User</class>

    <properties>
      <property name="hibernate.dialect" value="org.hibernate.dialect.H2Dialect"/>
      <property name="hibernate.connection.driver_class" value="org.h2.Driver"/>
      <property name="hibernate.connection.url" value="jdbc:h2:mem:mydb" />
      <property name="hibernate.connection.username" value="sa"/>
      <property name="hibernate.connection.password" value="sasa"/>
      <property name="hibernate.connection.autocommit" value="false" />
      <property name="hibernate.max_fetch_depth" value="3"/>
      <property name="hibernate.hbm2ddl.auto" value="create" />
      <property name="hibernate.show_sql" value="true" />
    </properties>
  </persistence-unit>
</persistence>10.3.7. Starting the Human Task Service as a Web Application
web.xml which is located in the jbpm-human-task-war/WEB-INF/ directory by setting init parameters of the HumanTaskServiceServlet.
- task.persistence.unit: The name of persistence unit that will be used to build EntityManagerFactory (default org.jbpm.task).
- user.group.callback.class: The implementation of UserGroupCallback interface to be used to resolve users and groups (default DefaultUserGroupCallbackImpl which is provided for testing purposes).
- escalated.deadline.handler.class: The implementation of EscalatedDeadlineHandler interface to be used to handle escalations and notifications (default DefaultEscalatedDeadlineHandler).
- user.info.class: The implementation of UserInfo interface to be used to resolve user/group information such as email address and preferred language.
- load.users: This specifies the location of a file that will be used to initially populate task server db with users. It accepts two types of files: MVEL and properties; It must be suffixed with .mvel or .properties. Location of the file can be either on classpath (with prefix classpath:) or valid URL. NOTE: That with custom user files, Administrator user must always be present.
- load.groups: This specifies the location of a file that will be used to initially populate task server db with groups. It accepts two types of files: MVEL and properties; the file must be suffixed with .mvel or .properties. Location of the file can be either on classpath (with prefix classpath:) or valid URL.
- active.config: The main parameter that controls what transport is configured for Task Server. By default this is set to HornetQ, but it also accepts Mina and JMS.
- mina.host: The host/ip address used to bind Apache Mina server (localhost).
- mina.port: The port used to bind Apache Mina server (default 9123).
- hornetq.port: The port used to bind HornetQ server (default 5446).
- JMSTaskServer.connectionFactory: JNDI name of QueueConnectionFactory to look up (no default).
- JMSTaskServer.transacted : A boolean flag that indicates if JMS session will be transacted or not (no default).
- JMSTaskServer.acknowledgeMode: Acknowledgment mode (default DUPS_OK_ACKNOWLEDGE).
- JMSTaskServer.queueName: The name of JMS queue (no default).
- JMSTaskServer.responseQueueName: The name of JMS response queue (no default).
10.4. Human Task Persistence
10.4.1. Human Task Persistence

Figure 10.1. Human Task Service Data Model
- The
taskentity which represents the main information for a task. (See the right-hand side of the ERD above.) - The
deadline,escalation, andnotificationentities represent deadlines and escalations for tasks and notifications associated with those deadlines. (See the left-hand side of the ERD above.)
i18ntext and organizationalentity.
- The
i18ntextentity is used to store text which may be language related, such as names or descriptions entered by users. - The
organizationalentityentity represents a user.
-1 or 0.
10.4.2. Task Related Entities
task entity contains the information for describing a task.
Table 10.1. Task
| Field | Description | Null | Foreign Key |
|---|---|---|---|
id | The primary key of the task identity |  | |
priority | The priority of the task | | |
allowedtodelegate | The group this task may be delegated to |  | |
status | The status of the task | | |
previousstatus | The previous status of the task | | |
actualowner_id | The ID of the organizational entity who owns the task | | |
createdby_id | The ID of the organizational entity who created the task | | |
createdon | The timestamp describing when this task was created | | |
activationtime | The timestamp describing when this task was activated | | |
expirationtime | The timestamp describing when this task will expire | | |
skipable | Whether or not this task may be skipped | | |
workitemid | The ID of the work item associated with this task (see jBPM core schema) | | |
processinstanceid | The ID of the process instance associated with this task (see jBPM core schema) | | |
documentaccesstype | How a document associated with the task can be accessed | | |
documenttype | The type of data in the document | | |
documentcontentid | The ID of the content entity containing the document data | | |
outputaccesstype | How the output document associated with the task can be accessed | | |
outputtype | The type of data in the output document | | |
outputcontentid | The ID of the content entity containing the output document data | | |
faultname | The name of the fault generated, if a fault occurs | | |
faultaccesstype | How the document associated with the fault can be accessed | | |
faulttype | The type of data in the fault document | | |
faultcontentid | The ID of the content entity containing the fault document data | | |
parentid | This is the ID of the parent task | | |
processid | The name (ID) of the associated process | | |
processsessionid | The ID of the associated (knowledge) session | | |
taskinitiator_id | The ID of the organizational entity who created the task | | |
subtasksstrategy entity is used to save the strategy that describes how parent and sub-tasks should react when either parent or sub-tasks are ended.
Table 10.2. SubTasksStrategy
| Field | Description | Null | Foreign Key |
|---|---|---|---|
id | The primary key | | |
dtype | A discriminator column | | |
name | The name of the strategy | | |
task_id | The primary key of the associated task | | |
organizationalentity entity is extended to represent the different people assignments that are part of the task.
Table 10.3. OrganizationalEntity
| Field | Description | Null |
|---|---|---|
id | The primary key | |
dtype | The discriminator column | |
attachment entity describes attachments that have been added to the task.
Table 10.4. Attachment
| Field | Description | Null | Foreign Key |
|---|---|---|---|
id | The primary key | | |
name | The (file) name of the attachment | | |
accesstype | How the attachment can be accessed | | |
attachedat | When the attachment was attached to the task | | |
attachment_size | The size (in bytes) of the attachment | | |
attachmentcontentid | The ID of the content entity storing the raw data of the attachment | | |
contenttype | The MIME type of the attachment data | | |
attachedby_id | The ID of the organizationalentity entity that attached the attachment | | |
taskdata_attachments_id | The ID of the task entity to which this attachment belongs | | |
task_comment entity describes comments added to tasks.
Table 10.5. task_comment
| Field | Description | Null | Foreign Key |
|---|---|---|---|
id | The primary key | | |
addedat | The timestamp of when the comment was added to the task | | |
text | The text of the comment | | |
addedby_id | The primary key of the associated organizationalentity entity | | |
taskdata_comments_id | The primary key of the associated task entity | | |
delegation_delegates table is a join table for relationships between the task entity and the organizationalentity.
Table 10.6. delegation_delegates
| Field | Description | Null | Foreign Key |
|---|---|---|---|
task_id | The primary key of the associated task | | |
entity_id | The primary key of the associated organizationalentity | | |
peopleassignments_stakeholders table is a join table that describes which organizationalentity entities are task stakeholders of a particular task.
Table 10.7. peopleassignments_stakeholders
| Field | Description | Null | Foreign Key |
|---|---|---|---|
task_id | The primary key of the associated task entity | | |
entity_id | The primary key of the associated organizationalentity entity | | |
peopleassignments_potowners table is a join table that describes which organizationalentity entities are potential owners of a particular task.
Table 10.8. peopleassignments_potowners
| Field | Description | Null | Foreign Key |
|---|---|---|---|
task_id | The primary key of the associated task entity | | |
entity_id | The primary key of the associated organizationalentity entity | | |
peopleassignments_exclowners table is a join table that describes which organizationalentity entities are the excluded owners of a particular task.
Table 10.9. peopleassignments_exclowners
| Field | Description | Null | Foreign Key |
|---|---|---|---|
task_id | The primary key of the associated task entity | | |
entity_id | The primary key of the associated organizationalentity entity | | |
peopleassignments_bas table is a join table that describes which organizationalentity entities are business administrators of a particular task.
Table 10.10. peopleassignments_bas
| Field | Description | Null | Foreign Key |
|---|---|---|---|
task_id | The primary key of the associated task entity | | |
entity_id | The primary key of the associated organizationalentity entity | | |
peopleassignments_recipients table is a join table that describes which organizationalentity entities are notification recipients for a particular task.
Table 10.11. peopleassignments_recipients
| Field | Description | Null | Foreign Key |
|---|---|---|---|
task_id | The primary key of the associated task entity | | |
entity_id | The primary key of the associated organizationalentity entity | | |
10.4.3. Deadline, Escalation, and Notification Related Entities
deadline entity represents a deadline for a task.
Table 10.12. deadline
| Field | Description | Null | Foreign Key |
|---|---|---|---|
id | The primary key | | |
deadline_date | The deadline date | | |
escalated | Whether or not the deadline has been escalated | | |
deadlines_startdeadline_id | The ID of the associated task entity which uses this deadline as its start deadline. | | |
deadlines_enddeadline_id | The ID of the associated task entity which uses this deadline as its end deadline. | | |
escalation entity describes an escalation action that should be taken for a particular deadline.
Table 10.13. escalation
| Field | Description | Null | Foreign Key |
|---|---|---|---|
id | The primary key | | |
name | The name of the escalation event | | |
deadline_escalation_id | The ID of the associated deadline entity | | |
booleanexpression entity represents an expression that evaluates to a boolean. These expressions are used to determine if a constraint should be applied.
Table 10.14. booleanexpression
| Field | Description | Null | Foreign Key |
|---|---|---|---|
id | The primary key | | |
expression | The expression text | | |
type | The type of expression | | |
escalation_constraints_id | The ID of the escalation constraint used on the expression | | |
notification entity describes a notification generated by an escalation action.
Table 10.15. notification
| Field | Description | Null | Foreign Key |
|---|---|---|---|
id | The primary key | | |
dtype | The discriminator column | | |
priority | The priority of the notification | | |
escalation_notifications_id | The ID of the associated escalation entity | | |
email_header entity describes an email that will be sent as part of a notification.
Table 10.16. email_header
| Field | Description | Null |
|---|---|---|
id | The primary key | |
fromaddress | The email address the e-mail is sent from | |
replytoaddress | The reply-to address used in the e-mail | |
language | The language the email is written in | |
subject | The subject of the email | |
body | The body of the email | |
notification_email_header table is a join table that describes and qualifies which email_header entities are part of a notification.
Table 10.17. notification_email_header
| Field | Description | Null | Foreign Key |
|---|---|---|---|
notification_id | Together with the mapkey, this field is part of the primary key. This field refers to the notification entity that the email_header is associated with | | |
mapkey | Together with the mapkey, this field is part of the primary key. This field describes what the type is of the associated email_header | | |
emailheaders_id | The ID of the associated email_header entity | | |
reassignment entity describes reassignments associated with escalations.
Table 10.18. reassignment
| Field | Description | Null | Foreign Key |
|---|---|---|---|
id | The primary key | | |
escalation_reassignments_id | The ID of the associated escalation entity | | |
reassignments_potentialowners table is a join table that describes which organizationalentity entities are potential owners if a reassignment happens as part of an escalation.
Table 10.19. reassignment_potentialowners
| Field | Description | Null | Foreign Key |
|---|---|---|---|
task_id | The primary key of the associated reassignment entity | | |
entity_id | The primary key of the associated organizationalentity entity | | |
notification_bas table is a join table that describes which business administrators will be notified by a notification.
Table 10.20. notification_bas
| Field | Description | Null | Foreign Key |
|---|---|---|---|
task_id | The primary key of the associated notification entity | | |
entity_id | The primary key of the associated organizationalentity entity | | |
notification_recipients table is a join table that describes which recipients entities will be received a notification.
Table 10.21. notification_recipients
| Field | Description | Null | Foreign Key |
|---|---|---|---|
task_id | The primary key of the associated notification entity | | |
entity_id | The primary key of the associated organizationalentity entity | | |
content entity represents the content of a document, output document, fault or other object.
Table 10.22. content
| Field | Description | Null |
|---|---|---|
id | The primary key | |
content | The content data | |
i18ntext entity is used by a number of other entities to store text fields. The deadline, notification, reassignment, and task entities use this entity to store descriptions, subjects, names, and other documentation.
Table 10.23. i18ntext
| Field | Description | Null | Foreign Key |
|---|---|---|---|
id | The primary key | | |
language | The language of the text | | |
text | The text | | |
task_subjects_id | The ID of the task entity that this subject refers to | | |
task_names_id | The ID of the task entity this name refers to | | |
task_descriptions_id | The ID of the task entity this description refers to | | |
reassignment_documentation_id | The ID of the reassignment entity this documentation refers to | | |
notification_subjects_id | The ID of the notification entity this subject refers to | | |
notification_names_id | The ID of the notification entity this name refers to | | |
notification_documentation_id | The ID of the notification entity this documentation refers to | | |
notification_descriptions_id | The ID of the notification entity this description refers to | | |
deadline_documentation_id | The ID of the deadline entity this documentation refers to | | |
Chapter 11. Testing and Debugging
11.1. Unit Testing
11.1.1. Unit Testing
- Helper methods to create a new knowledge base and session for a given set of processes.
- Assert statements to check:
- The state of a process instance (active, completed, aborted).
- Which node instances are currently active.
- Which nodes have been triggered (to check the path that has been followed).
- The value of variables.
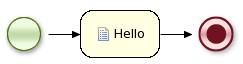
Figure 11.1. Example Hello World Process
Example 11.1. example junit Test
public class MyProcessTest extends JbpmJUnitTestCase {

   public void testProcess() {
       // create your session and load the given process(es)
       StatefulKnowledgeSession ksession = createKnowledgeSession("sample.bpmn");
       // start the process
       ProcessInstance processInstance = ksession.startProcess("com.sample.bpmn.hello");
       // check whether the process instance has completed successfully
       assertProcessInstanceCompleted(processInstance.getId(), ksession);
       // check whether the given nodes were executed during the process execution
       assertNodeTriggered(processInstance.getId(), "StartProcess", "Hello", "EndProcess");
    }
}11.1.2. Helper Methods to Create Sessions
- createKnowledgeBase(String... process):
- Returns a new knowledge base containing all the processes in the given filenames (loaded from the classpath).
- createKnowledgeBase(Map<String, ResourceType> resources):
- Returns a new knowledge base containing all the resources from the given filenames (loaded from the classpath).
- createKnowledgeBaseGuvnor(String... packages):
- Returns a new knowledge base containing all the processes loaded from Guvnor (the process repository) from the given packages.
- createKnowledgeSession(KnowledgeBase kbase):
- Creates a new stateful knowledge session from the given knowledge base.
- restoreSession(StatefulKnowledgeSession ksession, boolean noCache):
- Completely restores this session from the database; it can be used to recreate a session to simulate a critical failure and test recovery. If noCache is true, the existing persistence cache will not be used to restore the data.
11.1.3. Assertions
- assertProcessInstanceActive(long processInstanceId, StatefulKnowledgeSession ksession):
- Checks whether the process instance with the given ID is still active.
- assertProcessInstanceCompleted(long processInstanceId, StatefulKnowledgeSession ksession):
- Checks whether the process instance with the given ID has completed successfully.
- assertProcessInstanceAborted(long processInstanceId, StatefulKnowledgeSession ksession):
- Checks whether the process instance with the given ID was aborted.
- assertNodeActive(long processInstanceId, StatefulKnowledgeSession ksession, String... name):
- Checks whether the process instance with the given ID contains at least one active node with the given node name (for each of the given names).
- assertNodeTriggered(long processInstanceId, String... nodeNames):
- Checks for each given node name whether a node instance was triggered (but not necessarily active anymore) during the execution of the process instance with the given node name (for each of the given names).
- getVariableValue(String name, long processInstanceId, StatefulKnowledgeSession ksession):
- Retrieves the value of the variable with the given name from the given process instance; it can then be used to check the value of process variables:
11.1.4. Testing Integration with External Services

public void testProcess2() {
    // create your session and load the given process(es)
    StatefulKnowledgeSession ksession = createKnowledgeSession("sample2.bpmn");
    // register a test handler for "Email"
    TestWorkItemHandler testHandler = new TestWorkItemHandler();
    ksession.getWorkItemManager().registerWorkItemHandler("Email", testHandler);
    // start the process
    ProcessInstance processInstance = ksession.startProcess("com.sample.bpmn.hello2");
    assertProcessInstanceActive(processInstance.getId(), ksession);
    assertNodeTriggered(processInstance.getId(), "StartProcess", "Email");
    // check whether the email has been requested
    WorkItem workItem = testHandler.getWorkItem();
    assertNotNull(workItem);
    assertEquals("Email", workItem.getName());
    assertEquals("me@mail.com", workItem.getParameter("From"));
    assertEquals("you@mail.com", workItem.getParameter("To"));
    // notify the engine the email has been sent
    ksession.getWorkItemManager().abortWorkItem(workItem.getId());
    assertProcessInstanceAborted(processInstance.getId(), ksession);
    assertNodeTriggered(processInstance.getId(), "Gateway", "Failed", "Error");
}
11.1.5. Configuring Persistence
public class MyProcessTest extends JbpmJUnitTestCase {

    public MyProcessTest() {
        // configure this test to use persistence
        super(true);
        setPersistence(true);
    }
    ...
11.2. Debugging
11.2.1. Debugging
11.2.2. The Process Instances View
Example 11.2. Sample Process Instances View
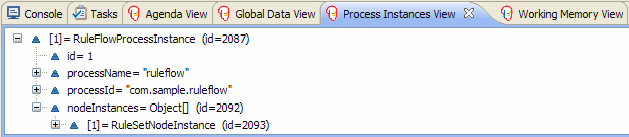
11.2.3. The Human Task View
Example 11.3. Sample Human Task View

11.2.4. The Audit View
Example 11.4. Threaded File Logger
KnowledgeRuntimeLogger logger = KnowledgeRuntimeLoggerFactory
   .newThreadedFileLogger(ksession, "logdir/mylogfile", 1000);
// do something with the session here
logger.close();

Chapter 12. Business Activity Monitoring
12.1. Business Activity Monitoring
Important
Chapter 13. Integration
13.1. Integration
13.2. OSGi
- jbpm-flow
- jbpm-flow-builder
- jbpm-bpmn2
Example 13.1. OSGi Example
ServiceReference serviceRef = bundleContext.getServiceReference( ServiceRegistry.class.getName() );
ServiceRegistry registry = (ServiceRegistry) bundleContext.getService( serviceRef );

KnowledgeBuilderFactoryService knowledgeBuilderFactoryService = registry.get( KnowledgeBuilderFactoryService.class );
KnowledgeBaseFactoryService knowledgeBaseFactoryService = registry.get( KnowledgeBaseFactoryService.class );
ResourceFactoryService resourceFactoryService = registry.get( ResourceFactoryService.class );

KnowledgeBuilderConfiguration kbConf = knowledgeBuilderFactoryService.newKnowledgeBuilderConfiguration( null, getClass().getClassLoader() );
KnowledgeBuilder kbuilder = knowledgeBuilderFactoryService.newKnowledgeBuilder( kbConf );
kbuilder.add( resourceFactoryService.newClassPathResource( "MyProcess.bpmn", Dummy.class ), ResourceType.BPMN2 );

KnowledgeBaseConfiguration kbaseConf = knowledgeBaseFactoryService.newKnowledgeBaseConfiguration( null, getClass().getClassLoader() );
KnowledgeBase kbase = knowledgeBaseFactoryService.newKnowledgeBase( kbaseConf );
kbase.addKnowledgePackages( kbuilder.getKnowledgePackages() );

StatefulKnowledgeSession ksession = kbase.newStatefulKnowledgeSession();
13.3. Spring
Example 13.2. Example Spring Configuration File
<?xml version="1.0" encoding="UTF-8"?>
<beans xmlns="http://www.springframework.org/schema/beans"
       xmlns:xsi="http://www.w3.org/2001/XMLSchema-instance"
       xmlns:jbpm="http://drools.org/schema/drools-spring"
       xsi:schemaLocation="http://www.springframework.org/schema/beans http://www.springframework.org/schema/beans/spring-beans-2.0.xsd
                           http://drools.org/schema/drools-spring org/drools/container/spring/drools-spring-1.2.0.xsd>

  <jbpm:kbase id="kbase">
    <jbpm:resources>
      <jbpm:resource type="BPMN2" source="classpath:HelloWorld.bpmn2"/>
    </jbpm:resources>
  </jbpm:kbase>

  <jbpm:ksession id="ksession" type="stateful" kbase="kbase" />

</beans>
ClassPathXmlApplicationContext context =
    new ClassPathXmlApplicationContext("spring-conf.xml");
StatefulKnowledgeSession ksession = (StatefulKnowledgeSession) context.getBean("ksession");
ksession.startProcess("com.sample.HelloWorld");
<bean id="myObject" class="org.jbpm.sample.MyObject">
  <property name="session" ref="ksession" />
</bean>
public class MyObject {
  private StatefulKnowledgeSession ksession;
  public void setSession(StatefulKnowledgeSession ksession) {
    this.ksession = ksession;
  }
  public void doSomething() {
    ksession.startProcess("com.sample.HelloWorld");
  }
}
13.4. Maven
Procedure 13.1. Importing the Drools and jBPM Jar Files to the Local Maven Repository
- Download the deployable package zip file from the Red Hat Customer Support Portal at https://access.redhat.com. Select → → , then select the version and JBoss BRMS 5.3.1.
- Extract the zip archive.
- Extract the
jboss-brms-engine.zipandjboss-jbpm-engine.ziparchives. - Run the following maven commands to import the Drools and jBPM jar files to the local maven repository:
mvn install:install-file -Dfile=knowledge-api-5.3.1.BRMS.jar -DgroupId=org.drools -DartifactId=knowledge-api -Dversion=5.3.1.BRMS -Dpackaging=jar
mvn install:install-file -Dfile=drools-core-5.3.1.BRMS.jar -DgroupId=org.drools -DartifactId=drools-core -Dversion=5.3.1.BRMS -Dpackaging=jar
mvn install:install-file -Dfile=drools-compiler-5.3.1.BRMS.jar -DgroupId=org.drools -DartifactId=drools-compiler -Dversion=5.3.1.BRMS -Dpackaging=jar
mvn install:install-file -Dfile=drools-decisiontables-5.3.1.BRMS.jar -DgroupId=org.drools -DartifactId=drools-decisiontables -Dversion=5.3.1.BRMS -Dpackaging=jar
mvn install:install-file -Dfile=drools-templates-5.3.1.BRMS.jar -DgroupId=org.drools -DartifactId=drools-templates -Dversion=5.3.1.BRMS -Dpackaging=jar
mvn install:install-file -Dfile=drools-persistence-jpa-5.3.1.BRMS.jar -DgroupId=org.drools -DartifactId=drools-persistence-jpa -Dversion=5.3.1.BRMS -Dpackaging=jar
mvn install:install-file -Dfile=jbpm-flow-5.3.1.BRMS.jar -DgroupId=org.jbpm -DartifactId=jbpm-flow -Dversion=5.3.1.BRMS -Dpackaging=jar
mvn install:install-file -Dfile=jbpm-flow-builder-5.3.1.BRMS.jar -DgroupId=org.jbpm -DartifactId=jbpm-flow-builder -Dversion=5.3.1.BRMS -Dpackaging=jar
mvn install:install-file -Dfile=jbpm-bam-5.3.1.BRMS.jar -DgroupId=org.jbpm -DartifactId=jbpm-bam -Dversion=5.3.1.BRMS -Dpackaging=jar
mvn install:install-file -Dfile=jbpm-bpmn2-5.3.1.BRMS.jar -DgroupId=org.jbpm -DartifactId=jbpm-bpmn2 -Dversion=5.3.1.BRMS -Dpackaging=jar
mvn install:install-file -Dfile=jbpm-human-task-5.3.1.BRMS.jar -DgroupId=org.jbpm -DartifactId=jbpm-human-task -Dversion=5.3.1.BRMS -Dpackaging=jar
mvn install:install-file -Dfile=jbpm-persistence-jpa-5.3.1.BRMS.jar -DgroupId=org.jbpm -DartifactId=jbpm-persistence-jpa -Dversion=5.3.1.BRMS -Dpackaging=jar
mvn install:install-file -Dfile=jbpm-workitems-5.3.1.BRMS.jar -DgroupId=org.jbpm -DartifactId=jbpm-workitems -Dversion=5.3.1.BRMS -Dpackaging=jar
Note
The list of imported jar files above is not complete. Make sure you import alldrools,knowledge, andjbpmjar files.
<?xml version="1.0" encoding="utf-8"?>
   <project xmlns="http://maven.apache.org/POM/4.0.0"
            xmlns:xsi="http://www.w3.org/2001/XMLSchema-instance"
            xsi:schemaLocation="http://maven.apache.org/POM/4.0.0 http://maven.apache.org/maven-v4_0_0.xsd">

   <modelVersion>4.0.0</modelVersion>
   <groupId>org.jbpm</groupId>
   <artifactId>jbpm-maven-example</artifactId>
   <name>jBPM Maven Project</name>
   <version>1.0-SNAPSHOT</version>
   <brms-version>5.3.1.BRMS<brms-version>
  ...
  <dependencies>
    <!-- core dependencies -->
    <dependency>
      <groupId>org.drools</groupId>
      <artifactId>knowledge-api</artifactId>
      <version>${brms-version}</version>
    </dependency>
    <dependency>
      <groupId>org.drools</groupId>
      <artifactId>drools-core</artifactId>
      <version>${brms-version}</version>
    </dependency>
    <dependency>
      <groupId>org.mvel</groupId>
      <artifactId>mvel2</artifactId>
      <version>2.1.Beta6</version>
    </dependency>
    <dependency>
      <groupId>com.thoughtworks.xstream</groupId>
      <artifactId>xstream</artifactId>
      <version>1.3.1</version>
    </dependency>

    <!-- required to compile DRL -->
    <dependency>
      <groupId>org.drools</groupId>
      <artifactId>drools-compiler</artifactId>
      <version>${brms-version}</version>
    </dependency>
    <dependency>
      <groupId>org.eclipse.jdt.core.compiler</groupId>
      <artifactId>ecj</artifactId>
      <version>3.5.1</version>
    </dependency>
    <dependency>
      <groupId>org.antlr</groupId>
      <artifactId>antlr-runtime</artifactId>
      <version>3.3</version>
      <exclusions>
        <exclusion>
          <groupId>org.antlr</groupId>
          <artifactId>stringtemplate</artifactId>
        </exclusion>
      </exclusions>
    </dependency>

    <!-- required to compile decision tables -->
    <dependency>
      <groupId>org.drools</groupId>
      <artifactId>drools-decisiontables</artifactId>
      <version>${brms-version}</version>
    </dependency>
    <dependency>
      <groupId>org.drools</groupId>
      <artifactId>drools-templates</artifactId>
      <version>${brms-version}</version>
    </dependency>
    <dependency>
      <groupId>net.sourceforge.jexcelapi</groupId>
      <artifactId>jxl</artifactId>
      <version>2.6.10</version>
    </dependency>

    <!-- required for jBPM5 processes -->
    <dependency>
      <groupId>org.jbpm</groupId>
      <artifactId>jbpm-flow</artifactId>
      <version>${brms-version}</version>
    </dependency>
    <dependency>
      <groupId>org.jbpm</groupId>
      <artifactId>jbpm-flow-builder</artifactId>
      <version>${brms-version}</version>
    </dependency>
    <dependency>
      <groupId>org.jbpm</groupId>
      <artifactId>jbpm-bam</artifactId>
      <version>${brms-version}</version>
    </dependency>
    <dependency>
      <groupId>org.jbpm</groupId>
      <artifactId>jbpm-bpmn2</artifactId>
      <version>${brms-version}</version>
    </dependency>
    <dependency>
      <groupId>org.jbpm</groupId>
      <artifactId>jbpm-human-task</artifactId>
      <version>${brms-version}</version>
    </dependency>
    <dependency>
      <groupId>org.jbpm</groupId>
      <artifactId>jbpm-persistence-jpa</artifactId>
      <version>${brms-version}</version>
    </dependency>
    <dependency>
      <groupId>org.jbpm</groupId>
      <artifactId>jbpm-workitems</artifactId>
      <version>${brms-version}</version>
    </dependency>
    <dependency>
      <groupId>org.drools</groupId>
      <artifactId>drools-persistence-jpa</artifactId>
      <version>${brms-version}</version>
    </dependency>
    <dependency>
      <groupId>com.google.protobuf</groupId>
      <artifactId>protobuf-java</artifactId>
      <version>2.4.1</version>
    </dependency>
  </dependencies>
</project>Appendix A. Revision History
| Revision History | |||
|---|---|---|---|
| Revision 5.3.1-86.400 | 2013-10-31 | ||
| |||
| Revision 5.3.1-86 | Tue Dec 11 2012 | ||
| |||