
17.4. Configure a Deployed Resource Adapter
Procedure 17.5. Configure a resource adapter using the Management CLI
- Open a command prompt for your operating system.
- Connect to the Management CLI.
- For Linux, enter the following at the command line:
$ EAP_HOME/bin/jboss-cli.sh --connect
$ Connected to standalone controller at localhost:9999
- For Windows, enter the following at a command line:
C:\>EAP_HOME\bin\jboss-cli.bat --connect
C:\> Connected to standalone controller at localhost:9999
- Add the resource adapter configuration.
[standalone@localhost:9999 /] /subsystem=resource-adapters/resource-adapter=eis.rar:add(archive=eis.rar, transaction-support=XATransaction) {"outcome" => "success"} - Configure the
serverresource adapter level <config-property>.[standalone@localhost:9999 /] /subsystem=resource-adapters/resource-adapter=eis.rar/config-properties=server/:add(value=localhost) {"outcome" => "success"} - Configure the
portresource adapter level <config-property>.[standalone@localhost:9999 /] /subsystem=resource-adapters/resource-adapter=eis.rar/config-properties=port/:add(value=9000) {"outcome" => "success"} - Add a connection definition for a managed connection factory.
[standalone@localhost:9999 /] /subsystem=resource-adapters/resource-adapter=eis.rar/connection-definitions=cfName:add(class-name=com.acme.eis.ra.EISManagedConnectionFactory, jndi-name=java:/eis/AcmeConnectionFactory) {"outcome" => "success"} - Configure the
namemanaged connection factory level <config-property>.[standalone@localhost:9999 /] /subsystem=resource-adapters/resource-adapter=eis.rar/connection-definitions=cfName/config-properties=name/:add(value=Acme Inc) {"outcome" => "success"} - Add an admin object.
[standalone@localhost:9999 /] /subsystem=resource-adapters/resource-adapter=eis.rar/admin-objects=aoName:add(class-name=com.acme.eis.ra.EISAdminObjectImpl, jndi-name=java:/eis/AcmeAdminObject) {"outcome" => "success"} - Configure the
thresholdadmin object property.[standalone@localhost:9999 /] /subsystem=resource-adapters/resource-adapter=eis.rar/admin-objects=aoName/config-properties=threshold/:add(value=10) {"outcome" => "success"} - Activate the resource adapter.
[standalone@localhost:9999 /] /subsystem=resource-adapters/resource-adapter=eis.rar:activate {"outcome" => "success"} - View the newly configured and activated resource adapter.
[standalone@localhost:9999 /] /subsystem=resource-adapters/resource-adapter=eis.rar:read-resource(recursive=true)
{
    "outcome" => "success",
    "result" => {
        "archive" => "eis.rar",
        "beanvalidationgroups" => undefined,
        "bootstrap-context" => undefined,
        "transaction-support" => "XATransaction",
        "admin-objects" => {"aoName" => {
            "class-name" => "com.acme.eis.ra.EISAdminObjectImpl",
            "enabled" => true,
            "jndi-name" => "java:/eis/AcmeAdminObject",
            "use-java-context" => true,
            "config-properties" => {"threshold" => {"value" => 10}}
        }},
        "config-properties" => {
            "server" => {"value" => "localhost"},
            "port" => {"value" => 9000}
        },
        "connection-definitions" => {"cfName" => {
            "allocation-retry" => undefined,
            "allocation-retry-wait-millis" => undefined,
            "background-validation" => false,
            "background-validation-millis" => undefined,
            "blocking-timeout-wait-millis" => undefined,
            "class-name" => "com.acme.eis.ra.EISManagedConnectionFactory",
            "enabled" => true,
            "flush-strategy" => "FailingConnectionOnly",
            "idle-timeout-minutes" => undefined,
            "interleaving" => false,
            "jndi-name" => "java:/eis/AcmeConnectionFactory",
            "max-pool-size" => 20,
            "min-pool-size" => 0,
            "no-recovery" => undefined,
            "no-tx-separate-pool" => false,
            "pad-xid" => false,
            "pool-prefill" => false,
            "pool-use-strict-min" => false,
            "recovery-password" => undefined,
            "recovery-plugin-class-name" => undefined,
            "recovery-plugin-properties" => undefined,
            "recovery-security-domain" => undefined,
            "recovery-username" => undefined,
            "same-rm-override" => undefined,
            "security-application" => undefined,
            "security-domain" => undefined,
            "security-domain-and-application" => undefined,
            "use-ccm" => true,
            "use-fast-fail" => false,
            "use-java-context" => true,
            "use-try-lock" => undefined,
            "wrap-xa-resource" => true,
            "xa-resource-timeout" => undefined,
            "config-properties" => {"name" => {"value" => "Acme Inc"}}
        }}
    }
}
Procedure 17.6. Configure a resource adapter using the Web-based Management Console
- Start your JBoss Enterprise Application Platform 6 server.
- If you have not yet added a management user, add one now. For more information, refer to the Getting Started chapter of the Installation guide for JBoss Enterprise Application Platform 6.
- Open a web browser and navigate to the Management Console. The default location is http://localhost:9990/console/. For more information about the Management Console, see Section 3.2.2, “Log in to the Management Console”.
- Click on the Profile link on the top right to switch to the Profile view. Choose Resource Adapters in the left navigation panel, then click at the top right.

Figure 17.10. JCA Resource Adapters
- Enter the archive name and choose transaction type
XATransactionfrom the TX: drop-down box. Then click .
Figure 17.11. Create Resource Adapter
- Select the Properties tab, then click to add resource adapter properties.

Figure 17.12. Add Resource Adapter Properties
- Enter
serverfor the Name and the host name, for examplelocalhost, for the Value. Then click to save the property.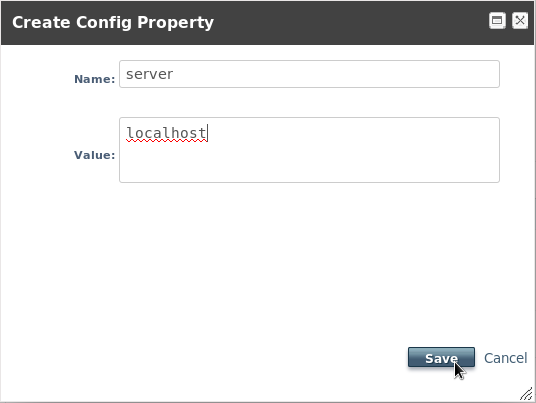
Figure 17.13. Add Resource Adapter Server Property
- Enter
portfor the Name and the port number, for example9000, for the Value. Then click to save the property.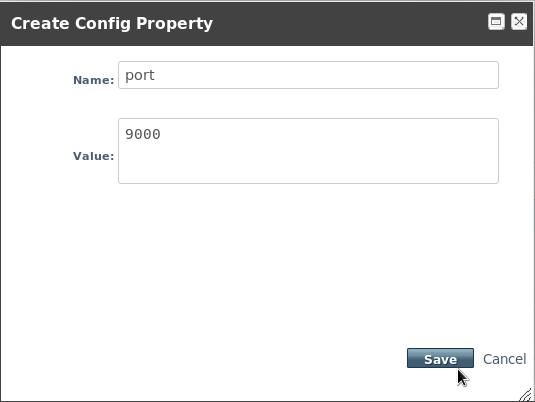
Figure 17.14. Add Resource Adapter Port Property
- The
serverandportproperties now appear in the Properties panel. Click the View link under the Option column for the listed resource adapter to view the Connection Definitions.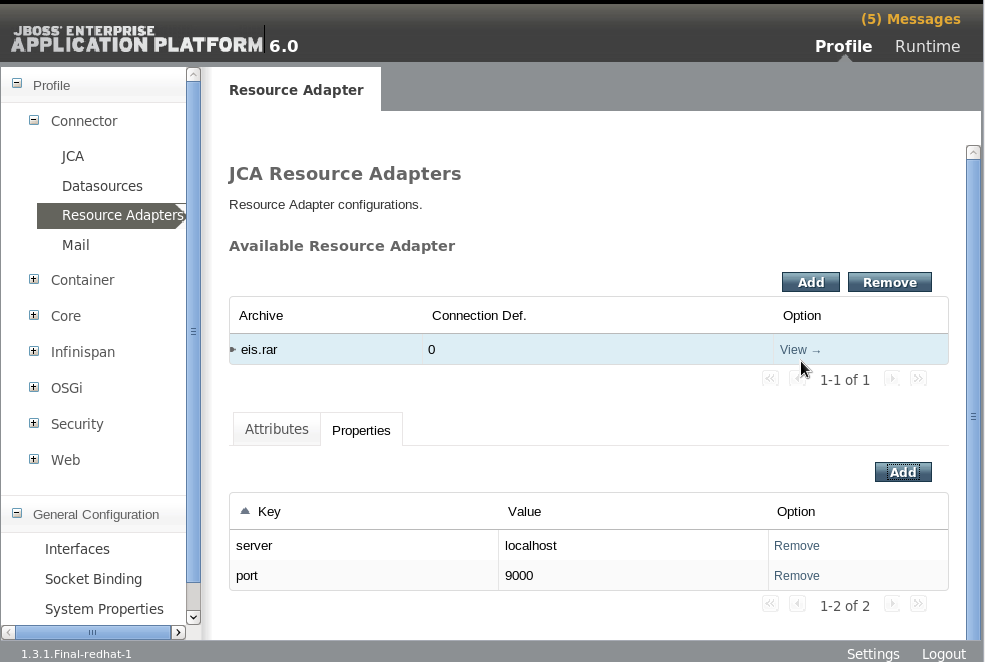
Figure 17.15. Resource Adapter Server Properties Complete
- Click Add in the upper right side of the page to add a connection definition.
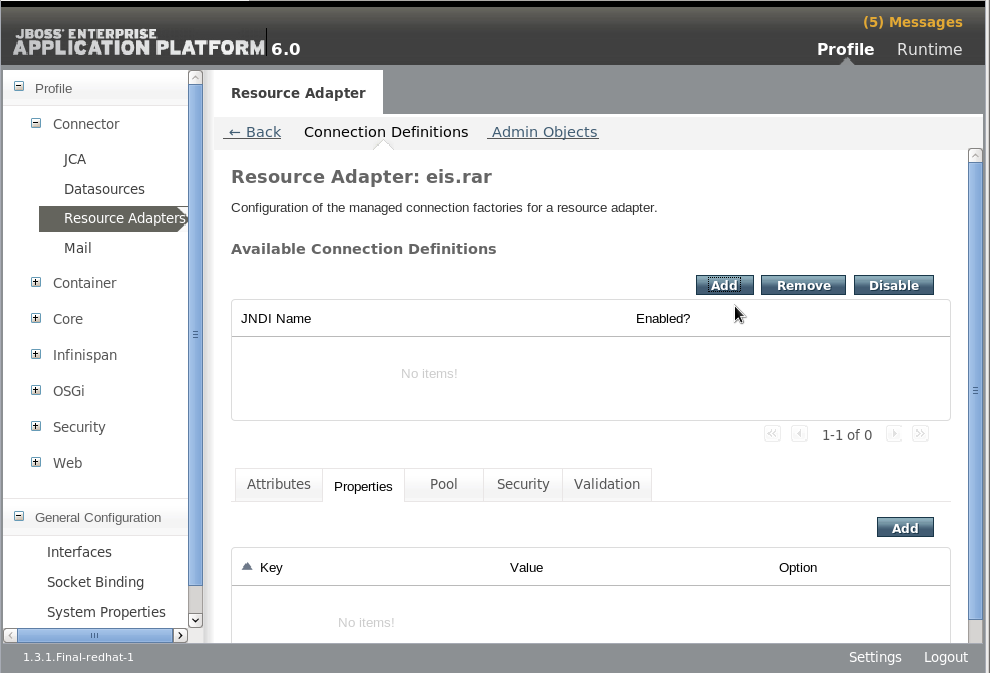
Figure 17.16. Add a Connection Definition
- Enter the JNDI Name and the fully qualified class name of the Connection Class. Then click .

Figure 17.17. Create Connection Definition Property - Step 1
- Click to enter the Key and Value data for this connection definition.
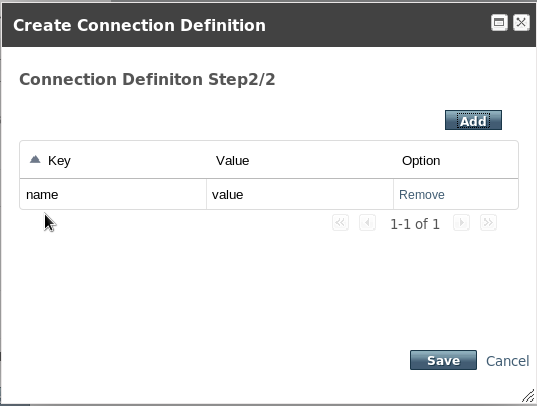
Figure 17.18. Create Connection Definition Property - Step 2
- Click in the
namefield under the Key column to enable data entry for the field. Type the property name and press enter when done. Click in thevaluefield under the Value column to enable data entry for the field. Enter the value for the property and press enter when done. Then click to save the property.
Figure 17.19. Create Connection Definition Property - Step 2
- The connection definition is complete, but disabled. Click to enable the connection definition.

Figure 17.20. Create Connection Definition - Disabled
- A dialog asks "Really modify Connection Definition?" for the JNDI name. Click . The connection definition should now appear as
Enabled.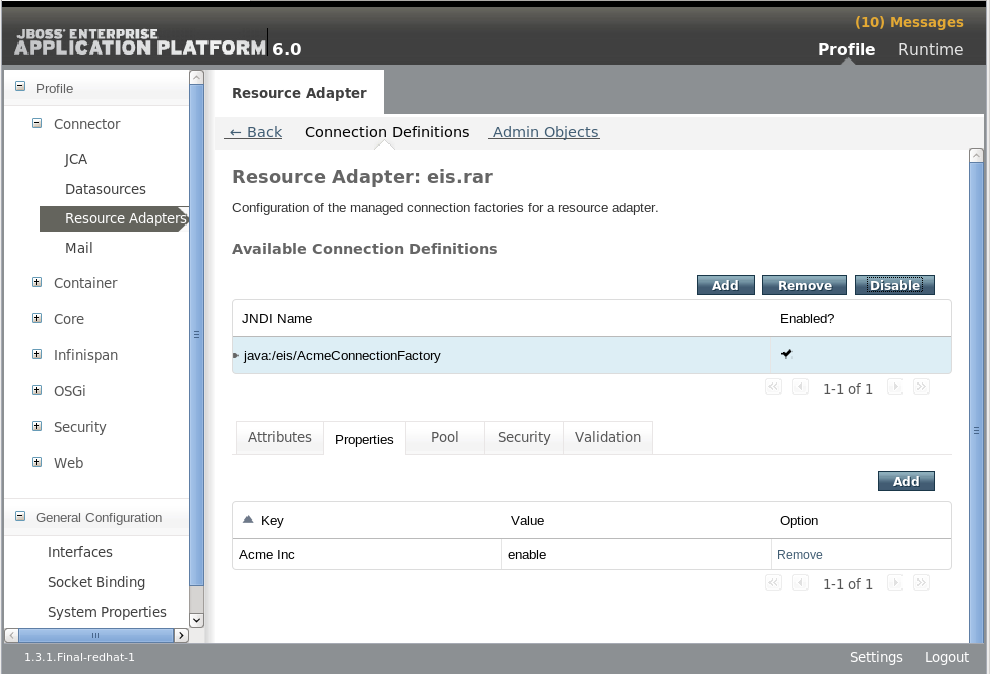
Figure 17.21. Connection Definition Enabled
- Click the Admin Objects tab in top middle of the page to create and configure admin objects. Then click .

Figure 17.22. Available Admin Objects
- Enter the JNDI Name and the fully qualified Class Name for the admnin object. Then click .

Figure 17.23. Create Admin Object
- Select the Properties tab, then click to add admin object properties.
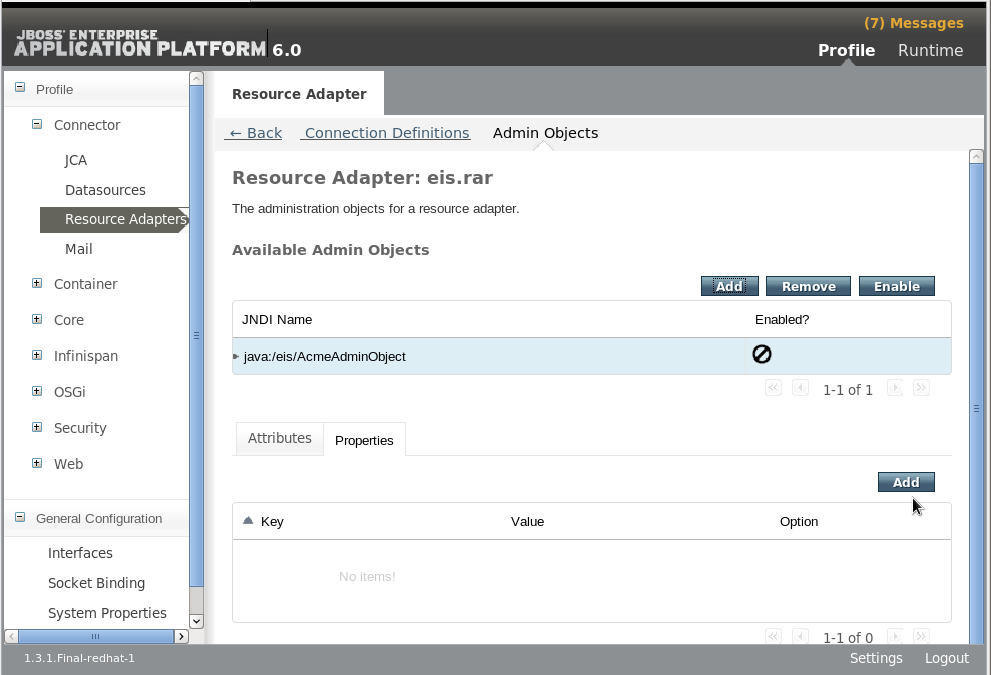
Figure 17.24. Add Admin Object Properties
- Enter an admin object configuration property, for example
threshold, in the Name field. Enter the configuration property value, for example10, in the Value field. Then click to save the property.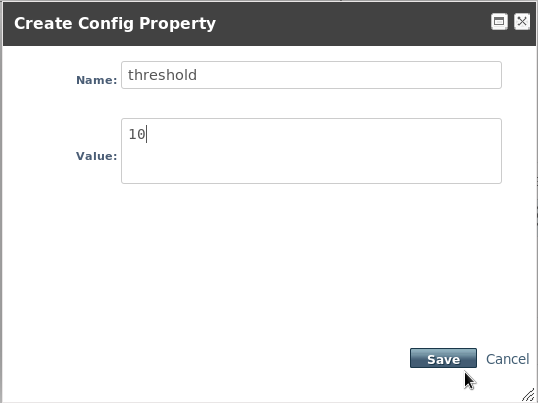
Figure 17.25. Create Admin Ojbect Configuration Property
- The admin object is complete, but disabled. Click to enable the admin object.

Figure 17.26. Admin Object - Disabled
- A dialog asks "Really modify Admin Ojbect?" for the JNDI name. Click . The admin object should now appear as
Enabled.
Figure 17.27. Connection Definition Enabled
- You must reload the server configuration to complete the process. Click on the Runtime link on the top right to switch to the Runtime view, then choose Configuration in the left navigation panel, and click at the right.
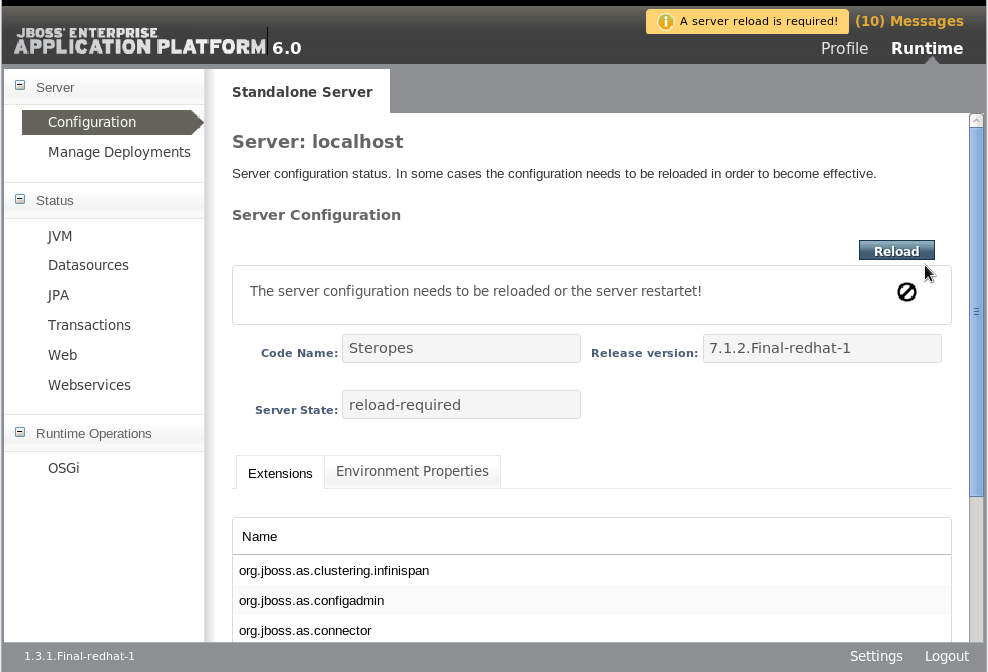
Figure 17.28. Server Configuration Reload
- A dialog asks "Do you want to reload the server configuration?" for the specified server. Click . The server configuration is up to date.
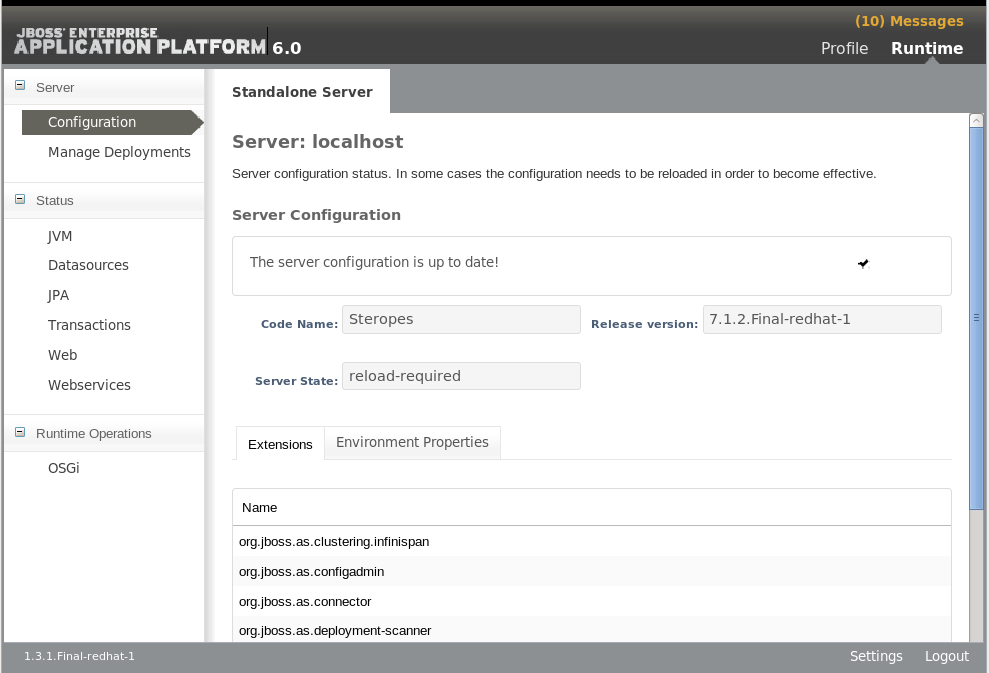
Figure 17.29. Connection Definition Enabled
Procedure 17.7. Configure a resource adapter manually
- Stop the JBoss Enterprise Application Platform server.
Important
You must stop the server before editing the server configuration file for your change to be persisted on server restart. - Open the server configuration file for editing.
- For a standalone server, this is the
EAP_HOME/standalone/configuration/standalone.xmlfile. - For a managed domain, this is the
EAP_HOME/domain/configuration/domain.xmlfile.
- Find the
urn:jboss:domain:resource-adapterssubsystem in the configuration file. - If there are no resource adapters defined for this subsystem, first replace:
<subsystem xmlns="urn:jboss:domain:resource-adapters:1.0"/>
with this:<subsystem xmlns="urn:jboss:domain:resource-adapters:1.0"> <resource-adapters> <!-- <resource-adapter> configuration listed below --> </resource-adapters> </subsystem> - Replace the
<!-- <resource-adapter> configuration listed below -->with the XML definition for your resource adapter. The following is the XML representation of the resource adapter configuration created using the Management CLI and Web-based Management Console described above.<resource-adapter> <archive> eis.rar </archive> <transaction-support>XATransaction</transaction-support> <config-property name="server"> localhost </config-property> <config-property name="port"> 9000 </config-property> <connection-definitions> <connection-definition class-name="com.acme.eis.ra.EISManagedConnectionFactory" jndi-name="java:/eis/AcmeConnectionFactory" pool-name="java:/eis/AcmeConnectionFactory"> <config-property name="name"> Acme Inc </config-property> </connection-definition> </connection-definitions> <admin-objects> <admin-object class-name="com.acme.eis.ra.EISAdminObjectImpl" jndi-name="java:/eis/AcmeAdminObject" pool-name="java:/eis/AcmeAdminObject"> <config-property name="threshold"> 10 </config-property> </admin-object> </admin-objects> </resource-adapter> Start the server
Relaunch the JBoss Enterprise Application Platform server to start it running with the new configuration.